Pages

Monday, September 26, 2011

Prepare Today Homemade- Mock Apple Crisp

Why a mock apple crisp instead of using real apples you may ask?  Because I have a TON of zucchini and it's really yummy!!  I tried this dish at Honeyville Grain during our potluck food storage class.  I have to tell you I came away from that class with some of the yummiest recipes and really great tips.  Click HERE to view the upcoming classes at Honeyville.  There are some great ones coming up!

I made this dish and all my kids tried it before I told them what the apples really were, and none of them knew there was anything different!!  I also cooked mine in the Sun Oven and it came out so good!


First you are going to need a few BIG zucchinis from your garden.  The big ones will look more like apples when you cut them.  Peel and scoop all the seeds out of your zucchini. Then chop into thin "apple" like slices.  I cut my zucchini in half so the slices weren't too wide.  
All my "apple" slices ready to be cooked.
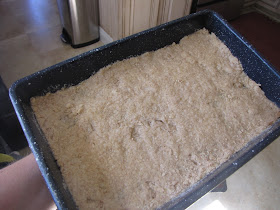
 Before cooking my zucchini I put together the crust and put it in the sun oven to brown.
Press the crust into a 13x 9 pan. (this is a little smaller to fit in the sun oven)
While the crust is browning away you need to cook your zucchini for a few minutes with some lemon juice.  


After it cooks you'll add some sugar and spices and pour over the crust.  Then sprinkle some reserved crust over the top and bake.
"Apple" Crisp baking in the Global Sun Oven
Mock Apple Crisp
Crust:
2 C flour 
1 C sugar
1/4 t salt
3/4 C butter
Filling:
4 C. sliced, peeled zucchini
1/3 C lemon juice
1/2 C sugar
1/2 t cinnamon
1/8 t nutmeg
1/4 C walnuts (optional)
In a large bowl, combine the flour, sugar, and salt.  Cut in the butter until mixture resembles coarse crumbs.  Press half of the crumb mixture into a greased 9x13 pan.  Bake at 375 for 10-12 minutes or until lightly browned.  Set the remaining crumbs aside.


Meanwhile, in a large saucepan, bring zucchini an lemon juice to a boil.  Reduce heat; cover and simmer for 5-6 minutes or until tender.  Drain.  Stir in the sugar, cinnamon, nutmeg, and 1/2 of the reserved crumb mixture.  Cook and stir 2-3 minutes.  Stir in the nuts if using. Spread filling over crust.  Sprinkle with remaining crumb mixture and bake for 25-30 minutes more.


Not much left!  It was so good!
It really did taste like apple crisp and it was such a great way to use up those baseball bat zucchinis. Enjoy!

Saturday, September 24, 2011

Homemade Gatorade

When you think of Gatorade you may picture an athlete re-hydrating after a good workout, but did you know that you may need to add it to your storage. Did you know that diarrhea is the third highest killer in third world countries?  Dehydration sets in and many people die from it! Having an electrolyte drink on hand may be the simple solution, that can be made at home, to help those suffering from diarrhea and dehydration. If we were ever in a crisis situation and sanitation has caused many to become ill, we may need to be able to make an electrolyte drink to help those who have diarrhea.  I feel it is important to print out information like this and keep it in a binder for future reference.  You may not have electricity in an emergency for your computer and the stores may also be closed, so no getting your Gatorade.  

This mixture is for use in a crisis situation, you should always see your Doctor for diagnosis and treatment of diarrhea, especially in children.

A tip for this mix is to make several baggies worth at a time to have on hand.  If mom becomes sick, then others can mix up the electrolyte drink.  Just remember to have water stored to mix up the powdered drink.


Homemade Electrolyte Drink
(from Theharriedhomemakerpreps.blogspot.com)
1 quart water
1/2 t baking soda
1/2 t salt
3-4 T sugar
1/4 t salt substitute (it has potassium in it)
Mix well and can be flavored with lemon juice or sugar-free kool-aid.

**Adults should drink after each loose stool and drink at least 3 quarts or until they are well.

Children over 2 should drink 1/2-1 large cup of the mix.  You may have to spoon feed.

Children under 2 should drink 1/4-1/2 of a large cup.

Give it to the ill slowly and wait 10 minutes after vomiting to drink small amounts. If the drink is not used in 24 hours, make a new batch. 

**Info from HERE

Here is a simplified recipe with only three ingredients.  For children older than one years old. 

1 quart of water
2 T sugar
1/2 t salt
Mix all ingredients.  Can serve cold or room temperature.  Spoon feed if necessary.  Follow the same directions above when administering to the ill.


Enjoy the Journey!
Enjoy the Blessings!
Feel the PEACE!! 

Monday, September 19, 2011

Prepare Today Homemade-Garden Foccacia Bread

This recipe came out of a necessity because of all the tomatoes and zucchini I have from my garden. I don't like to throw anything away and I can only dehydrate so much :)  So I went through a bunch of old Taste of Home magazines and found all the recipes that had zucchini in them.  


Garden Focaccia Bread
Dough**
2 1/2 C flour (I used a wheat/white flour mixture)
1 t salt
1 t sugar
1 T quick rise yeast (I use SAF instant yeast)
1 C warm water (120-130degrees)
2 T oil-divided
1 t dried rosemary
1 t dried thyme

Combine the first 4 ingredients in a bowl.  Combine the water and oil and add to the flour mixture.  Add additional flour if needed to make a soft dough.  Knead for 1-2 minutes or until smooth and elastic.  Place in a greased bowl, cover and let rise for 20 minutes.  Punch down and pat into a cookie sheet.  Using your fingertips make indentations into the dough.  Brush with 1 T oil and sprinkle with rosemary and thyme.  Bake at 400 for 12-15 minutes or until golden brown. 
Sauce & Toppings
1 package cream cheese (8oz) reduced fat works great!
1/4 C finely chopped onion (I used dehydrated onion)
1 garlic clove, minced
4 large mushrooms, sliced (I used canned, dehydrated would work too)
3 medium tomatoes, sliced
1 small zucchini thinly sliced
1/4 C Parmesan cheese

In a bowl, combine the cream cheese, onion and garlic.  Spread over the cooled crust.  Top with mushrooms tomatoes, zucchini;  sprinkle with Parmesan cheese.  Bake for 12-15 minutes longer at 400 degrees.  Cool for 5 minutes before slicing. 
**You can also use 1lb frozen bread dough instead of making your own.

I served this with a tomato quiche for our tomato garden dinner :)  This would also make an amazing appetizer if you cut it into smaller pieces.  Enjoy!!

Saturday, September 17, 2011

Dehydrating Made Easy

Homegrown tomatoes in the dehydrator
Dehydrating your food is simple, cost-efficient, and space-efficient. It is such a simple way to have fruits and veggies in your storage without spoilage.  If we were ever to eat solely from our home stored food we would soon be craving fresh fruits and veggies, and having a variety of dehydrated foods on hand allows you to have that!  

American Harvest Dehydrator


I have been experimenting with dehydrating the past couple of years and it is really fun to see everyday foods shrink down to tiny pieces of themselves.  I also love to dehydrate because I can purchase produce for a great price, and use all my garden produce, dehydrate it, and seal it in a mason jar using my FoodSaver.  It allows me to save money and stock my pantry at the same time.  Storing dehydrated food takes up minimal space in your pantry and is so simple to do!! Just remember that there are 4 key factors that will affect the success you have with food dehydration.  (From "The Dehydrator Bible)
  1. Time
  2. Temperature
  3. Air speed
  4. Raw material preparation (use quality produce for a quality finished product)
Check with the instructions that came with your dehydrator, but if you keep all items within 1/4" then everything will dry equally.  "The Dehydrator Bible"  is a amazing resource for dehydrating along with the dehydrate2store.com website.

I have dried tomatoes, zucchini, celery,rice, pureed fruit for fruit leather, frozen veggies, grapes, apples, green onions, strawberries, cabbage, etc!!!  The possibilities are endless!!  I love to buy frozen fruit when it's on sale and then puree it and make fruit leather out of it.  My kids eat it as fast as I can make it! Another great idea is to dehydrate soups (use the plastic dehydrator tray inserts to hold liquids), rice dishes, and other meals to make backpacking dehydrated meals.  All you need is to add water.  

Using a FoodSaver to seal dehydrated zucchini in a mason jar.

 I have dehydrated a chicken and rice dish and I was so excited to see it actually worked!  Dehydrating is all about experimenting.  Zucchini is really easy and abundant, especially right now, just slice or shred and dehydrate.  Now you have zucchini for breads, soups, etc. all year long!!
 
Zucchini and Cherry tomatoes.


Shredded Zucchini
One of my favorite tips is to save your veggies from dinner (I serve a lot of frozen veggies and we don't always finish them)  and when you have enough to fill a tray, dehydrate them all. Now you have veggies for soups or you can even blend them into a powder and toss that into anything!! Waste not want not!! I use dehydrated food in many soups, spaghetti sauces, muffins, banana bread, pizza, enchiladas (onions), sauces, etc. 
Dehydrated veggies from dinner.

If you don't have a dehydrator you can use your oven.  My oven actually has a dehydrator setting, but the very lowest setting that you can get will work. Depending on the water content of the food it can take anywhere from 4-36 hours to be fully dehydrated.  I would look online or get a book from the library for exact times.  Just remember to have fun!!  Don't stress about it, this is really one thing I don't think is intimidating and you get great results!!  So don't let all that garden produce go to waste!!  Dehydrate it!!


 Dehydrating is only one of our goals this month.  Click HERE to see them all!


Enjoy the Journey!
Enjoy the Blessings!
Feel the PEACE!!

Monday, September 12, 2011

Prepare Today Homemade-Cake Mix Cookies

This recipe is probably the easiest recipe on the planet, but it also makes it dangerous because you can whip up a batch and devour them just as quickly!!  I have made cake mix cookies for years, but I forget about the recipe. So when I came across it the other day I remembered how easy and yummy they were, and I just had to make them.  I have made them twice in the last 2 days and there are no leftovers :)  Now is also a perfect time to buy a case of cake mix at Smiths.  You get 12 boxes of cake mix for $10.68, that's only .89 a box!!


Cake Mix Cookies
1 box cake mix (any flavor)
1/3 C oil (or 1/3 C black beans for chocolate cake mix or white beans for white/yellow cake mix)
2 eggs (or 2 T egg powder and 1/4 C water)
Mix all ingredients with a spoon until combined.  Roll into 2" balls and place on a greased cookie sheet.  Bake at 375 for 6-8 minutes.  Cool on wire rack. 


That's it!!!  Told you, soooo easy!!  And sooooo yummy!!

Monday, September 5, 2011

Prepare Today Homemade-Pumpkin French Toast Fingers

French Toast Fingers are another great option for my kids lunch boxes.  They are easy to eat, dip, and have a nutritional kick with the added pumpkin.  I just have to remember to make an extra loaf of bread so we can enjoy these yummy bites!


Pumpkin French Toast Fingers

30 slices whole wheat bread-cut into thirds
1/4 C butter melted
8 eggs
1/3 C sugar
1 1/3 C milk
2 t vanilla
1 t cinnamon
1/2 C canned or garden pumpkin puree
Mix butter through pumpkin in shallow dish or pie pan.  Dip bread into mixture and then cook on a griddle until golden brown on each side, around 2-3 minutes.  

I flash freeze the french toast sticks on a large cookie sheet for 30 minutes and then store in a freezer bag.  To eat just microwave a few sticks 30-45 seconds.  Serve with syrup or fruit. This makes a quick convenient breakfast for those crazy school mornings, and saves you money on all those prepackaged, processed breakfast foods.
My kids love these in their lunches with a little container of syrup for dipping. 

Saturday, September 3, 2011

September Goals

This post is really late!  My youngest sister got married today and we had a day full of family and fun!  I am exhausted though, being part of a wedding makes me so tired.  But even though I am tired the storage goals must go on.  September is here and it is my most favorite month of all for food storage!!  It is National Preparedness Month AND Smiths is having their semi-annual case lot sale!!!  Woohoo, it's like Christmas in September for me!


3-Month Supply/Financial Goal/Long-Term Supply goals are:


The goals for this month are pretty simple.  (I hope)  You need to inventory your pantry or storage room and see what you need!  Use the case lot sales to add to your storage while also saving money.  I always feel so at peace after unloading all my cases to my storage room.  It gives me a feeling of being prepared and ready for anything {have I told you what a food storage nerd I am}.  So make a list, check it twice and head to Smith's starting on Sept. 7th.  The sale lasts for 2 weeks or until supplies last.   

Our emergency preparedness goal is to can and dehydrate.  Canning is making a comeback and so many people are learning how to bottle their own food.  If you already do this you are one step ahead, keep going and don't let anything go to waste!!  If not, google search canning or check out some books from the library.  My favorite thing to pressure can is chicken.  I feel so much peace knowing my protein source for my family is tucked away in my storage room and not in my freezer!  Check out a post HERE  on canning or HERE to see a video on canning chicken.  I also love to water bath can maple syrup!


Dehydrating your garden produce is another great way to have fruits and veggies in your long-term storage.  I have talked about the Food Saver before, but I just love this little machine.  I can fit a ton of dehydrated food into a mason jar and seal it with my Food Saver and it will last for years!! An amazing website dedicated to all things dehydrated is dehydrate2store.com  and it is FULL of amazing videos to go along with all of the useful information!!


I hope you get as excited as I do about saving money and stocking up during the case lot sales!!  If not, call me, we'll go shopping together!!  It should be fun to be prepared!!