Showing posts with label wheat thin crackers. Show all posts

Tuesday, May 26, 2015

How To Make Ice Cream Out Of Wheat

Print Friendly and PDFPrint Friendly
Yes, the title is correct!  I made ice cream out of wheat.  It may seem impossible and maybe even a little gross (according to two of my kids it was), but it was a very interesting process.  

I came across this recipe in the "Passport To Survival" book that I found at a local thrift store. Click here to see my review of the book.

There are only four survival foods used in the recipes in this book, wheat, powdered milk, honey, and salt.  It is truly amazing what can be made out of them!  

There are a few steps to actually get ice cream out of wheat, but they are simple.  Start off by steaming your wheat.  This can be done in a crock pot, thermal cooker, wonder box, or in a double boiler.  I would've made this in my Saratoga Jacks thermal cooker, but I wanted to try this exactly as Esther Dickey's recipe said to do it.  

You will need two pots, one that fits inside the other.  You will also need some sort of metal ring, or small can, to elevate the inside pot off the bottom of the bigger pan.


I used my trivet from my Saratoga Jacks thermal cooker to raise up the blue pot.  
 Pour in enough water to come to 1" below the blue pot. 

Add 5 C of wheat kernels, 7 C of water, and 1 T salt to the inner pot.  Cover, bring to a boil, then lower heat to a simmer, and steam the wheat for 4 hours.


You will end up with 12 cups of cooked wheat berries. For a smaller recipe use 2 C of wheat, 1 3/4 C water, and 1 t salt.  That will produce about 5 C of cooked wheat berries.  

Once you have cooked wheat berries, the fun begins.  In a blender add 3 C steamed wheat berries, 3 C water, 3/4 C powdered milk, and 1/3 C honey.  Blend until mixed.  There will be bits of bran that won't blend up, but they get strained out in the next step. 

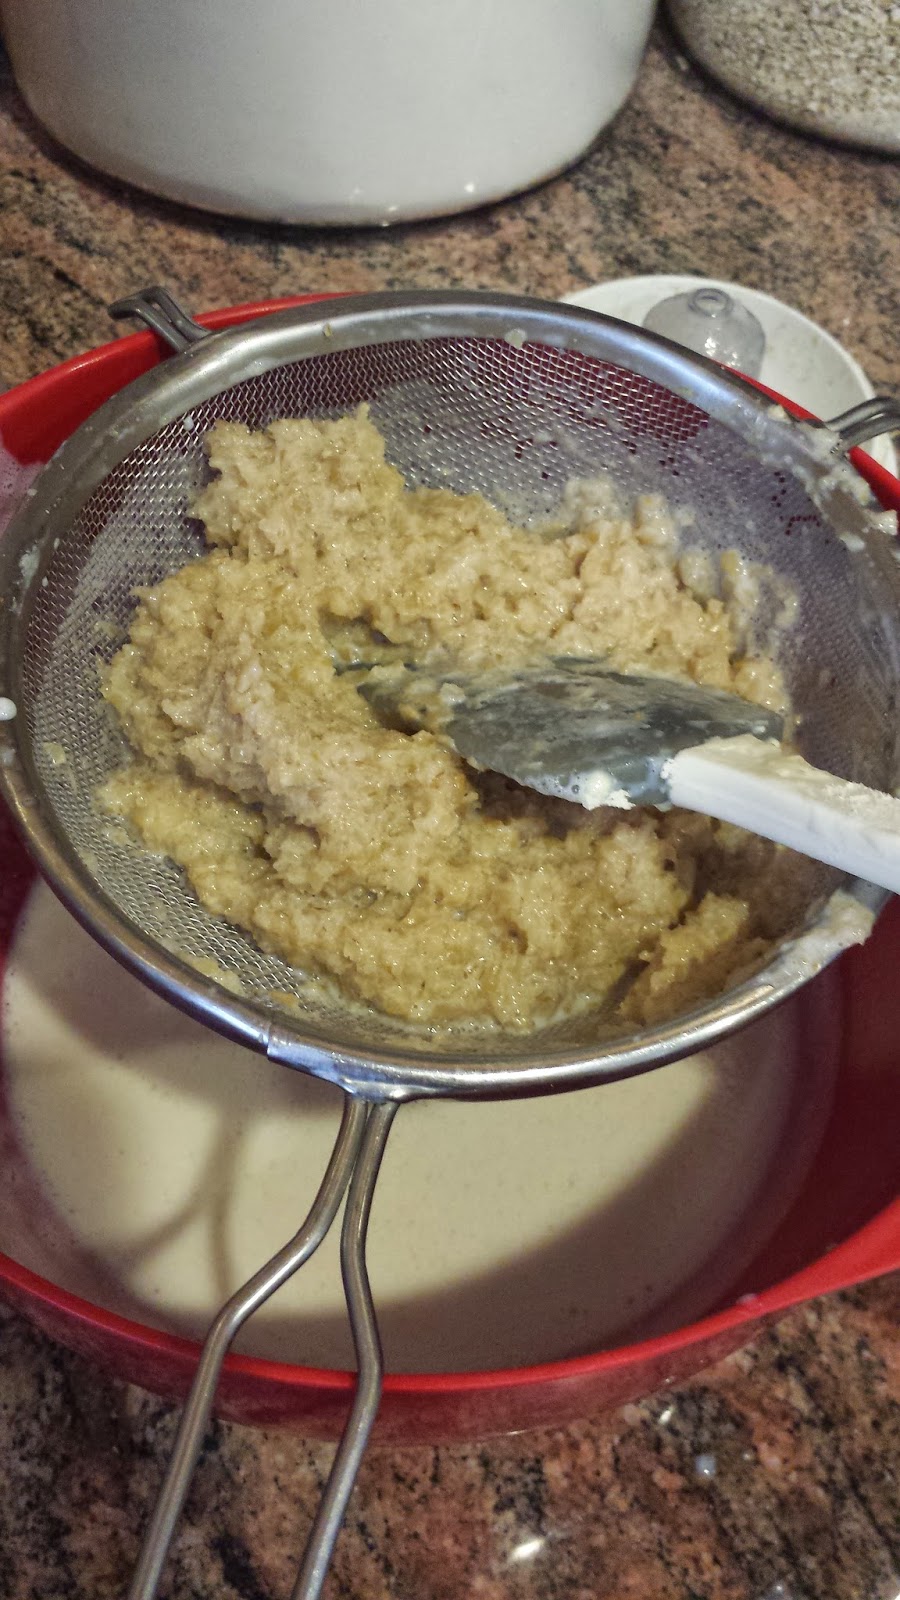
Once the mixture is blended well it needs to be strained.  The bran will be left in the strainer and the whey mixture will be used for the ice cream.  Save the bran for a recipe later.  

This is the bran left over after all the liquid has been drained off. 
Pour the liquid onto a large rimmed cookie sheet and freeze until solid. 

When you are ready to make ice cream, pull out the cookie sheet from the freezer and let it warm up for a minute or two.  I used a spatula to scrape up pieces and then used my Bosch with the cookie paddles to mix it into ice cream.  It will seem like it won't work but once the mixture softens enough it will mix into an ice cream looking substance. 

Here is my honest review.  It was pretty good.  It really tasted like a frozen yogurt.  My first two kids that tried it thought it was really ice cream and shoved a big mouthful of it in their mouths. They weren't expecting the flavor that it was and spit it out just as fast. It has a wheatie, honey flavor to it, but it was cold and creamy.  My husband and 3 other children ate it and liked it.  I have to say, that in an emergency, without all the modern foods from the grocery store, this would be a treat!  What made it even better was stirring in a bit of cocoa powder to make it chocolate ice cream.  That flavor disappeared!  Chocolate makes everything better :)

Wheat Ice Cream
3 C steamed wheat
3 C water
3/4 C powdered milk
1/3 C honey
Mix in blender until smooth.  Strain out the bran and save in a separate bowl.  Pour the liquid onto a rimmed cookie sheet and freeze until solid.  Let thaw a few minutes before mixing with cookie paddles or beaters to make it creamy and smooth. Makes about 1 1/2 C ice cream.  Optional:  Add cocoa powder for a chocolate flavor!

Wheat is amazing!  Here's what I made out of the original 12 cups of steamed wheat.....
  1. I used 6 cups of wheat berries in a double recipe of the ice cream.
  2. The left-over bran was used to make wheat crackers, recipe from the same book. (1 3/4 C bran & about 2 C wheat flour, 1 C water, 1/2 t salt.  Roll out thin, cut, sprinkle with ground up baked wheat kernels and bake at 375 for 15 min.  I just kept adding flour until the bran was able to be rolled out into a dough.) 
  3. I broiled, then slowly baked a few cups of steamed wheat into crunchy snack kernels. I ground up a handful to use as a topping on the wheat crackers, and we snacked on the rest. (Broil cooked wheat berries for 10 min or until they start popping, then bake at 250 for 30 min, or until lightly browned.)
  4. I made 24 bran muffins out of 3 C of the bran leftover from the ice cream.  (I used this recipe:  bran muffins
  5. The last of the wheat berries were made into a salad for dinner that night.  click here for that recipe 


Out of 12 cups of cooked wheat I made a dessert, 2 snacks, breakfast muffins, and a dinner.  The bran is in the green bowl above in the picture.  There was quite a bit left-over after making the ice cream and it went a long way in making A LOT of crackers and 24 bran muffins.  Wheat really is the staff of life!!  The whole book "Passport to Survival" is filled with recipes that start off as one recipe and then lead into several other ways to prepare it. Wheat is so versatile and truly is a survival food!!

Saturday, September 6, 2014

Prepping In September: My Week In Review

Print Friendly and PDFPrint Friendly
September is...

What are you doing to become more prepared?

This week in Utah several grocery stores are having case lot sales.  We are able to by food by the case for a discounted price. I was running low on several things and I purchased:
  • tuna
  • pasta sauce
  • creamed soups
  • black beans
  • bottled water
  • chicken broth
  • paper towel 
  • toilet paper

We were running low on toilet paper so I have been buying a few every time I go to the store.  The sale goes for two weeks so I'll have plenty of time to stock up!

After shopping I had a baking day.


My kids love bagels and bagel sandwiches in their school lunches, so I cooked up a batch.  Click HERE to see the recipe that I use


A big money saver is making my own crackers. Wheat thins are a hit at my house and making them is pretty simple.  My issue with making crackers was always getting the dough uniform so they cooked evenly.  My friend Megan over at myfoodstoragecookbook.com is a genius!  She uses her pasta roller to roll out the cracker dough so it will be the same thickness and cook evenly.  It's the only way I make crackers now!  Here is the recipe that I have been using lately for wheat thin crackers.


Wheat Thin Crackers
1 C. whole wheat flour
1 C. white flour
1/2 C. sugar (or 1/2 C. honey, use less milk when mixing)
1/4 t salt
2 T. butter softened
approx. 1/2 C milk
salt for the tops
 ranch dressing mix, cheese powder, garlic powder, etc for seasoning the crackers*

Combine the flours, sugar, and salt in a bowl.  Cut in butter until it looks like coarse meal.  (I use my hands for this) Add the milk a little at a time and mix the dough until it forms a ball and the dough holds together.  (I have never used all the milk, so slowly add it in) If you are using honey, the dough will be slightly sticky and you'll need to work it a little more to get it to stick together.

*if you would like to make a flavored cracker this is the point to divide the dough and add in the spices.  I added a package of ranch dressing mix (homemade) to one batch, and cheese powder to another batch.  Start with a tablespoon or two and see how cheesy you like them.  Mix the dough with the desired flavor until incorporated.

Divide the dough into fourths and roll the dough using a pasta roller, or rolling pin, to 1/16-1/8" thick.  Lay the pieces of dough on a sprayed cookie sheet.  Cut into cracker sized pieces. (no need to move the cut squares apart, they will separate a little on their own) Spray with cooking spray and add salt to the tops, if desired.  (I use the tool on the right to cut my crackers.  Very easy and takes only seconds to cut a whole tray of crackers)


Bake at 325° for 15-20  minutes.  Really watch the oven after about 12 minutes.  All ovens vary and they will burn very easy.  The tops should be slightly browned.  Cool on the cookie sheets a few minutes.  The crackers will harden as they cool.  Remove to a cooling rack.  Store in airtight container or bag.
 

I cooked up part of the dough in my Global Sun Oven and they were delicious!  Perfectly cooked.  Don't walk away from them though.  Even though the sun oven won't burn most foods, crackers and cookies will burn.  These took about 11 minutes to cook.

I love the feeling of being well stocked after shopping at the case lot sales and baking all day. Now, I only wish the food didn't disappear as easily as I accumulated it.  :)
Related Posts Plugin for WordPress, Blogger...