Showing posts with label sun oven. Show all posts

Wednesday, June 8, 2016

Sun Oven Fruit Cobbler

Print Friendly and PDFPrint Friendly
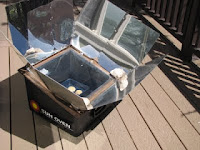
The kids are out of school and the craziness that has been my life over the last 9 months has slowed to a less-crazy life.  Time is on my side for a moment and I thought I would bake a little something in my Global Sun Oven. (click here to read more on the Global Sun Oven) It has been over 90 degrees where I live and that always makes me want to cook with my sun oven.  The sun oven doesn't need the summer heat to work, just the sun, but the heat makes me want to cook outside and not inside my house. (click here to see how the Sun Oven saved my Christmas dinner)


Apple cobbler sounded like a yummy treat, but this recipe is very versatile and other fruit will work as well.  Because I have to change every recipe into a food storage recipe I started off with dehydrated apples from the LDS Cannery, and boiled them in some water to speed up the rehydrating process.  

 I boiled 2 cups of dehydrated apples, 4 cups of water, a dash of lemon juice and 1/3 cup of sugar for about 5 minutes.  It was as easy as that and after draining them I poured them into a greased dark metal pan.  The dark cookware is a good option for sun oven cooking.  It keeps the heat inside the food, where as shiny metal, or glass pans, will reflect the heat outside of the oven.  

To save cleaning another bowl I melted the butter in the same pan that the apples cooked in.  The flour and brown sugar were added to the butter and honestly it was hard not to eat it straight from the pan!! 

Once the crumb topping was mixed well I sprinkled it over the apples and it was ready for the oven. 

The sun oven was preheated for about 20 minutes while I put the cobbler together and when I put the cobbler in, it had reached 375 degrees.  Cover the dish and bake for 2 or more hours. If you aren't familiar with the sun oven you will have to make sure the oven gets turned towards the sun as the day goes on.  A good way to make sure the position is correct is to check the shadows on either side of the oven.  If they are even on both sides of the oven, the oven is correctly facing the sun. I actually forgot about the cobbler cooking and it was in the oven for a little over 3 hours, but what is so great about the sun oven is that most dishes won't burn.  Food stays warm and ready to eat when you are ready!

This cobbler was delicious!!  Kind of warm on a hot day, but I loved that it was made from dehydrated apples.  I'm adding it to my food storage recipe binder. 

Fruit Cobbler
2 C fresh fruit (apples and berries work best) OR
2 C dehydrated apples
1/3 C sugar
1/2 t lemon juice
1/2 C butter
1 C flour
1 C brown sugar
cinnamon
If using dehydrated apples:  place apples plus 4 cups of water in a saucepan and bring to a boil.  Simmer for 5-10 minutes or until soft.  Remove from heat and drain.  Stir in the sugar and lemon juice.  Pour into greased baking dish. 

If using fresh fruit: mix the fruit with the sugar and lemon juice and pour into greased baking dish.

In a saucepan pan melt the butter over low heat.  Remove from heat and stir in flour and brown sugar.  Stir until well mixed.  Sprinkle over the apples in the baking dish.  Sprinkle cinnamon over the crumb topping. Cover the dish and bake in a preheated sun oven for about 2 hours. To cook in a conventional oven bake at 350 for 25-30 minutes.
 

Thursday, June 4, 2015

Sun Oven Cooking-- Corn on the Cob

Print Friendly and PDFPrint Friendly
This a re-post from May 2012.  I saw this post on the blog the other day I thought I would share again with those readers who may have missed it. I can't wait to cook summer corn in my Sun Oven.  

Cooking for a crowd can get tricky when you want everything to be cooked and ready at the same time.  Mother's Day dinner was at my house with 17 people.  I didn't want the stove and oven going while everyone was in the kitchen so we decided to grill hamburgers.  That got the main dish outside but we still had all the side dishes to cook.  I used the oven for the sweet potato fries but I didn't want to lug my big pot upstairs from the storage room and use the stove to cook the corn on the cob.  Then I remembered a post I saw on the Global Sun Oven site about cooking corn on the cob in the Global Sun Oven.  I tossed 8 rather large ears of corn, still in their husks, into the sun oven and closed the door.  That was literally the easiest thing I have "cooked" in a long time.  


They cooked for about 1 1/2 hours, and they could have gone for about another 1/2 hour or so to be really done, but I forgot about cooking the corn until right before dinner.  (seriously if my head wasn't attached...) We were ready to eat but I knew the corn was close to being done because the glass had condensation on the inside of it.  That usually means your dish is close to being finished, if not all the way done.  The temperature hovered just above 250 degrees the whole time.  The corn was crisp tender and so sweet when we ate it!  I am really surprised every time I cook something in the Sun Oven and it comes out tasting so good.  I should know by now that it will work but it just makes me happy every time it does!

Tuesday, October 21, 2014

Easy No Knead Artisan Bread

Print Friendly and PDFPrint Friendly
Say you're in a situation where you have no electricity and you want to make bread.  Well, first you'll need to manually grind your wheat, then mix it all up, knead it by hand, (have you kneaded bread for 15 minutes?....not the easiest job) let rise, and then bake the bread over the fire, in a Volcano stove, or in a Sun Oven.  This is quite labor intensive! Kneading alone would have me making flatbread a couple times a week.  Have you ever tried out your manual wheat grinder?  It takes quite a bit of energy for a small amount of wheat flour. The girls over at foodstoragemadeeasy.net shared a really cool bread recipe.  It makes a loaf of artisan style bread with no grinding of flour, no kneading, and needs no electricity to bake.  I wasn't sure I  believed their claims. So I HAD to try it out!!  


Look what the final product was!! I don't know why I was so shocked that it worked, but I was.  I couldn't believe how easy this was to make.  Here's how I did it.....

First of all I followed the recipe from foodstoragemadeeasy.net exactly as they explained it.  Click HERE to see the recipe.  

The first step takes the longest, but doesn't involve any work on your part.  Crazy, right?!  
 The night before you want your bread baked, you need to mix up the ingredients.  It takes 12-18 hours for the dough to rise.  That's the longest part of this recipe, but it just sits on the counter and does it's thing.  Here's what you do:  stir together 3 cups of white flour, 1/2 t yeast, 1 3/4 t salt, and 1 1/2 cups of cool water.  It should be a sticky clump of dough.  Stir it well and then cover with plastic wrap. 

Then let the dough sit for 12-18 hours to rise.  This picture was taken in the morning after sitting for around 12 hours.  


Once the dough has risen for 12-18 hours turn it out onto a floured surface and let rest, covered, for 30 minutes. You may have to scrape the dough out of the bowl to get it into a ball shape.  I folded the dough into itself a few times to get it to stick into a ball shape. 

 Once it's fully rested, place the dough onto a piece of parchment paper and then into a round Sun Oven pan, that was heating up in the Sun Oven.  You can see my bread baking in the Sun Oven out in my yard.  

After about two hours, I took the lid off of the pan and let the bread "brown" for about a half hour.  I did mist it with water to help it brown a little.  Bread cooked in the Sun Oven doesn't get brown like in a conventional oven.  My oven hovered around 300° the whole baking time.  When the half hour was up, I took the bread out and was a little worried.  It almost looked like it wasn't cooked, but it was, and it did have a slightly hardened crust. 


I sliced up the loaf for dinner and was very excited that it worked so well.  It had a definite sourdough taste to it, so be prepared for that.  It isn't a strong sourdough flavor but definitely not a typical white loaf of bread.  It is great to know that even in a stressful, emergency situation that I could make bread for dinner without having to grind flour and then knead it by hand.  Now my next goal is to make this with wheat flour!

Saturday, September 6, 2014

Prepping In September: My Week In Review

Print Friendly and PDFPrint Friendly
September is...

What are you doing to become more prepared?

This week in Utah several grocery stores are having case lot sales.  We are able to by food by the case for a discounted price. I was running low on several things and I purchased:
  • tuna
  • pasta sauce
  • creamed soups
  • black beans
  • bottled water
  • chicken broth
  • paper towel 
  • toilet paper

We were running low on toilet paper so I have been buying a few every time I go to the store.  The sale goes for two weeks so I'll have plenty of time to stock up!

After shopping I had a baking day.


My kids love bagels and bagel sandwiches in their school lunches, so I cooked up a batch.  Click HERE to see the recipe that I use


A big money saver is making my own crackers. Wheat thins are a hit at my house and making them is pretty simple.  My issue with making crackers was always getting the dough uniform so they cooked evenly.  My friend Megan over at myfoodstoragecookbook.com is a genius!  She uses her pasta roller to roll out the cracker dough so it will be the same thickness and cook evenly.  It's the only way I make crackers now!  Here is the recipe that I have been using lately for wheat thin crackers.


Wheat Thin Crackers
1 C. whole wheat flour
1 C. white flour
1/2 C. sugar (or 1/2 C. honey, use less milk when mixing)
1/4 t salt
2 T. butter softened
approx. 1/2 C milk
salt for the tops
 ranch dressing mix, cheese powder, garlic powder, etc for seasoning the crackers*

Combine the flours, sugar, and salt in a bowl.  Cut in butter until it looks like coarse meal.  (I use my hands for this) Add the milk a little at a time and mix the dough until it forms a ball and the dough holds together.  (I have never used all the milk, so slowly add it in) If you are using honey, the dough will be slightly sticky and you'll need to work it a little more to get it to stick together.

*if you would like to make a flavored cracker this is the point to divide the dough and add in the spices.  I added a package of ranch dressing mix (homemade) to one batch, and cheese powder to another batch.  Start with a tablespoon or two and see how cheesy you like them.  Mix the dough with the desired flavor until incorporated.

Divide the dough into fourths and roll the dough using a pasta roller, or rolling pin, to 1/16-1/8" thick.  Lay the pieces of dough on a sprayed cookie sheet.  Cut into cracker sized pieces. (no need to move the cut squares apart, they will separate a little on their own) Spray with cooking spray and add salt to the tops, if desired.  (I use the tool on the right to cut my crackers.  Very easy and takes only seconds to cut a whole tray of crackers)


Bake at 325° for 15-20  minutes.  Really watch the oven after about 12 minutes.  All ovens vary and they will burn very easy.  The tops should be slightly browned.  Cool on the cookie sheets a few minutes.  The crackers will harden as they cool.  Remove to a cooling rack.  Store in airtight container or bag.
 

I cooked up part of the dough in my Global Sun Oven and they were delicious!  Perfectly cooked.  Don't walk away from them though.  Even though the sun oven won't burn most foods, crackers and cookies will burn.  These took about 11 minutes to cook.

I love the feeling of being well stocked after shopping at the case lot sales and baking all day. Now, I only wish the food didn't disappear as easily as I accumulated it.  :)

Wednesday, June 12, 2013

The All American Sun Oven Newsletter- June Edition

Print Friendly and PDFPrint Friendly
The Global Sun Oven company sends out a free newsletter once a month entitled, Every Needful Thing.  It is full of emergency prep information along with Sun Oven tips and tricks, and of course, Sun Oven recipes.  In the June newsletter I found this tip too good to not share.  


 Use your Sun Oven as a wonderbox cooker!!!!

From the June issue of Every Needful Thing....
Use Your Sun Oven® as a Food Wonder Box
Sometimes the best laid plans, like cooking in your Sun Oven®, get messed up. We
were all set to bake pork chops in our Sun Oven®. The oven had been preheated to
250 degrees on a partly sunny day. Previously skillet browned chops, placed in a
graniteware pan over sliced, raw sweet potatoes, were on their way to the oven when
we noticed that our partly sunny day had become a much less sunny day. We put the
chops in the Sun Oven®, left it for about an hour, checking from time to time. The
weather deteriorated, so we closed the oven reflector and took it inside, leaving it
closed until dinner time. When opened, the potatoes were soft and the chops were
“melt in your-mouth” tender. What a concept-use your SunOven® as a wonder box.
A Wonder Box is a heat retention cooker. Once you heat your food to boiling,
place it in the insulated cooker. It will keep your food at cooking temperature for
hours. This can be done with gas cookers outside as well as starting food on your
stovetop. The other night, we prepared old fashioned oatmeal and cracked barley in
coconut milk for breakfast, just bringing it to a boil. Into the Sun Oven® it went.
Next morning all we had to do was add some warm milk, stir and eat.


I thought this was a great idea for all those cloudy days.  I don't know if this happens to anyone else, but whenever I set out my Sun Oven, the clouds roll in.  Now I have a back up plan if this happens again!!  For all other questions and for a great collection of Sun Oven recipes check out their website HERE!

Saturday, January 26, 2013

Every Needful Thing Newsletter

Print Friendly and PDFPrint Friendly

 One of my favorite ways to cook without power is with the Global Sun Oven.  I have blogged about the Sun Oven many times (click HERE to see those posts)  I also receive the Global Sun Oven newsletter every month called "Every Needful Thing".  It is chock full of preparedness information and is very well written.  I was shocked when I opened the January 2013 newsletter to find one of my posts highlighted.  I was so excited!!  At Christmastime I wrote a post about cooking our ham in my sun oven and they picked it to add to their link list.  


Click HERE to view the list of all the Every Needful Thing newsletters and also take a minute to sign up for their email list. You only get one email a month with a link to the newsletter.  I highly recommend getting on that list.  They are also in the process of hiring a new editor for the newsletter. If you are interested there is more information through the link above.  

Saturday, December 29, 2012

How The Sun Oven Saved Christmas Dinner!

Print Friendly and PDFPrint Friendly
I hosted my first Christmas dinner for my family this year.  It wasn't hard to come up with recipes but getting it all cooked at the same time had me worried.  

My sister brought over a ham for our dinner and I was also making a turkey.  I only have one oven and I still had the sweet potato casserole to bake. I didn't know how I was going to get it all cooked in my oven and it was on my mind all morning. After the Christmas morning festivities we were getting ready to head over to my in-laws when I had a light bulb moment.  Why don't I put the ham in the sun oven to warm while we are gone and then it would be ready for dinner later, and then I could use the oven for the turkey.  I was so excited.  My husband thought I was looney.  It was about 24° outside with quite a bit of snow on the ground from the storm the night before.  But I knew it didn't matter what the temperature was, just as long as there was sun, and we had a lot of sun on Christmas day.

I had to dig out my sun oven from all of the boxes we have for moving, and then I had my husband shovel off the deck so I could get to where the sun was.  I am totally kicking myself for not taking a photo but we were so late in getting to my in-laws that I totally forgot to take a picture. So here is a picture of some corn cooking in the sun oven, just to give you an idea of what I did. Just picture a lot more snow and a ham ;)

 I put the ham in an oven bag and tied it closed.  The ham didn't fit on the leveling tray inside the oven, so I took the tray out and placed one of the sun oven baking racks inside the bottom of the oven.  These are sold wherever Sun Ovens are sold.  They are for cookies, pizza, etc. and now ham.  To cook food properly in the sun oven you have to have air flow around the food.  The rack kept the ham of the bottom of the oven so it cooked evenly.
The sun in winter is so low in the horizon that I needed to lift my sun oven with the back leg all the out.  I had the leg on the last possible notch.  I turned it a little to the south so the sun would still be on it when I got home and we left for grandma's house.

When we returned home 3 hours later the ham was still cooking at 250 degrees.  My only problem was the loss of the sun so early in winter.  After about 4:30 I had to keep the ham warm in my oven inside until dinner was ready.  I forgot that I had a roaster oven for the turkey, so I only had the casserole to bake in the oven and then dinner was done.  I was so excited that I figured this all out and my emergency preps had saved my day.  I don't know why I think so literally and don't go outside of the box when it comes to cooking, but I was so excited that I thought to use my sun oven.  (humor me, I have a lot going on right now ;)    

Monday, July 23, 2012

Prepare Today Homemade- Solar Oven Broccoli

Print Friendly and PDFPrint Friendly
Cooking vegetables can be tricky, but in the solar oven they come out tasty and perfect!  I like to make broccoli in my global sun oven and it goes with so many dishes that we seem to eat it quite often.  If you cook the broccoli in the solar oven round pan, you can stack it with your main dish and cook both at the same time.  I made chicken in the bottom pot and broccoli in the top pot for a complete meal.  

Here is the broccoli ready to go in the sun oven.
Solar Oven Broccoli
1 lb broccoli
1/3 clove garlic
1/2 t salt and pepper
2 T butter or oil

Rinse the broccoli and shake off excess water.  Place in pan while still slightly wet.  Add garlic and stir.  Cook in the sun oven for about 40 minutes.  Add salt, pepper, and butter after cooking.  

 This shows the pots double stacked in the sun oven.  This allows you to cook a complete meal at one time. 

Thursday, July 5, 2012

Sun Oven Cookies and Cupcakes

Print Friendly and PDFPrint Friendly
It is finally raining here in Utah, an answer to many, many prayers,  but yesterday was another blistering hot day.  My daughter wanted to make cupcakes for the 4th of July and so I had her try them in the sun oven.  

 We used a regular cake mix and I decided to try the rectangular pan versus a muffin tin because we could fit more cupcakes in. They came out kind of square but they tasted the same.  I stacked the pans using the Sun Oven dehydrator racks. (available at the SLC Honeyville retail store, and at sunoven.com) I have tried to stack muffin tins before with canning rings but it was really hard to keep them from falling.  The racks made it so much easier to layer the pans.

 The racks come in a set of three and are made for dehydrating fruits and veggies in the sun oven.  But they also work great for cookies, pizza, and stacking baking pans. If you're wondering how on earth you get cookies to stay put, the racks come with a roll of parchment paper.  This gives you a surface similar to a cookie sheet.  I love this oven!!

 Here are our cookies baking in the sun oven.  I fit all three racks into the oven.  My mom was visiting and she was amazed at all the things we were able to cook using the sun oven.   We made cake mix cookies, click HERE to see that recipe.

The strawberry flavored cookies were perfect for the 4th of July and they were gone right after the picture was taken.  With 5 kids, hungry husband, and grandma those cookies had no chance of hanging around very long.

It is really fun to find new ways to cook and bake using the sun oven.  I am kind sad that it is raining today because I was going to make lasagna and broccoli.  We do need the rain so I am not going to complain.  I am sure we'll have a sunny day soon and I really want to try pizza too.  So many ideas......

Monday, July 2, 2012

Prepare Today Homemade- Sun Oven Cooking

Print Friendly and PDFPrint Friendly
I don't do heat!  I get grumpy and tired when it is really hot outside. I am even worse when it is hot inside my house.  It has been close to 100° for the last week or so and my air conditioner is on it's last leg.  During the day my house temperature hovers around 75-76° and I do not want to turn on my oven.  I am doing everything I can to keep my interior temperature down and a great way to do that is to cook outside.  I am taking advantage of the hot temps and using my sun oven to cook our food.  Saturday was another hot day and I decided to get a bunch of baking done.  Usually I can control the weather by putting out my sun oven (it will get cloudy or storm, I swear!!) but it stayed sunny all day.

I started baking at about 10:00 in the morning and I made bread first.  The trick to bread in the sun oven is to not let your bread raise too high before placing it in the oven.  The bread will keep rising in the sun oven and then bake when the temperature goes back up.  (the temp drops when you open the door) That rule works best if your sun oven isn't above 300°, but when I put my bread into the oven on Saturday it was 400°!!  So my bread just cooked and didn't raise any higher like it usually does.  The second trick is to lightly mist your bread with water BEFORE you put the bread into the oven. You will get a lovely brown crusted bread this way.

 This is my bread after a half hour in the sun oven.  If I had let my bread stay in a 400° oven inside it would have been burned, but the sun oven keeps it from burning. I also mist my bread with water after it comes out of the oven to keep the top crust soft.  Next time I will let my bread raise a little longer before cooking, but this loaf was still yummy!  I used THIS recipe to make my bread.

Since I had the oven out and heated up I decided to keep baking.  My kids love to eat Monkey Bars and I had several ripe bananas ready to use.  These bars take minutes to put together and only 15 minutes in a regular oven.  The original recipe uses a jelly roll pan but that obviously won't fit into the sun oven.  I used 3 rectangular pans and stacked them.  The sun oven is like a convection oven, it cooks evenly no matter what part of the food is in the sun.  All 3 pans were cooked and done at the same time.  I actually took a shower after putting these in the oven, so I know they were in there for at least a half hour. (my shower wasn't a half hour but using the hair dryer etc. takes 30 minutes :)

The pans fit just like this inside the oven.  I bought the 2 lighter pans at the Dollar Tree store (they are Wilton baking pans) and the darker pan from the Honeyville SLC retail store.  The Dollar store also sells a set of smaller muffin pans (holds 6 muffins) that I stack too.  I used THIS recipe for the Monkey Bars.

Even though I got the Sun Oven to have for emergencies, it really is such a life saver during the hot summers in Utah.  It also saves me money on our electric bill.  I also know how to use my Sun Oven and all the little tricks and tips to making food work out.  Don't count on knowing how to use a sun oven if there is an emergency.  If you own one, pull it out, use it!!! 

Monday, May 14, 2012

Prepare Today Homemade- Baked Chicken in the Saratoga Jacks Thermal Cooker

Print Friendly and PDFPrint Friendly
Making preparedness a way of life involves a great deal of cooking for me.  For every meal that I prepare I think of how it could be made without electricity.  The Global Sun Oven and my Saratoga Jacks Thermal Cooker are my go-to powerless emergency cookers.  I used my Sun Oven about 3 days a week last summer and I became accustomed to making our meals and bread in it, but even though I live in Utah, and we are supposedly a desert, we don't have sun every day.  I need an alternative cooking source for those sunless days.  I found a chicken recipe that my family absolutely loved in the Sun Oven and I decided to replicate it in my thermal cooker.  

Thermal cooking works best when your pans are filled with food or water, like soups, stews, and sauces, and for this recipe I didn't want a chicken soup, I wanted baked chicken.  I solved this problem of needing to fill the whole pan with food with a......
 .....cereal bag!!  That's right a plain old plastic insert from a cereal box.  They make wonderful cooking bags for thermal cooking.  They work great for the Wonderbox as well.  No need to spend money on pricey steam bags.  Just use something that would be thrown away and save some $$.  (the plastic bags also make great fruit leather roll ups)

I started off with my free chicken (you heard me...free chicken...there was a rebate at the grocery store for $10 when you bought $10 or more of poultry)  and cut each breast into fourths.  The meat will cook faster in smaller pieces.  
 I added my spices and oil to the bag and dumped in the chicken.  Give it a good massage and they're ready to go.
The chicken is ready to be placed into the boiling water.
 Place the bag into the water with the edge of the bag hanging over the edge.  (this would work in a pot over an open flame but watch the plastic, Volcano Stove, butane stove, etc. just boil until the chicken is done. The thermal cooker will save your fuel!)  Bring the water to a boil with the lid on.
Boil for 4 minutes (for raw meat) and place into the Saratoga Jacks thermal base.
 The cereal bag will fold nicely over the top of the pan lid.  Close the cooker and wait about 1 hour at the earliest to open and eat.  I made this at 1:38 PM and we ate it for dinner at 5:45 PM.  
 This picture was when I opened the cooker at 5:45.  It was STEAMING hot and I needed a hot pad to raise the pan out of the base.  
 I drained the broth off (I know I know, I should have made mashed potatoes in the smaller Saratoga Jacks pan and made a gravy out of the juices) and served it for dinner.  My kids loved it!  It was moist, juicy, and fall apart tender.  

Chicken Wings (or breasts, thighs, etc)
10 chicken wings (I used 3 chicken breasts)
3 T oil
3 garlic cloves
2 t chili powder
1 t garlic powder
salt and pepper to taste

Add the chicken, oil, and spices into a bag.  Shake to combine.  Place in baking dish and bake at 375 for 1 hour or until juices run clear.  

Sun Oven Instructions
Place all ingredients into a dark enamelware pot with a lid and stir.  Bake for 2 or more hours at 250 degrees or higher in the sun oven. 

Saratoga Jacks or Wonderbox Directions
Place all ingredients into a cereal insert bag or an oven bag and rub until combined.  Place in a pan of hot water, boil for 4 minutes, (boil longer for wonderbox @ 10 min) place in thermal cooker or wonderbox and, "cook" for 2-8 hours.  When using a wonderbox you will need to check the temperature of your food beyond 6 hours to make sure it hasn't fallen below 145 degrees.  If it has you need to reheat it or put it in the fridge.  It is safe to eat if above 145 degrees.  The Sartatoga Jacks thermal cooker will maintain a steady temperature, because of its insulation, for up to 8 hours.


Bonus Material!!!!

What to do with your pot full of  hot, steaming water?  You could use the water to wash dishes, wash your face, clean, make soup, or how about Hot Chocolate!  I thought I was being brilliant and added some of the Morning Moo's chocolate milk powder to my hot water.

We whisked it up and my children were so excited to have some delicious chocolatey milk for dessert.  That was until...they took the first swallow.  I am writing this because I want to be totally honest and....the hot chocolate tasted like our chicken dinner...go ahead and laugh because we all were too!!  I even added more chocolate powder and it still tasted like chicken.
 But guess what???  They ALL drank it and asked for more.  I was laughing that they would still drink it, but because it was chocolate they gulped it down. My son drank 4 glasses full.  So lesson learned, next time I will make a chicken noodle soup out of the boiled chicken dinner water :) (or maybe the lesson learned was my kids will eat or drink anything with chocolate in it)

Saturday, May 28, 2011

Cooking Without Power

Print Friendly and PDFPrint Friendly
I thought living in Utah meant sunny days and warm weather, but I guess Mother Nature is in control and she hasn't received that message yet this year.  When I received my Sun Oven I thought I would be able to cook in it about 85% of the year.  Yeah...I think there is some kind of weird connection between the clouds coming out and me using my Sun Oven.  It was sunny all morning today and I decided to get out my Sun Oven to make some brownies.  Within minutes the clouds rolled in and the sun only peeked out every half hour or so.  I did leave the brownies in the oven and it did reach a temperature of 220 degrees, but the clouds are here to stay and so I'll finish the brownies inside.  


Photo credit:  Utahpreppers.com
I have been noting the sunny days lately and I would probably only have been able to cook my family a meal in the sun oven about 4 times in the last 3 weeks.  This got me thinking about how I would prepare food for my family if I couldn't solely use my sun oven.  I have been trying out some of my recipes with home canned chicken and American Beauty Quick Cook pasta. Guess what?  I can get a meal cooked and served in 10 minutes!!  Those quick cook noodles are a food storage addicts dream!  If you had to use a camp stove or propane stove, conserving  fuel will be a concern.  So I boil my water and cook the noodles in 3 minutes, open a bottle of chicken and throw a quick sauce together, dinner is done!

To add variety to my meals I would need to plan on baking quite a bit in my sun oven when the sun is actually out.  This way I could have muffins or bread for those days I couldn't use the sun oven.  It all takes a little planning but I can see how I would get a system down of baking and cooking with the sun oven and having bread for my weekly meals. 

My suggestion is to learn how to bottle your own meat. (I know you can buy it at Costco, but my kids think the chicken tastes like tuna)  It is a relatively simple process and if you can find a great deal on meat you are saving a TON of money.  Watch the video below for detailed instructions on how to can chicken.  The only change you will need to make is that we live above 5000 feet and you need to vent the canner for 10 minutes before placing the weight on.  PLEASE read the instructions for your canner!!


May is almost over!! Get those goals accomplished!  Click HERE to see the goals for May!

Check out the blog on Monday's for a new series of posts titled "Prepare Today Homemade"!!  Learn some fun, new recipes using your 3-month and long-term storage.

Enjoy the journey!
Enjoy the blessings!
Feel the peace!! 

Saturday, May 21, 2011

Sun Oven Class

Print Friendly and PDFPrint Friendly
Paul Munson, the president of Sun Oven, taught a very informative class on the Sun Oven at Honeyville Grain.  If you have no idea what a Sun Oven is check out the website HERE.  They are light weight, easy to use (you can't burn anything but cookies) and use NO power outside of the sun.  The Sun Oven cooks meat until it is tender and juicy and it just falls off the bone!  I learned that you can set a cardboard carton of eggs (with the lid torn off) in the Sun Oven and in about a half hour you will have hard "boiled" eggs!!  Isn't that the most amazing fact!!  The Sun Oven retains all the moisture inside the sealed box so your food stays moist and doesn't dry out!  When cooking you will need to use 1/3 C LESS water in your recipes because the water isn't evaporating.  
  • Cooking food takes a little longer than in a regular oven.  Don't plan on eating dinner in the evening.  Plan on a midday meal.
  • Use only black enamelware to absorb the heat of the sun.  Glass and metal will work just plan on a little longer cooking time.  
  • Use lids when cooking to ensure the moisture stays inside the pot.  
  • Cookies will burn in the Sun Oven if left unattended.  The sugar in them causes them to burn.  Most other foods will be kept warm and not overcook if left in the Sun Oven.
  • The Sun Oven can be used YEAR ROUND, as long at the sun is out you can cook with it!! 
  • You can stack pans, cookie sheets and pots in your Sun Oven.  Use canning rings or small cooling rack to keep the pans off the bottom of the Sun Oven. Have beans cooking in one pot and a pot on top of it cooking the rice.  The heat is even inside the chamber and the pot and food will be the same temperature, so stacking your cookware lets all the food cook at the same temperature!
  • If you open the lid during cooking, add 10-15 minutes to your cooking time.
 There is also a way to pasteurize your water using a Sun Oven and mason jars.  Strain your water through a coffee filter or cheese cloth and then fill mason jars.  Place in the sun oven, elevated on canning rings or cooling rack.  Add a WAPI to one of the jars.  Don't know what a WAPI is? It is a water purifying instrument and it is so simple you may think it's too good to be true! Inside the WAPI the green wax will melt and when the green wax gets to the bottom of the WAPI your water is safe to drink!! Let the WAPI "dry"  for about 2 minutes and you can use it all over again!!  So simple and yet so needed in many parts of the world! Think of the ease of purifying your water over and over again with an $8 product!  Click HERE to view more information on the WAPI.  You can also purchase these at Honeyville Grain.


I filmed a few videos during the class and you will see that there is WAY more info than I could type here, so PLEASE visit the Sun Oven website for more videos and information!


Learn all about baking bread in the Sun Oven from Paul Munson, Sun Oven president.

 Learn all about cooking a whole turkey in the Sun Oven.

Cooking Corn and Boiling Water in the Sun Oven


Low-Fat Chocolate Chip Cookies in the Sun Oven

Making Cookies In The Sun Oven


I got almost to 300 degrees
I used my Sun Oven for the first time this spring and made some chocolate chip cookies.  They were delicious and so easy to do! 


 I used this recipe HERE from Every Day Food Storage.  The butter is replaced with white beans in this recipe :)


See the goals for May HERE!

Enjoy the Journey!
Enjoy the Blessings!
Feel the Peace!!
Related Posts Plugin for WordPress, Blogger...