Showing posts with label powdered milk. Show all posts

Tuesday, May 26, 2015

How To Make Ice Cream Out Of Wheat

Print Friendly and PDFPrint Friendly
Yes, the title is correct!  I made ice cream out of wheat.  It may seem impossible and maybe even a little gross (according to two of my kids it was), but it was a very interesting process.  

I came across this recipe in the "Passport To Survival" book that I found at a local thrift store. Click here to see my review of the book.

There are only four survival foods used in the recipes in this book, wheat, powdered milk, honey, and salt.  It is truly amazing what can be made out of them!  

There are a few steps to actually get ice cream out of wheat, but they are simple.  Start off by steaming your wheat.  This can be done in a crock pot, thermal cooker, wonder box, or in a double boiler.  I would've made this in my Saratoga Jacks thermal cooker, but I wanted to try this exactly as Esther Dickey's recipe said to do it.  

You will need two pots, one that fits inside the other.  You will also need some sort of metal ring, or small can, to elevate the inside pot off the bottom of the bigger pan.


I used my trivet from my Saratoga Jacks thermal cooker to raise up the blue pot.  
 Pour in enough water to come to 1" below the blue pot. 

Add 5 C of wheat kernels, 7 C of water, and 1 T salt to the inner pot.  Cover, bring to a boil, then lower heat to a simmer, and steam the wheat for 4 hours.


You will end up with 12 cups of cooked wheat berries. For a smaller recipe use 2 C of wheat, 1 3/4 C water, and 1 t salt.  That will produce about 5 C of cooked wheat berries.  

Once you have cooked wheat berries, the fun begins.  In a blender add 3 C steamed wheat berries, 3 C water, 3/4 C powdered milk, and 1/3 C honey.  Blend until mixed.  There will be bits of bran that won't blend up, but they get strained out in the next step. 

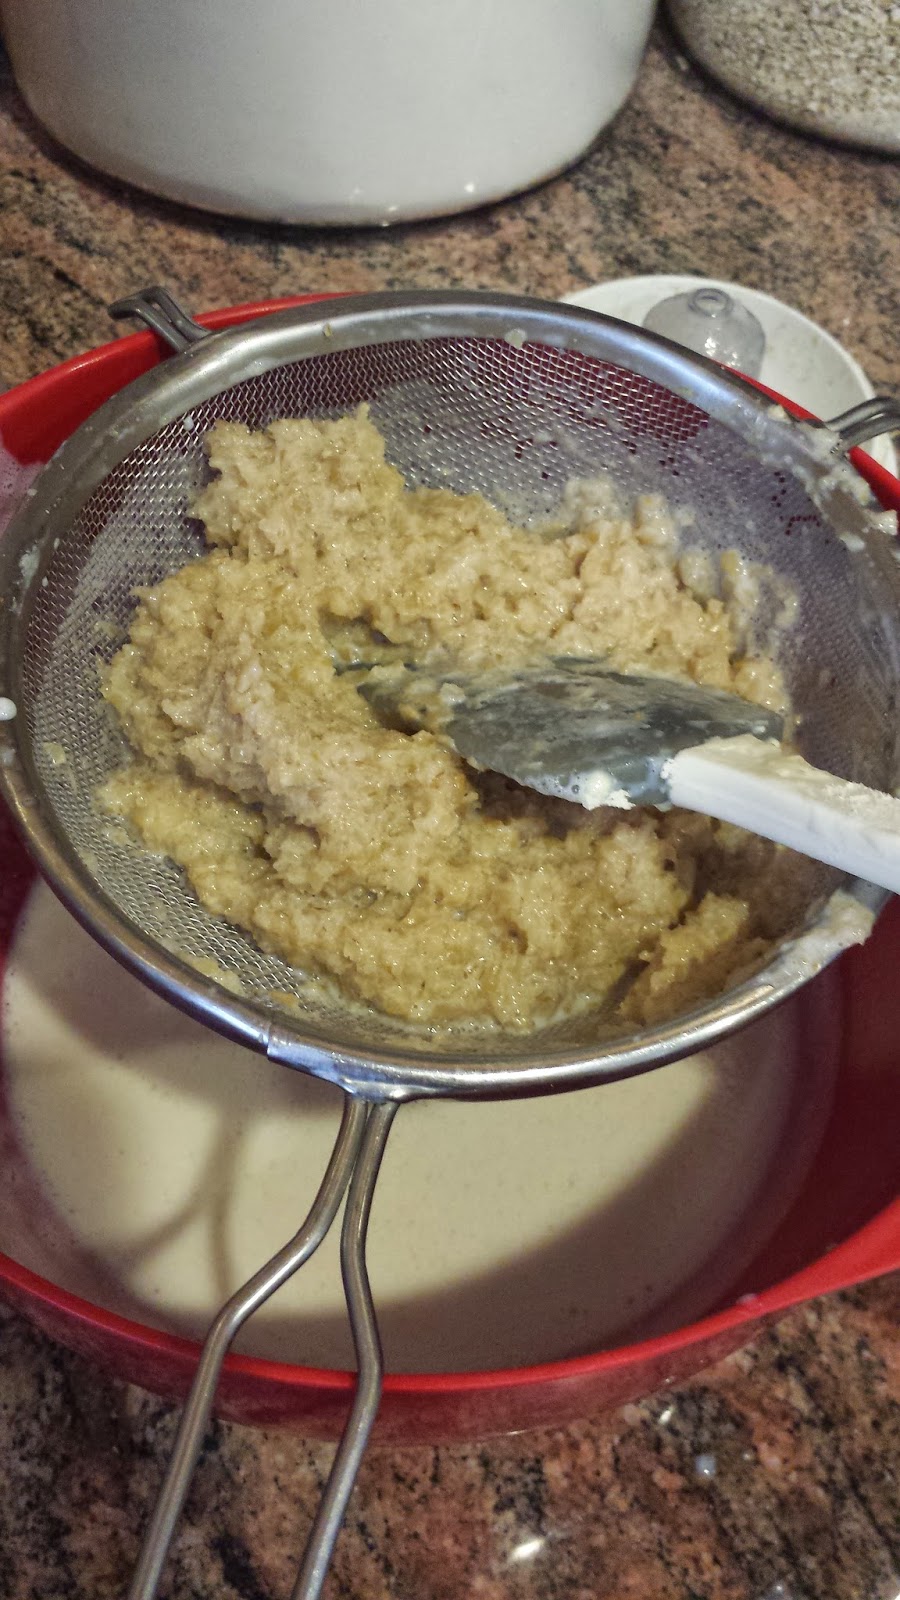
Once the mixture is blended well it needs to be strained.  The bran will be left in the strainer and the whey mixture will be used for the ice cream.  Save the bran for a recipe later.  

This is the bran left over after all the liquid has been drained off. 
Pour the liquid onto a large rimmed cookie sheet and freeze until solid. 

When you are ready to make ice cream, pull out the cookie sheet from the freezer and let it warm up for a minute or two.  I used a spatula to scrape up pieces and then used my Bosch with the cookie paddles to mix it into ice cream.  It will seem like it won't work but once the mixture softens enough it will mix into an ice cream looking substance. 

Here is my honest review.  It was pretty good.  It really tasted like a frozen yogurt.  My first two kids that tried it thought it was really ice cream and shoved a big mouthful of it in their mouths. They weren't expecting the flavor that it was and spit it out just as fast. It has a wheatie, honey flavor to it, but it was cold and creamy.  My husband and 3 other children ate it and liked it.  I have to say, that in an emergency, without all the modern foods from the grocery store, this would be a treat!  What made it even better was stirring in a bit of cocoa powder to make it chocolate ice cream.  That flavor disappeared!  Chocolate makes everything better :)

Wheat Ice Cream
3 C steamed wheat
3 C water
3/4 C powdered milk
1/3 C honey
Mix in blender until smooth.  Strain out the bran and save in a separate bowl.  Pour the liquid onto a rimmed cookie sheet and freeze until solid.  Let thaw a few minutes before mixing with cookie paddles or beaters to make it creamy and smooth. Makes about 1 1/2 C ice cream.  Optional:  Add cocoa powder for a chocolate flavor!

Wheat is amazing!  Here's what I made out of the original 12 cups of steamed wheat.....
  1. I used 6 cups of wheat berries in a double recipe of the ice cream.
  2. The left-over bran was used to make wheat crackers, recipe from the same book. (1 3/4 C bran & about 2 C wheat flour, 1 C water, 1/2 t salt.  Roll out thin, cut, sprinkle with ground up baked wheat kernels and bake at 375 for 15 min.  I just kept adding flour until the bran was able to be rolled out into a dough.) 
  3. I broiled, then slowly baked a few cups of steamed wheat into crunchy snack kernels. I ground up a handful to use as a topping on the wheat crackers, and we snacked on the rest. (Broil cooked wheat berries for 10 min or until they start popping, then bake at 250 for 30 min, or until lightly browned.)
  4. I made 24 bran muffins out of 3 C of the bran leftover from the ice cream.  (I used this recipe:  bran muffins
  5. The last of the wheat berries were made into a salad for dinner that night.  click here for that recipe 


Out of 12 cups of cooked wheat I made a dessert, 2 snacks, breakfast muffins, and a dinner.  The bran is in the green bowl above in the picture.  There was quite a bit left-over after making the ice cream and it went a long way in making A LOT of crackers and 24 bran muffins.  Wheat really is the staff of life!!  The whole book "Passport to Survival" is filled with recipes that start off as one recipe and then lead into several other ways to prepare it. Wheat is so versatile and truly is a survival food!!

Tuesday, May 19, 2015

"Passport To Survival"

Print Friendly and PDFPrint Friendly
Let's say that you have followed only part of the advice from our Church leaders and stored wheat, powdered milk, honey, and salt.  You never felt the urgency to prepare but bought your year supply of wheat and powdered milk from the Church and stuck the #10 cans in your basement, hopefully to never see them again.  From the looks of your storage it doesn't seem like you'll be eating too well in an emergency....unless you buy this book on Amazon;)

"Passport To Survival"

The premise of Esther Dickey's "Passport To Survival" is that we can survive, and not have appetite fatigue, with four survival ingredients stored. "Thus it is these four emergency foods, wheat, powdered milk, honey, and salt- nutritionally sound, readily storable, highly adaptable, and pleasingly palatable- in which I place my trust as the basis of my passport to survival" -Esther Dickey p. 14. She does go on to list 40 other foods that she stores for her family but the book uses only those 4 survival ingredients in the recipes.


I only purchased this book because I thought it would be fun to read about how preparedness was done in 1969.  Little did I know what a wealth of information Esther has in this book!  I found myself marking passages and turning down pages to mark things I wanted to try.  What this woman does with wheat is amazing!!!

Esther calls wheat, powdered milk, honey, and salt the Survival Four.  There are over 100 recipes using just those four ingredients. 

 Here are a few examples: 
  • gluten (in all sorts of shapes and sizes)
  • steamed wheat
  • sprouted wheat
  • making yeast
  • batters and doughs
  • soups and gravies
  • cookies, crackers, candies
  • ice cream and wheat pudding?!
  • waffles, cereals
  • caramel syrup, honey frosting
  • cottage cheese and yogurt

Dessert anyone? Do you see the spoon shaped crackers?  Esther took a thin batter and using a squirt bottle made those spoon shapes on a cookie sheet.  After baking she uses them for dessert with a sweet topping on them.  She is so creative!!


There are many recipes that use the basics and are then turned into a meal. 

Included in the book after all the recipes are given, is a 7 day menu.  There is also a section on advanced preparation that helps plan out the cooking so meals will come together quickly.  Whether in an emergency situation or not, this is very useful time management information. 


Steamed wheat is turned into ice cream?!  I think this is the the reason I need this book...haha. But I really can't wait to try it out!

This book is FULL of tips, preparedness techniques, water and food storage ideas, and positive thinking for the future.  If there will ever be a time where food is scarce but we have prepared properly with survival foods....we will be able to keep our families alive. Esther cooked these meals for 10 days for her family of 7 and they were filling and nutritious. While reading this book I kept telling my husband how inspired this woman was!  To be able to take those four ingredients and come up with the recipes that she did, she had to have help from above.  This is one book that I will always have in my food storage library.  

Here is a link to buy this book on Amazon
I do not make money on this link.  It is purely for you to find it easier on Amazon.

Tuesday, April 21, 2015

LDS Cannery Powdered Milk....Now Online!

Print Friendly and PDFPrint Friendly
Every month I try to order one or two items for my food storage from the LDS Church online. (lds.org) When I got online to order my oats guess what is now available..... non-instant powdered milk!!!  It wasn't previously available online.  I am sooooo excited!  I make yogurt with this milk and many other things, but I am so happy that it can be delivered right to my door, instead of driving all the way to the cannery in Salt Lake....it comes in a case of 12 28-oz pouches for $67.00.

Click HERE to see the milk.  Some don't care for this powdered milk as a drink, but there are so many other ways it can be used.  I use if for...


And any recipe that calls for milk. For 1 cup of milk= 1 cup of water + 3 T of powdered milk.  There have been so many nights of making dinner and I am out of milk.  Powdered milk to the rescue.  It's a great, affordable, powdered milk!!!
 

Thursday, February 19, 2015

Prepare Today Homemade-- Shelf Stable Cheesecake Recipe

Print Friendly and PDFPrint Friendly
My cheesecake drama, you can read about here, actually turned into an experiment on how to use cream cheese powder.  I purchased a #10 can of cream cheese powder from Honeyville Grain and then attempted to make a no-bake cheesecake out of it.  Attempted because there aren't a lot of instructions on the side of the can to know how to reconstitute it! I asked a friend of mine to help me with measurements and she said 1 1/2 Cups of powdered cream cheese will equal 1 8oz. block of cream cheese.  Adding water to get the right consistency is what took a little experimenting.  I only used about a 1/2 cup of water to get a cream cheese texture that I could mix easily with a hand mixer.  So watch the water amounts when you are making this, you can always add more.

 Shelf stable whipping cream made by Gossner's is one of my favorite items to have in my food storage.  It can be used for whipped cream, you can make butter out of it, and it is great in soups.  I buy mine from Honeyville in Salt Lake City.  Totally worth it to have on hand!  And the cream cheese powder is now another one of my favorite shelf stable ingredients.  I picked that up at Honeyville as well.  It runs about $28 online right now.  I was not compensated for this post.  These are truly products that I have in my storage and that I use. 


As you can see from the picture I figured out this cheesecake craziness!  Much better than my first runny mess of a cheesecake attempt.  You can see that disaster in my last post, read it HERE. I was making the cheesecake for a preparedness class at church so I used a 13x9 pan to feed a crowd instead of a pie pan.  

The crust is simple, I used the same recipe from my last post HERE,  which has graham cracker crumbs, sugar, powdered butter, and then I added the water to reconsitute the powdered butter. 
I mixed it up with a fork and then used my hands to really mix it well.  Then I firmly patted it down into the 13x9 pan and let it chill in the fridge.

Now, onto the making of the filling.  I actually made two different cheesecakes so I could try out my shelf stable heavy cream in one of them.  The other recipe uses sweetened condensed milk with the cream cheese. 

No-Bake Cheesecake Using Heavy Cream


3 C powdered cream cheese (or 2 8oz packages cream cheese)
1/2 C- 1 C water (don't add the water if using real cream cheese)
2 t lemon juice
16oz (1 pint) heavy whipping cream, chilled
1/3 C sugar

Using a hand mixer blend the powdered cream cheese with a half cup of the water.  Slowly add more water until you reach a cream cheese texture.  Don't add too much water!  You don't want it runny. Mix in the lemon juice until well blended.

Add in the whipping cream and mix on medium high until stiff peaks form.  Add in the sugar and mix well.  Mixture should be slightly thick, not runny.  Pour into prepared graham cracker crust and chill at least 2 hours. 

This is the cream cheese powder mixed with a little water.  Don't let it get too thinned out or the cheesecake won't set up.  The cream cheese powder does thicken when it sits in the fridge. 


This is the mixture after adding in the lemon juice and the whipping cream. See the stiff peaks in the middle of the creamed mixture. 

The sugar gets mixed in lastly and mixed well.


Spread the mixture over the crust and chill. 


No-Bake Cheesecake With Sweetened Condensed Milk

Toothpicks held up the cover :)

Sweetened Condensed Milk
In a blender add:
1/2 C hot water
1 C non-instant powdered milk
1 C sugar
3 T melted butter (3 T butter powder+3/4 t water)
Blend until mixed well. Or substitute 1 14oz can sweetened condensed milk.

In a mixing bowl add:
3 C cream cheese powder (or 2 8oz packages cream cheese)
1/2 C-1 C water (don't add the water if using real cream cheese)
Combine the cream cheese powder and water in bowl with hand mixer, slowly add 1/2 C water until well blended, smooth, and has a cream cheese texture. Add more water as needed to achieve the right cream cheese consistency. 
Add in:
2 t lemon juice
1 t vanilla
Blend well.  Add in the sweetened condensed milk from the blender, or 1 can sweetened condensed milk.  Blend well with hand mixer.  Pour into prepared graham cracker crust and chill at least 2 hours. 

This is the cream cheese powder, lemon juice, and vanilla mixed together.  

In goes the homemade sweetened condensed milk.

Chilled and ready for serving. I needed to transport this to where I was teaching and I first put aluminum foil over the top...see where it stuck to the top of the cheesecake!  I added toothpicks to hold up the foil.  I didn't want to mess it up even more by pulling them out before taking the photo. 


The cheesecake made with the shelf stable whipping cream set up a little better and had a firmer texture.  It also cut and held up on a plate better than the sweetened condensed milk version, which was kind of sticky. I preferred the cheesecake made with whipping cream because it had a lighter texture and wasn't too sweet. But they both tasted great!  It's always smart to have options when it comes to food storage. If plan A doesn't work, you can fall back to plan B or even plan C.  I will probably use real cream cheese to make these recipes most often, but knowing I have another option, if the situation arose that I needed one, is a comforting feeling.

Saturday, January 10, 2015

Everything In Its Place...Organizing The Storage Room

Print Friendly and PDFPrint Friendly
How are all of your January resolutions going? Did you read my last post on my food storage goal for 2015?  Click HERE is you missed it. Since it's still January, I'm going to continue with the organizing theme.  Remember...

A house of order can transcend to all aspects of our lives, but let's start with our food storage.  I hope you were all able to accomplish the organizing assignment in the last post.  The assignment was to inventory your food storage pantry or storage room.  This may seem monumental but I promise it will help in the long run of having a useable food storage system.  (Scroll down the page to see a picture of how I keep an inventory on a white board of all my #10 cans.)


After inventorying your food and supplies the next step is to organize your food into a system that functions for you.  
I am going to show you what works for me and what keeps my food rotated and useable, but there are many other ways to organize your food storage and I'll mention those at the end of the post. 

I have been blessed with a large storage room where I keep all of my extra smaller cans, #10 cans, bulk foods, paper goods, etc.  This is the room that I go to when I need to refill the containers in my kitchen pantry.  The pictures in this post are going to be dark, I apologize but there isn't any natural lighting in this room. Which is a good thing for food storage!  Remember that light, temperature, moisture and bugs/pests all need to be considered when you pick an area for your food storage. 

In my storage room I try to group "like" items together.  That way I usually know where everything is and goes.  I group my #10 cans in a different area then my smaller cans.  The smaller cans are stored in my kitchen and I only keep them out in the storage room when I have too many to fit in the kitchen. 

This is a small sampling of how I organize my #10 cans of dehydrated and freeze-dried foods. 
I have most of my fruits and veggies grouped together.  This helps with knowing how much I have, but it also helps my kids know where things are when they are sent out to the storage room to grab something for me.  The powdered milk and other dairy items like sour cream powder, buttermilk powder, powdered eggs, freeze-dried cheese, powdered shortening, and powdered butter all get stored together.  I also have baking supplies like baking powder, baking soda, and cocoa powder on that shelf.  There is actually a shelf below the milk shelf and it holds my salt, oils, cornstarch and any other baking items that I might buy in bulk.  

How do you store oddly shaped containers, like condiments?
I use the free boxes I get from case lot sales and food storage retailers to group them all together on a shelf.  I also live in earthquake territory and I feel this gives me added protection if the room started shaking.  I really need to instal a small lip on my shelves so things don't go sliding off, but that is on the to-do list :)

All of my bulk items like wheat, oats, rice, sugar, etc. are stored in buckets around the perimeter of my storage room.
I love gamma lids!!  They make it so easy to open and close, and it doesn't feel like such a chore when I need to refill my kitchen pantry containers.  It is very dry where I live so I don't use the mylar bags inside of my bulk buckets.  I pour the bulk bags directly into my buckets.  And I am also comfortable resting them directly on the concrete.  Some may not feel comfortable doing that, but my room doesn't fluctuate in temperature too much and the concrete doesn't get wet.  I feel the chemicals from the concrete are not leaching into my buckets.  This is one of those examples of what works for me may not work for you ;)

And finally, this is how I keep track of all those #10 cans of food.
In all honesty here....this is my goal....to update this white board.  Notice I didn't take the picture too close...haha.  This proves I'm not perfect and I need a food storage refresher too.  The cans that get used the most are the fruits and veggies, so they need to be updated first.  But this is how I keep a visual of what I have.  Some cans are things that I won't use unless I absolutely have too, like the canned cheese and butter.  But having it listed on the board with hash marks allows me to know at a glance what I have in my storage room.  

Other Food Storage Options
 Some people may like using the commercial can rotater systems, but I don't have the room for them.  I have found that I can easily add newer cans to the back of my shelf without having a rotating shelf.  But you can decide if that will work for you.  You can also store like items together or groups of ingredients into complete meals.  Like the meal in a bag idea. Or maybe you like to make meals in a jar. Or maybe storing your food like the grocery store, with different types of food together, like Italian, Mexican.  I know of some people who like to store their food according to breakfast, lunch, or dinner meals.  It's all up to you!! It is really up to what works for you so you will USE your food storage!

Remember this rule with any food storage system....
F.I.F.O


This is how you rotate your food!  Always place the newer foods in the back.  This may seem tedious and hard to do but knowing you are using the oldest food first will save you a lot of $$.  Take the few minutes when you buy your food to put them in the proper place...behind the older food! 

Food Storage in Smaller Homes 

Many of us may live in smaller homes or apartments.  How is is possible to have food storage....and to store the larger amounts of food needed?
  • Think of the space under the beds in your homes.  For long-term foods (#10 cans that lasts 20+ years) they can be stored in their boxes under a bed.  Think about taking the bed off the frame and using the food storage as the base.  The food from the cannery like rice, wheat, oats, powdered milk, would all work great for this option.  They don't need used as often. 
  • Do you have extra space above your kitchen cabinets?  This unused space could easily store cans of food.  
  • Instead of end tables, place stacked cans under a tablecloth and use a wood or glass topper to create a small table.  
  • The space behind your sofa and the wall can hold food storage as well.  It can be covered with a cloth or if you know someone handy, they could build a cover for it out of wood. 
  • Do you use all that extra closet space on the shelf above your clothes?  Think of how high you could stack #10 cans if they went all the way to the ceiling of the closet.  
  • Buy several over the door pocket hangers, that are made for shoes, and you'll have a great area for smaller items. Think of all the doors and closets that you have and think if an over the door organizer would work there.  
**All of the above ideas take organization to a new level.  You will need to have a record of what you have stored and where you put it.  Keep a notebook with every item listed, where you put it, how much you have stored, and the expiration date.

It takes a little creativity and thinking outside of the box, but I know if you make it a priority to have your food storage you will be blessed.  Thoughts and ideas will come to your mind as you pray to know how to prepare for your family.  

Sunday, September 14, 2014

My Food Storge Week In Review- Yogurt, Cottage Cheese, & Bulk Spices

Print Friendly and PDFPrint Friendly
This week I was able to bake a little and add a little to my food storage.  Having basic baking ingredients on hand, like powdered milk, keeps me from running to the store for that one ingredient I need for dinner.  And buying spices and other basic ingredients in bulk really does save money, especially when I can save the bulk of it in mason jars with my foodsaver. 

Here's what I did this week that related to my food storage.

My kids have been begging for lasagna for dinner so we finally got around to having it.  I started the noodles cooking and then realized that I didn't have enough cottage cheese for the filling.  I only had about 1/4 C left and I needed a whole cup.  Not to worry....making a quick batch of cottage cheese is easy.  Plus, it uses powdered milk!


Easy Homemade Cottage Cheese
I followed this recipe in the link from Tactical Intelligence

I warmed the milk, added 1 T vinegar, let it sit to create curds, and then drained the curds in cold water.  You are left with basic cottage cheese type curds.  When I added them to the store bought cottage cheese you couldn't tell the homemade from the store bought.  It only took a couple of minutes for the whole process!

I must have had powdered milk on my mind because I made yogurt too this week.  I haven't used acidophilus as a starter for awhile, so I wanted to make sure that this process would still work for me. Usually a small amount of yogurt is used as a starter for a batch of yogurt, but I have found that acidiphilus tablets also work because they have the live active cultures in them.  I followed the recipe HERE from my previous post on yogurt, except I used my yogurt maker and not my thermal cooker.   I blended the powdered milk and water in my blender, added sugar, vanilla flavor, and three crushed acidophilus tablets.(using powdered milk also eliminates the need to heat up the milk and cool it back down because it is already pasteurized) Then let it incubate in my yogurt maker.


It took about 12 hours for the yogurt to set up in my Yogourmet yogurt maker and then I cooled it in the fridge overnight.  

 This picture is after I scooped out a little bit to make yogurt cheese.  The finished yogurt is smooth and creamy, perfect!


The yogurt that I scooped out is now draining over my sink in a cheese bag that came with my yogurt maker.  Cheesecloth or a clean t-shirt would also work over a sieve.  I only tried a little of the yogurt to see if we really liked it as yogurt cheese.  This cheese will be soft like a cream cheese, hopefully. We're going to eat it on bagels...yum!

Update on the cream cheese, aka yogurt cheese.  As I was putting the yogurt into the cheese bag I remembered that I had flavored the yogurt with sugar and vanilla.  So the yogurt cheese came out a little sweeter then I would like on crackers.  And I am also thinking that making yogurt cheese will take some practice.  I let it drain too long and was kind of dry.  It was still spreadable, but not as moist as cream cheese from the store is.  Next time I will check the yogurt cheese sooner.  But it was edible and kind of cool to know it works!  Especially knowing that it started out as powdered milk, water, and acidophilus tablets!


Spices in your food storage are almost as important as the basic ingredients.  Have you ever had to eat plain rice, or potatoes, every night without any flavoring.  It would be beyond bland and the family would probably rebel!  I like to keep many spices on hand for a variety in our cooking.  I finally made it to Winco this week to stock up on spices, and a few bulk items that I was running low on.  I bought basil, cinnamon, cumin, cocoa powder, and garlic powder. After refilling my smaller spice containers I sealed up the extra with the foodsaver to keep them fresh for much longer then sitting in my spice drawer.

Transferring from bag to bottle. 


Notice that I use more than just mason jars.  Old spaghetti sauce jars and any other glass jar with a metal lid will work with the foodsaver. 

It may not seem like a huge deal, but these small things make my food storage usable and manageable.  It takes a little organizing and some time to get used to a food storage system, but when you find what works for you, food storage becomes part of your every day life. 

Saturday, April 30, 2011

A New Month!

Print Friendly and PDFPrint Friendly
It's time for new goals!!  

3-Month Supply Goal for May:  Have at least a week's worth of shelf-stable meals in your pantry.  This means the ingredients have to come from a can or your pantry.  Check out Food Storage Made Easy website for shelf stable ideas.

  Water Storage Goal for May:  Keep storing water!  Every 24 pack of bottled water=3 gallons and you need at least 1 gallon of water per person for at least 2 weeks!

Financial Goal for May:  Continue to put money into savings.  You could have an extra account for Christmas, food storage, travel, etc.


Long-Term Storage Goal for May:  This month we are storing long-term dairy items.  Most dairy items will fit into the 3-month supply category, but there are many choices out there for shelf-stable dairy items.  Cheese, sour cream, milk, and eggs all come in dried and powdered form and they last for 5-10 years sealed in a #10 can.  Once opened they need to be used within a year, but you could seal them in a mason jar with your food saver and they would last a little longer.  Check Honeyville Grain and Emergency Essentials for more info on these items! I love powdered eggs!  I use them solely for all my cooking and baking (1 T powdered egg + 2 T water)! Just mix the powdered egg into your dry ingredients and add the water to your wet ingredients, no need to mix beforehand.  The only thing that can't be made out of powdered eggs is a boiled egg :)  Click HERE for more info on powdered sour cream.  Scroll down past the pricing information.

Another great way to have shelf stable milk and whipping cream is from Gossners in Logan.  You can make butter out of cream and Gossner's has shelf-stable cream! (click HERE to view a great post on making butter)
 gossner.com 
1000 N 1000 W
Logan, UT 84321
(435) 752-9365

Emergency Preparedness Goal for May:  This month is all about cooking without power!  My advice is to find what works for you and to store the right amount of fuel.  Gas grills, camp stoves, rocket stoves, Dutch ovens, solar ovens, applebox ovens, stove-in-a-can, and Volcano stoves are all great ways to cook without power.  
Click HERE for Applebox instructions.


Click Play above to view how to make a Rocket Stove.


Click HERE to view the Sun Oven.

Click HERE to view the Volcano Stove.


And click play to see a video of the Volcano Stove.


And Click HERE to view the BEST handout on cooking without power from Peace of Preparedness!  I would print this out and keep it for future reference!

 On May 17th, at Honeyville Grain, the President of the Sun oven, Paul Munsen, will be teaching a class on how to use the Sun Oven.  I highly recommend this class.  I own a Sun Oven and LOVE to use it all year round! If you are thinking of purchasing one or just want to know more you must attend this free class!!  Plus they cook yummy treats to share!


Enjoy the journey!
Enjoy the blessings!
Feel the PEACE!
Related Posts Plugin for WordPress, Blogger...