Showing posts with label wheat. Show all posts

Sunday, January 13, 2019

Five Things That Changed The Way I Do Food Storage

Print Friendly and PDFPrint Friendly

*This is a repost from 2011
There are so many topics to cover when it comes to Food Storage and Emergency Preparedness.  So when I attended a great class Tuesday at Honeyville Grain called "Five Things That Will Change Your Mind About Food Storage", taught by the store manager Lisa Barker, it got me thinking about how to narrow down the list of all the topics of preparedness to just 5.  Lisa's 5 things are very similar to the 5 things that changed the way I do food storage and also how it has simplified my food storage. (I'll list her ideas at the end of the post) My food storage journey really began on September 11, 2001.  I remember the panicked feeling after watching the Twin Towers fall and then watching the other planes crashing into the Pentagon and in Pennsylvania, and thinking this is it!  The world is ending!  The reason I felt so panicked was I had a 6 month old, 22 month old and a 4 year old and I didn't have more than a week's worth of anything.  My baby was strictly on formula and I only had the one can of formula we were using. I grabbed the kids and went to the grocery store and bought food, paper goods, formula, you name it and I probably bought it.  

As time went by and life looked like it was going to continue I really felt the need to start and continue a food storage program.  I started with basics and had things like flour, but I really didn't know how to store it and rotate it.  I went through several ways of storing my long-term items like a Rubbermaid container, buckets etc.  What I didn't realize was I needed to have a meal plan to create my 3-month supply and at that time I was still cooking whatever sounded good that day for dinner.  I wasted so much food and was really frustrated.  Contemplating what I should do; I know that I was inspired by the Spirit when an idea came to me one Sunday afternoon, and that was to create a menu plan with an ingredient list.  I wrote down every meal that my family ate and then I made an ingredient list of all the items from those meals.  That ingredient list became a built in shopping list. I could buy my ingredients when they went on sale and have a pantry full of food that I used on a daily basis.  This is all kept in a binder with sheet protectors and there’s one for each meal.  This plan has worked for my family for several years now.  What’s great is I can tweak it as I go and add or subtract recipes when we need a change.

My ingredient list that goes with my dinner meal plan.


The ingredient list helps me to see exactly what I need to have in my storage room for a 3-month supply.  I just multiply the item by 3 (which is more than a 3-month supply, but more is better, right?)  and I purchase that quantity.  The CASE LOT sales that are a PERFECT time to purchase items for your pantry!!!  (Because if your food storage plan is to come to my house in an emergency you will probably be disappointed to find that I make you work for free food)  hahaha :)  All kidding aside you really do need a plan for your family!!


Here is my list of the 5 things that changed my mind about food storage:
  1. Making a meal plan, ingredient list and shopping for items when they are on sale!!
  2. Using the Food Saver to preserve my dehydrated food, spices, chocolate chips, candy, etc. 
  3. Gamma Lids!!  These lids have made my life sooooo much easier!  I can open a bucket of wheat just by unscrewing the gamma lid and the resealing it without having to pry open those lids that come with the buckets. 
  4. Canning and dehydrating my own food at home!  I never knew how easy it was to can your own meat!  Click HERE to view a previous post on canning meat.  I have also learned to dehydrate almost anything I can get my hands on and then sealing the food in a mason jar with the food saver.  
  5. Wheat!  I have loved learning about all the things that wheat can do!  You can grind it into flour, cook it into a cereal, sprout it into a vegetable, crack it and cook it, even ice cream. I am continually amazed at what wheat can do! Making my own bread has been such a fun learning experiment.  Click HERE to see the recipe I use. 
There you have it!  The five things that changed my mind about food storage. These are Lisa's 5 things:
  1. Store what you eat...eat what you store!
  2. Canning my own foods.
  3. Freeze Dried Foods
  4. FoodSaver, Meals in a jar
  5. I Dare You To Eat It, and It's In the Bag Plans 
EDUCATION IS POWER!!!!

Friday, April 22, 2016

Food Storage Teacher/Mother's Day Gifts

Print Friendly and PDFPrint Friendly
One of the greatest gifts you can give anyone is the gift of preparedness!  I leave no one safe from my preparedness gift giving.   I give preparedness gifts to my friends, family, and also as wedding and baby shower gifts, instead of gifts that may be unused.  (I am not saying you aren't prepared if you get a preparedness gift from me, I just love to help everyone get prepared) I have given cookbooks, wheat, #10 cans of mixes, #10 cans of dehydrated fruits and veggies, water containers, and meals in a bag (which make great shower gifts for newlyweds and new moms).  Last year my children gave their teachers, secretaries, and principal buckets of wheat that they could keep in their storage or use to make blender wheat pancakes without a grinder.  

 I found these great little buckets at the Honeyville Grain store in Salt Lake City and I filled them with wheat.  

 On one side of the bucket I added the saying "We hope you have a sa-wheat summer".

On the other side of the bucket I added a recipe for Blender Wheat Pancakes.  The teachers LOVED them and thought they were quite unique.  This would make a great gift for your child's teacher, or even for a birthday/Mother's Day, or a gift for family, friends, or neighbor.  Maybe it will spark their interest in preparedness and get them going :)

Blender Wheat Pancakes
1 C milk (1 C water + 3 T non-instant powdered milk)
1 C wheat kernels
2 eggs
2 t baking powder
1/2 t salt
2 T oil

Place the milk and wheat in a blender and blend on high for 4-5 minutes or until smooth.  Add eggs, oil, baking powder, and salt and blend until mixed.  Don't over mix. Pour batter directly from the blender onto a hot griddle.  Cook for 1-2 minutes on each side.  

Tuesday, May 26, 2015

How To Make Ice Cream Out Of Wheat

Print Friendly and PDFPrint Friendly
Yes, the title is correct!  I made ice cream out of wheat.  It may seem impossible and maybe even a little gross (according to two of my kids it was), but it was a very interesting process.  

I came across this recipe in the "Passport To Survival" book that I found at a local thrift store. Click here to see my review of the book.

There are only four survival foods used in the recipes in this book, wheat, powdered milk, honey, and salt.  It is truly amazing what can be made out of them!  

There are a few steps to actually get ice cream out of wheat, but they are simple.  Start off by steaming your wheat.  This can be done in a crock pot, thermal cooker, wonder box, or in a double boiler.  I would've made this in my Saratoga Jacks thermal cooker, but I wanted to try this exactly as Esther Dickey's recipe said to do it.  

You will need two pots, one that fits inside the other.  You will also need some sort of metal ring, or small can, to elevate the inside pot off the bottom of the bigger pan.


I used my trivet from my Saratoga Jacks thermal cooker to raise up the blue pot.  
 Pour in enough water to come to 1" below the blue pot. 

Add 5 C of wheat kernels, 7 C of water, and 1 T salt to the inner pot.  Cover, bring to a boil, then lower heat to a simmer, and steam the wheat for 4 hours.


You will end up with 12 cups of cooked wheat berries. For a smaller recipe use 2 C of wheat, 1 3/4 C water, and 1 t salt.  That will produce about 5 C of cooked wheat berries.  

Once you have cooked wheat berries, the fun begins.  In a blender add 3 C steamed wheat berries, 3 C water, 3/4 C powdered milk, and 1/3 C honey.  Blend until mixed.  There will be bits of bran that won't blend up, but they get strained out in the next step. 

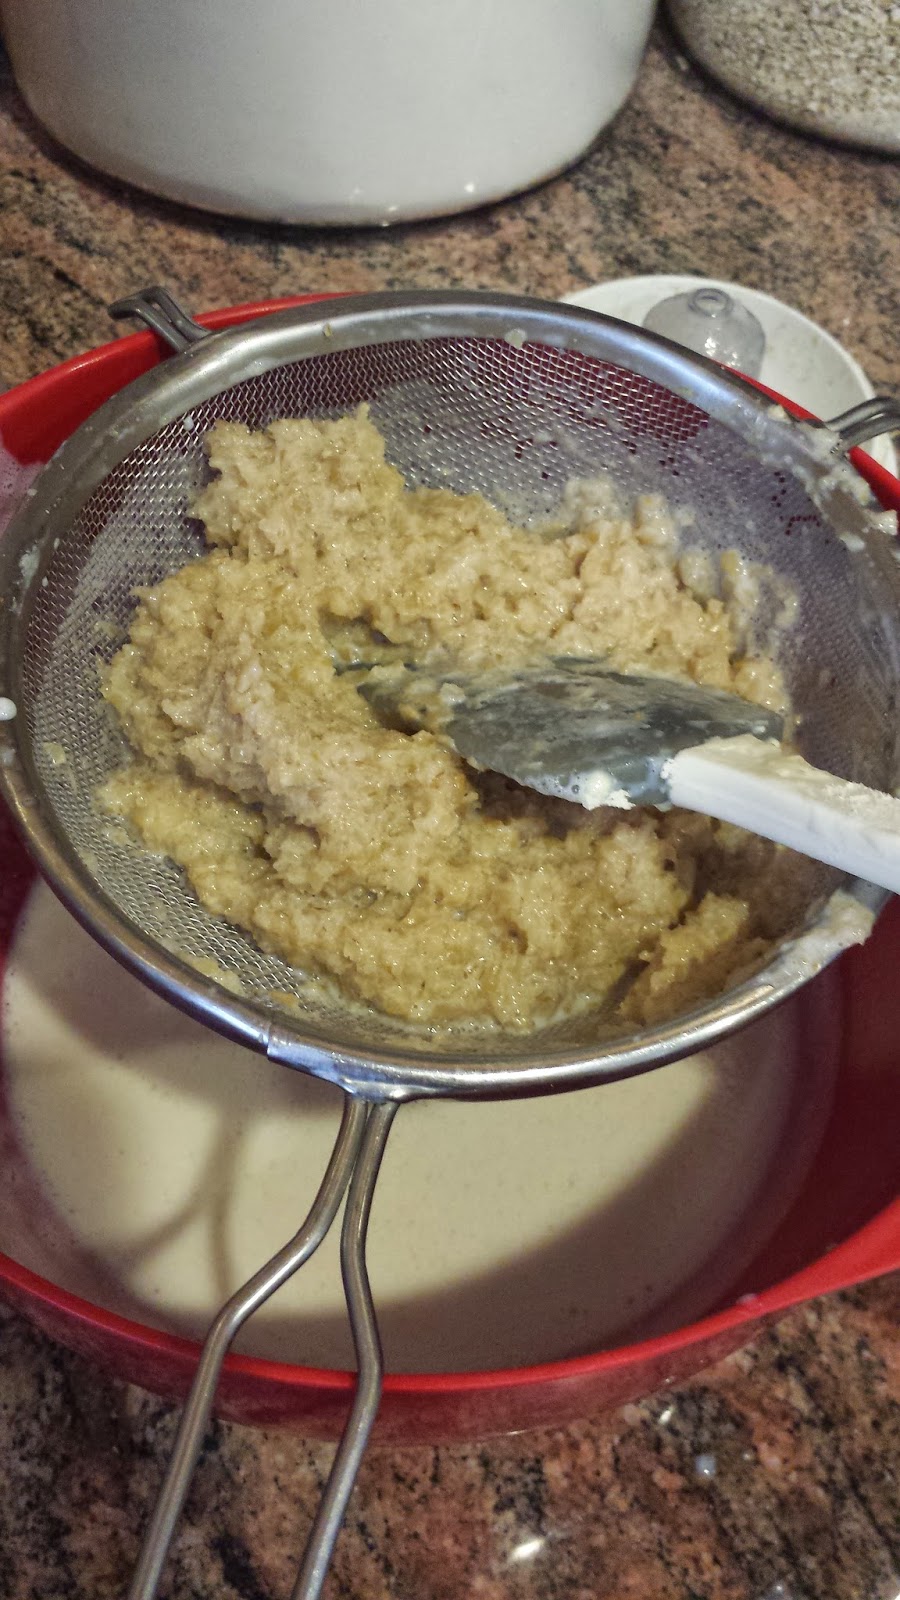
Once the mixture is blended well it needs to be strained.  The bran will be left in the strainer and the whey mixture will be used for the ice cream.  Save the bran for a recipe later.  

This is the bran left over after all the liquid has been drained off. 

Pour the liquid onto a large rimmed cookie sheet and freeze until solid. 

When you are ready to make ice cream, pull out the cookie sheet from the freezer and let it warm up for a minute or two.  I used a spatula to scrape up pieces and then used my Bosch with the cookie paddles to mix it into ice cream.  It will seem like it won't work but once the mixture softens enough it will mix into an ice cream looking substance. 

Here is my honest review.  It was pretty good.  It really tasted like a frozen yogurt.  My first two kids that tried it thought it was really ice cream and shoved a big mouthful of it in their mouths. They weren't expecting the flavor that it was and spit it out just as fast. It has a wheatie, honey flavor to it, but it was cold and creamy.  My husband and 3 other children ate it and liked it.  I have to say, that in an emergency, without all the modern foods from the grocery store, this would be a treat!  What made it even better was stirring in a bit of cocoa powder to make it chocolate ice cream.  That flavor disappeared!  Chocolate makes everything better :)

Wheat Ice Cream
3 C steamed wheat
3 C water
3/4 C powdered milk
1/3 C honey
Mix in blender until smooth.  Strain out the bran and save in a separate bowl.  Pour the liquid onto a rimmed cookie sheet and freeze until solid.  Let thaw a few minutes before mixing with cookie paddles or beaters to make it creamy and smooth. Makes about 1 1/2 C ice cream.  Optional:  Add cocoa powder for a chocolate flavor!

Wheat is amazing!  Here's what I made out of the original 12 cups of steamed wheat.....
  1. I used 6 cups of wheat berries in a double recipe of the ice cream.
  2. The left-over bran was used to make wheat crackers, recipe from the same book. (1 3/4 C bran & about 2 C wheat flour, 1 C water, 1/2 t salt.  Roll out thin, cut, sprinkle with ground up baked wheat kernels and bake at 375 for 15 min.  I just kept adding flour until the bran was able to be rolled out into a dough.) 
  3. I broiled, then slowly baked a few cups of steamed wheat into crunchy snack kernels. I ground up a handful to use as a topping on the wheat crackers, and we snacked on the rest. (Broil cooked wheat berries for 10 min or until they start popping, then bake at 250 for 30 min, or until lightly browned.)
  4. I made 24 bran muffins out of 3 C of the bran leftover from the ice cream.  (I used this recipe:  bran muffins
  5. The last of the wheat berries were made into a salad for dinner that night.  click here for that recipe 


Out of 12 cups of cooked wheat I made a dessert, 2 snacks, breakfast muffins, and a dinner.  The bran is in the green bowl above in the picture.  There was quite a bit left-over after making the ice cream and it went a long way in making A LOT of crackers and 24 bran muffins.  Wheat really is the staff of life!!  The whole book "Passport to Survival" is filled with recipes that start off as one recipe and then lead into several other ways to prepare it. Wheat is so versatile and truly is a survival food!!

Tuesday, May 19, 2015

"Passport To Survival"

Print Friendly and PDFPrint Friendly
Let's say that you have followed only part of the advice from our Church leaders and stored wheat, powdered milk, honey, and salt.  You never felt the urgency to prepare but bought your year supply of wheat and powdered milk from the Church and stuck the #10 cans in your basement, hopefully to never see them again.  From the looks of your storage it doesn't seem like you'll be eating too well in an emergency....unless you buy this book on Amazon;)

"Passport To Survival"

The premise of Esther Dickey's "Passport To Survival" is that we can survive, and not have appetite fatigue, with four survival ingredients stored. "Thus it is these four emergency foods, wheat, powdered milk, honey, and salt- nutritionally sound, readily storable, highly adaptable, and pleasingly palatable- in which I place my trust as the basis of my passport to survival" -Esther Dickey p. 14. She does go on to list 40 other foods that she stores for her family but the book uses only those 4 survival ingredients in the recipes.


I only purchased this book because I thought it would be fun to read about how preparedness was done in 1969.  Little did I know what a wealth of information Esther has in this book!  I found myself marking passages and turning down pages to mark things I wanted to try.  What this woman does with wheat is amazing!!!

Esther calls wheat, powdered milk, honey, and salt the Survival Four.  There are over 100 recipes using just those four ingredients. 

 Here are a few examples: 
  • gluten (in all sorts of shapes and sizes)
  • steamed wheat
  • sprouted wheat
  • making yeast
  • batters and doughs
  • soups and gravies
  • cookies, crackers, candies
  • ice cream and wheat pudding?!
  • waffles, cereals
  • caramel syrup, honey frosting
  • cottage cheese and yogurt

Dessert anyone? Do you see the spoon shaped crackers?  Esther took a thin batter and using a squirt bottle made those spoon shapes on a cookie sheet.  After baking she uses them for dessert with a sweet topping on them.  She is so creative!!


There are many recipes that use the basics and are then turned into a meal. 

Included in the book after all the recipes are given, is a 7 day menu.  There is also a section on advanced preparation that helps plan out the cooking so meals will come together quickly.  Whether in an emergency situation or not, this is very useful time management information. 


Steamed wheat is turned into ice cream?!  I think this is the the reason I need this book...haha. But I really can't wait to try it out!

This book is FULL of tips, preparedness techniques, water and food storage ideas, and positive thinking for the future.  If there will ever be a time where food is scarce but we have prepared properly with survival foods....we will be able to keep our families alive. Esther cooked these meals for 10 days for her family of 7 and they were filling and nutritious. While reading this book I kept telling my husband how inspired this woman was!  To be able to take those four ingredients and come up with the recipes that she did, she had to have help from above.  This is one book that I will always have in my food storage library.  

Here is a link to buy this book on Amazon
I do not make money on this link.  It is purely for you to find it easier on Amazon.

Friday, July 18, 2014

Back-To-Basics Frugal Food Storage Part 3: Bread Recipes

Print Friendly and PDFPrint Friendly
One of the ways that I am able to save money is to make my own breads at home.  The ingredients used for making bread are dirt cheap, have you noticed how much they charge you in the grocery store for artisan breads, even french bread.  It's outrageous to pay that much for flour and water. 

Here are a few of my favorite bread recipes.  Don't be scared of yeast, some people think it's tricky, but after using it a few times you'll get the hang of it.


Don't spend money on bagels either....click HERE for a bagel recipe that works for me.

If you try a new recipe give yourself time to learn it.  I remember trying to make bread the first time without a Bosch mixer and hand kneading.  It.took.forever.!!  And the final result was less than appetizing.  It took me almost 2 years, I'm a slow learner, to get my bread to a point of looking and tasting the way we like it.  Don't get frustrated and give up if it doesn't work the first time. Make a goal of trying a new bread recipe this week!

Monday, August 13, 2012

Prepare Today Homemade- Bagels

Print Friendly and PDFPrint Friendly
A big part of food storage and preparedness is making everyday grocery store food at home from scratch.  I love the challenge of making something that I would normally just buy at the store. Most of the time it works but there are the few times my family gives me funny looks. I decided to try bagels because my whole family loves them.  I have tried them several times over that past few years but I hadn't found a recipe that was simple, and also edible, until I found a great preparedness blog.   The recipe for bagels, I found at selfreliancebyjamie.blogspot.com, was simple and tasted so good! I couldn't wait to try them and when they were done and everyone ate them, I knew I found a keeper. 

This is the link to Jamie's bagel recipe.  Click HERE.

I started off by adding water, yeast, sugar, flour and salt into my mixer.  I added the flour until the dough started to pull away from the edge of the bowl.  It then kneaded for 8 minutes.  In the picture above I put the cover on and let it rise in the bowl for 20 minutes.

Next, divide the dough into 16 pieces and form into balls.  Take each ball and form into a bagel shape.  Make a hole in the middle with your thumb.

 Stretch the bagels a little as you make the holes and let them rise on a baking sheet for 20 minutes.

I didn't use a baking sheet, I just left them on the counter to rise. 

Bring a pot of water (big enough to hold a few bagels at a time) with 3 T of sugar.  Boil each bagel for 30 seconds on each side and let them drain on a dish towel.  Place the bagels onto a baking sheet and mix 1 egg white with 1 t water and brush each bagel. Bake the bagels and enjoy!!!

Homemade Bagels
3 C warm water
2 T yeast
1/3 C sugar
3 C flour (I used half wheat/half white)
4 t salt

Mix the water through salt in a mixer and mix one minute.  Add 3-4 cups more flour, until the dough starts to pull away from the side of the bowl.  Knead for 8 minutes.  Cover and let rise 20 minutes.

Divide the dough into 16 balls and using your thumb, poke a hole while slightly stretching the dough.  Place on baking sheet and let rise 20 more minutes.  

Boil a pot of water with 3 T sugar and boil each bagel for 30 second on each side.  Drain on paper towel or dish towel.  (now would be the time to add toppings like poppy seeds or sesame seeds) Place on a baking sheet.  Mix 1 egg white with 1-2 T water and brush bagels.  Bake at 400° for 25-30 minutes.

There are so many different variations that you could do to change these bagels up!  And when you look at the ingredients I can't believe I have wasted so much money at the bagel shop!!

Saturday, April 21, 2012

Sprouting

Print Friendly and PDFPrint Friendly
"Sprouts provide up to 600 percent more vitamins than the full grown plant."  Researchers at the University of Ulster, UK have found. 

Let's say you have been living solely on your food storage for 3 months now and your supplies are dwindling.  If summer has come and gone there isn't time to plant a garden, and your family is going to need vegetables.  I know pirates are quite popular but many of them died of scurvy and I personally don't want to have that in common with them.  With limited options in a survival scenario, your solution is SPROUTING.  When a tiny little seed/grain, with all of its necessary vitamins and nutrients for growing packed inside, is sprouted it becomes a powerful super food!!  


"Sprouts are cheap, easily accessible and an unpolluted source of vitamin C, some protein, traces elements, and B Group vitamins. They are also a true organic food, if they are grown on your very own windowsill, without chemicals."


Sprouting could literally be a life saver.  I grow sprouts because they are so nutritious and also because my children eat them and don't know they are eating veggies.  


I buy sprouting seeds from Honeyville Grain, but the container above I bought at the Self Reliance Expo last year.  


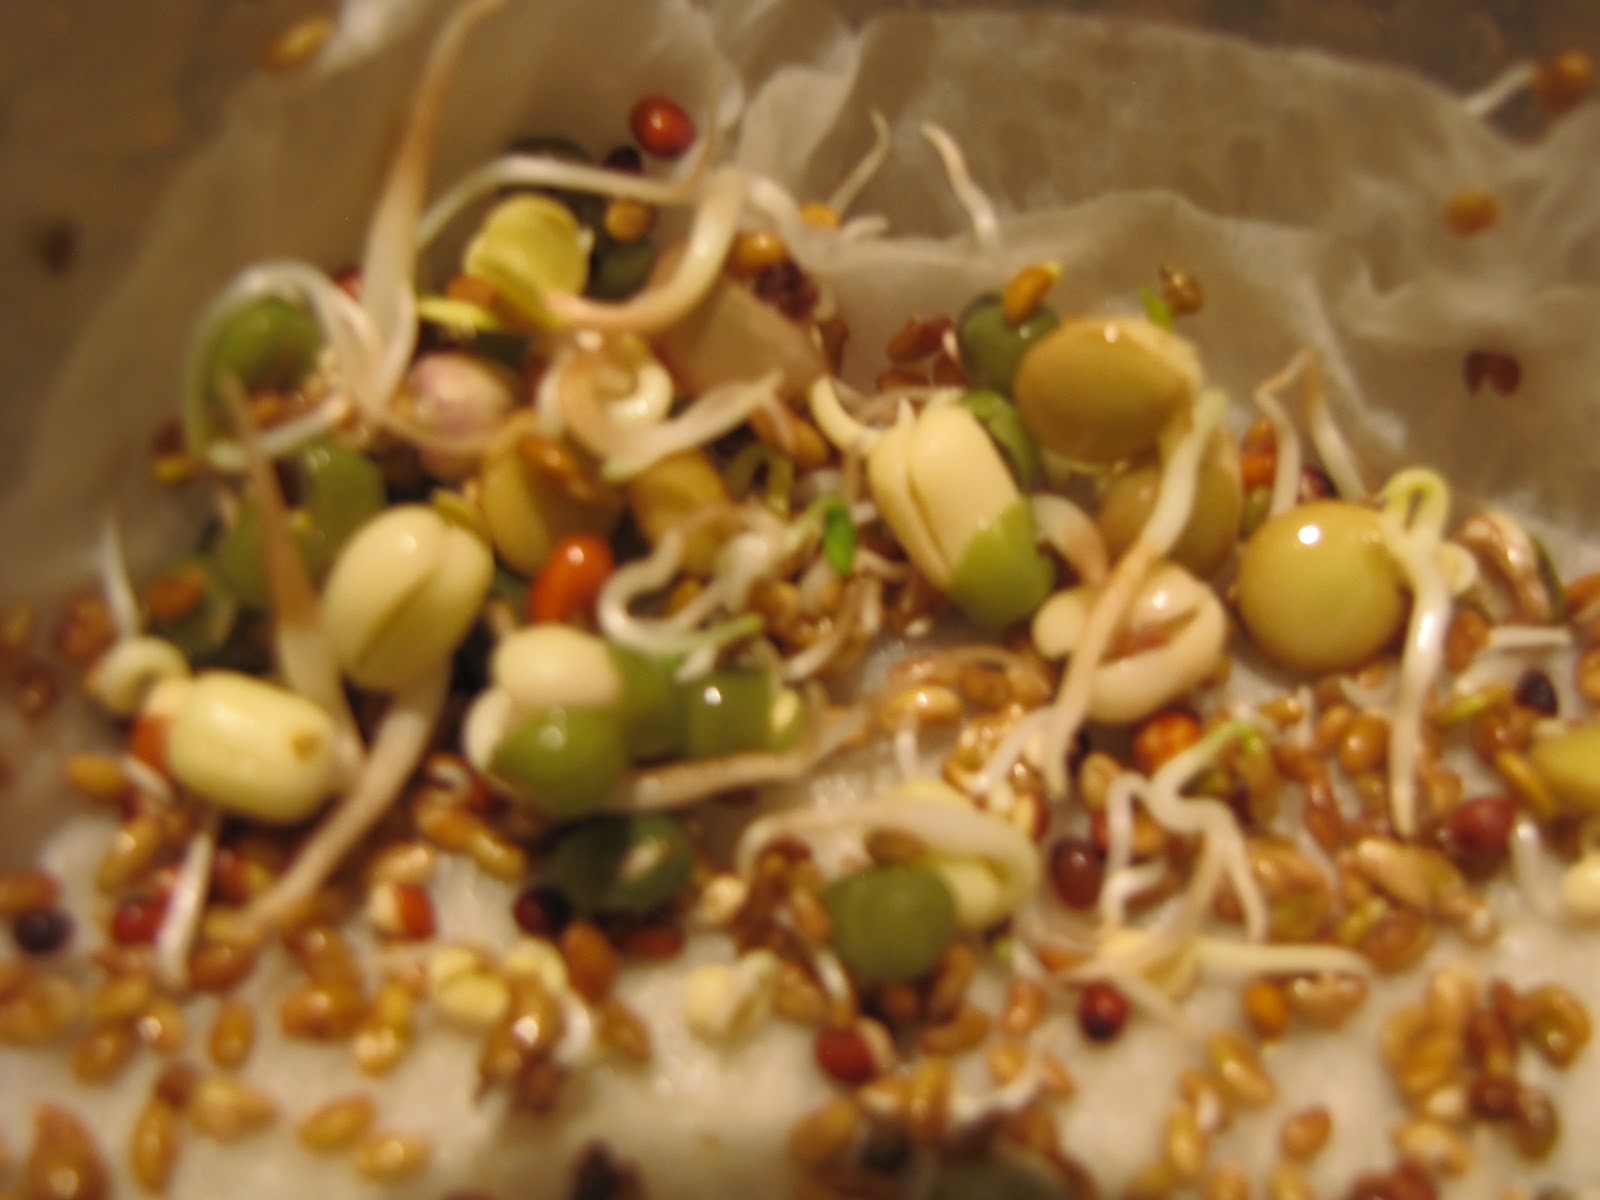
They also come in smaller bags.  You don't need to buy a special bag of sprouting seeds.  There are many seeds and grains that can be sprouted.  Wheat, garbanzo, alfalfa, mung beans, barley, lentils, whole peas, and many more are all able to be sprouted.  Experiment with different seeds and grains and find which ones you prefer.  I really like the salad mix (above) because it tastes like those yummy garden fresh peas.  They just taste fresh and healthy. 


These are the two contraptions that I use to sprout.  The mason jar on the left is quite easy to use and the least expensive (under $5 for the lid).  Put in a tablespoon of sprouts, soak over night (the seeds are soaking in the picture), and just rinse twice a day until sprouts form, about 3-5 days. It can also be done without the plastic straining lid.  I started sprouting with a canning jar, cheese cloth and the canning lid ring.  The other option is a sprouter.  I really love the Victorio Seed Sprouter, on the right, because it pretty much does all the work for you.  You pour the sprouts on each layer (about 1/2-1 T), add 2 C of water twice a day, and it soaks, drains, and grows the sprouts.  There is no need for soaking and rinsing and draining.  With 3 different levels you can stagger your growing or grow different kinds of seed in each one. Remember that sprouts don't like the sunlight.  You can put them in the sun once sprouted to turn them green but they need a warm dark spot to grow.  It really is just that simple!!


We eat our sprouts fresh out of the sprouters, but they need to go in the fridge once they are big enough to eat. (when the sprout is the length of the seed you can eat it).  They should stay good for about 1 week in the fridge.  Mine never last that long because they get eaten.  Sprouts are great for salads, sandwiches, soups, muffins, breads, dinner casseroles, etc, etc.  They can be added to anything.  


If you and your family needed quick nutrition in an emergency, having sprouting seeds is the answer.  Gardening has its place but it can take months.  Sprouting takes only days and allows you to grow your own food storage.  Storing sprouting seeds takes up little space and they last for many years, in the right conditions (dark, cool environment), and are relatively inexpensive.  I don't think I will ever have enough storage space to store the recommended amount of wheat for 7 people, but I can store a years worth of sprouting seeds.  Think of how many sprouts you'll get out of 1lb of wheat, a lot!!  One tablespoon of wheat will create one full layer sprouts in the Victorio Sprouter.  That's quite the bang for your buck!!  This is one area of preparedness that everyone can do and should do today.  The health benefits alone are why everyone should be sprouting.

Saturday, June 19, 2010

Whole Wheat Brownies

Print Friendly and PDFPrint Friendly

The Earthquake night is almost here. We are busy putting together packets and making sure everything is ready for Wednesday's meeting. I hope you have had time to go over your fliers and will fill out the emergency information. Make sure to bring this with you to the meeting. It will be a great night and I hope that you will spread the word to your neighbors!!


Since we are storing wheat this month I am going to include a recipe that will get most people to eat wheat..... BROWNIES! This is one of my family's favorite recipes and it makes your dessert a little healthier. :)


Homemade Wheat Brownies
From Wheat Cookin' Made Easy

1/2 C butter melted
1/4 C cocoa
1 C sugar
2 eggs
1/2 t salt
1/2 t baking powder
1 t vanilla
1 C whole wheat flour
1/2 C chopped nuts, optional

Melt butter in microwave and add remaining ingredients one at a time, beating after each addition with the exception of the nuts. Stir in nuts last. Pour batter into greased 8x8 pan and bake at 350 for 25 minutes. This can be doubled and made in a 13x9 pan.

We love to eat these brownies with...


Chocolate Butter Cream Frosting.

6 T butter 4 1/2 C powdered sugar
1/2 C cocoa powder 1/4 C milk or cream
1 1/2 t vanilla


Cream together butter, cocoa powder and vanilla and then gradually beat in powder sugar in 1 C at a time, beating thoroughly after each addition. Stir in milk or cream until frosting is of spreading consistency.
JUNE GOALS
WHEAT: 150LBS PER PERSON PER YEAR. #10 CAN FROM THE CANNERY IS $2.60 AND 25LB BAG IS $5.80.

VITAMINS, MEDICINE: GET EXTRA PRESCRIPTION MEDICATION IF ALLOWED. STOCK UP ON OVER THE COUNTER MEDICATION. PURCHASE VITAMINS FOR YOUR STORAGE. THEY ARE 50% OFF AT SMITHS THIS WEEK.

KEEP STORING WATER. WE ARE IN THE SUMMER MONTHS NOW AND MORE IMPORTANT THAN EVER TO HAVE EXTRA WATER.


ENJOY THE JOURNEY!
ENJOY THE BLESSINGS!
FEEL THE PEACE!

Saturday, June 12, 2010

Whole Wheat Pizza Dough

Print Friendly and PDFPrint Friendly

This month we are adding wheat to our home storage. I love to find ways to use my wheat besides just making bread. I was able to attend a food storage fair in May and the pizza recipe below is from one of the classes that I attended.

Whole Wheat Pizza Dough
Heidi LeBlanc

Less than 20 minutes!!!

2 C whole wheat flour
1 1/2 T yeast
2 t yeast
1 1/2 t sugar
3/4 C water
1 t canola oil

Mix all ingredients in a bowl. Let rise for 10 minutes while covered with a towel. Roll out into pizza shape. Add favorite toppings. (options below)

Greek-puree 1/2 C raisins, 2 T onion, and 1/3 C water for the spread. Top with 2 C fresh spinach, 1 C scallions, 1 T pine nuts, 1 T olive oil, 1/4 C lemon juice, 1/8 t allspice, 1/8 t pepper, salt to taste, 1/2 C feta cheese

Italian-cook 16oz canned tomato sauce, 1 grated carrot, 3 T fresh basil, 1/2 t oregano, 1/4t pepper, Top with 1 C artichoke hearts quartered, 1/2 C thinly sliced tomatoes and 2 T black olives, 1/2 C mozzarella cheese.

Mexican-1 C refried beans. Top with 1/2 C cheddar cheese, 1/2 C each green onion, chilies, tomatoes, bell pepper and 1 C salsa

Bake pizza at 425 for 10-15 minutes.


ENJOY THE JOURNEY!
ENJOY THE BLESSINGS!
FEEL THE PEACE!


Saturday, June 5, 2010

Do you REALLY have a year's supply?

Print Friendly and PDFPrint Friendly
I think that I over estimate the amount of food storage that I have. After reading an article in the LDS Preparedness Manual, I realized that I have a lot more to store to have enough food to sustain my family for a year. Click HERE if you would like to read this manual. (It is not endorsed by the church)

To make 2 loaves a bread every other day for one year, using 6 cups of
wheat flour, requires 275lbs of wheat. That is 5 1/2 buckets of wheat just for bread. You would also need 4 gallons of oil, 46lbs of honey, 8lb yeast. 61 cups of gluten, 3 2/3 quarts of lemon juice and 7.3lbs of salt. When it is laid out for you like that it really makes me think of how much I REALLY need of each ingredient.

When planning your 3-month menu you multiply ingredients to make sure you have enough for the whole 3 months. The same applies to a year's supply. The yearly amounts of food that the Church recommends for our food storage are the bare minimum that you should store, so your family doesn't starve. You will be fed, but still hungry! We're talking about a small loaf of bread and a handful of beans everyday.  That doesn't sound too appetizing, but it would be life sustaining. 


The numbers below are calculated for one adult and that equals 400lbs of grains. (Children under 6 only need 75lbs of wheat per each.)

So, just how much do you need?Two 5 gallon buckets will hold about 75lbs of wheat, rice or other grains. This means that you will need 11 buckets of grain for each person in your family.

If you store all your grains in #10 cans...


Wheat, Rice, Corn, etc..
You would need 64 cans or 10.5 cases per person.


Pasta
You would need 32 cans or 5.25 cases per person.


Rolled Oats
These are lighter but bulkier, so they require more storage containers and space. You would need 124 cans or 21 cases per person.

Beans
 

A 25lb bag of beans will about fit in a single 5 gallon bucket, with a little space over, so 2 buckets would hold a one person supply, or 12-13 #10 cans.


Reading this really made me think of how much I really had. I give you this information only to make you think of your storage, not to stress you out. Plan out your menus and add up the numbers so you know exactly what you will need.  It also puts into a visual perspective that living off a tiny loaf of bread, and a small amount of beans, everyday would lead to appetite fatigue rather quickly.  You need to store a variety of food beyond the basics in your storage. 


Try storing 100lbs of wheat at a time. On the right side of the blog there is a link for a food storage calculator so you can calculate how much food you will need for your storage. Try it to see, I was surprised by the numbers.


If you have wheat allergies there are many other options out there to store. Honeyville Grain has alternate flours, as well as Whole Foods and Winco, they have bulk areas that allow you to purchase any amount of flour that you need, such as spelt, rice, oat, barley
, etc.


You may want to think about how you will grind your wheat. If you don't have a grinder you may want to do a google search for one that will work for you. I own a Nutrimill grinder and I love it.  A manual grinder will be a must without electricity.


Enjoy the journey!
Enjoy the blessings!
Feel the peace!


Tuesday, June 1, 2010

June Goals & Storing Medications

Print Friendly and PDFPrint Friendly


June Goals
This month we are collecting WHEAT for our storage. You will need 100lbs of wheat per person for a year supply and that is the bare minimum. That may seem like a lot and it is :) so remember to only purchase the amounts that your budget allows. Wheat from the cannery costs $5.80 for 25lbs. That is a really easy way to stock up. Store the wheat in buckets to keep the bugs out.

If you have wheat allergies there are many other options out there to store. Whole Foods and Winco both have bulk areas that allow you to purchase any amount of flour that you need, such as spelt, rice, oat, barley
, etc.

Also, yo
u may want to think about how you will grind your wheat. If you don't have a grinder you may want to do a google search for one that will work for you. I own a Nutrimill grinder and I love it.

This month we are also stocking up on MULTI-VITAMINS AND ME
DICINE. Right now at Walgreens they have Nature's Bounty vitamins on sale for buy one get one free. Most of the vitamins I have purchased have a 3 year expiration date. 

Prescription medicines will have to be brought up with your doctor. Sometimes you are able to purchase a couple months worth, and other times not. Check to see if your medications allow you to do this.

Over-the-counter medicine is a little easier to stock up on. Walmart has a store brand that is very affordable and has the same ingredients as the name brands. I buy a children's ibuprofen and acetaminophen every time I go to there. I also make sure to have adult strength on hand. They are easier to buy in 500 count than children's liquid medicine.

Enjoy the journey!
Enjoy the blessings!
Feel the peace!

Saturday, May 29, 2010

What I Am Buying

Print Friendly and PDFPrint Friendly


I had a friend this week ask me where I buy some of my food storage. I realized that I haven't done a post of what I buy and where I buy it from. Most items can be purchased at the grocery store, but to get the best price when you are buying in bulk there are better deals out there. I will go through the items that I use for my family so this is not a comprehensive list by all means. It just helps to know what my bottom line price is and what I will and won't pay for certain items. Buying items at their cheapest price point allows you to save a LOT of $$$.

If you would like to read a wonderful price comparison list click HERE .
The list was put together in April during the case lot sales, and compares the case lot prices to Walmart, Costco, Sam's Club, & the LDS Cannery by preparedldsfamily.com. I actually printed it out and keep it in my purse so I am prepared at the store if I find an item on clearance and I know whether or not it is a stock up price. FYI: case lot sales are in April and September for Smiths and Macey's grocery stores.

Here's What I Am Buying: Prices are from May 2011 (add about 10% for 2013 prices)


Frozen Items
  • I buy frozen veggies at the grocery store and I wait until they are .88 or less for 16oz.
  • I buy Kroger frozen chicken in bags and I wait for it to go on sale for $6.96 or less.
Meat- I have to add a disclaimer here. I don't eat meat and my family really only eats chicken. I buy ground beef TVP, aka "fake" meat at Honeyville grain in 25lb bags.
  • Tuna- .50 or less at the grocery store during case lot sales. Fresh Market & Macey's is where I purchase it.
  • Canned chicken is the best price at Costco. You get 6 12.5oz cans for $9.99 (bottle your own chicken and buy chicken in bulk on sale to save the most money)
  • The best way to get meat for cheap is to wait for a sale and buy enough for 3 months and freeze it well.
Beans
  • Canned beans are cheapest at Smiths during the case lot sales. .50 a can
  • Dry beans are cheapest at the cannery. Black beans 25lbs $14.50, white navy beans 25lb bag $14.10, pinto beans #10 can $4.65
  • Pinto beans are cheapest at Costco 25lb bag $13.99
Pasta
  • I always get pasta during the case lot sales 8 48oz bags for $14.55
  • I also found great sales at Smiths this year and got 1lb bags for .29-.49 and with coupons I got 25 boxes of spaghetti for free (it is really worth it to coupon)
  • Mac'n Cheese is also cheapest at the case lot sales. WF mac'n cheese. 24 boxes for $6.00 at Macey's, If you have to have the Kraft brand it is cheapest at Walmart.
Soups
  • Ramen noodles I buy at the Smiths case lot sale. 12ct for $3.00
  • Kroger broth at the case lot sale. 24ct for $11.99.
  • Chicken Noodle soup, WF at Maceys 24ct for $11.28
  • Kroger Tomato soup at Smiths case lot sale 24ct for $10.68
  • Creamed soups I bought at Macey's. 24ct for $11.76
  • Progresso soups I buy in the winter during sales at Smiths and Walgreens
Vegetables
  • Canned tomatoes from Smiths case lot sale. 24ct for $11.99
  • Kroger tomato sauce 8oz cans from case lot sale. 24ct for $5.99
  • Kroger tomato paste from case lot sale. 24ct for $7.99
  • Hunt's pasta sauce from case lot sales and other sales during the year. I don't pay more than .75 a can.
  • Canned veggies from Macey's case lot sale. 24ct for $10.56
  • Dehydrated carrots from LDS cannery. #10 can for $7.10
  • Canned mushrooms from Winco .45 ea and Walmart for .46
  • WF diced green chilies from Macey's case lot sale. 24 for $12.00 (these go on sale all year for .50, don't pay more than that)
  • Dehydrated onions from LDS cannery. #10 can $6.00 (I rarely buy real onions, I use these in all my cooking)
  • Potato flakes from LDS cannery. #10 can $2.85 (shelf life of 30+ years)
Fruits
  • Raisins are cheapest at Macey's during the case lot sale and at Sam's Club for 32oz for $3.49ea. Costco's bag is only one penny more at $3.50 for 32oz.
  • Dehydrated apple slices from LDS cannery. #10 can for $4.90
  • Applesauce from Costco in #10 cans are $3.xx. I can't remember the actually price, but it is natural applesauce with no sugar and it is great for substituting for oil in baking.
  • Kroger mandarin oranges from case lot sale. 24ct for $7.99
  • WF canned pineapple is cheapest during the Macey's case lot sale, but I have found Dole pineapple for under .70 with coupons during the year.
  • I buy canned pears from the case lot sales and it is always a little different between Smiths and Macey's, but I don't pay more than .68 a can.
Sugars
  • Sugar is cheapest during Nov. and Dec. I stock up when there are sales. I don't like to spend more than $12 on a 25lb bag.
  • Powdered sugar and brown sugar are cheapest during the holiday's as well. Don't pay more than a $1.00 for a 2lb bag.
  • Honey can be found at Costco all the time for 6lbs for $11.99. Macey's also has really great prices during the case lot sales. 6 5lb containers for $59.88
Grains
  • I buy rice from Costco in 50lb bags for around $15.00. The price goes up and down all the time. You just have to watch it. Sams Club has 50lbs for about the same price. The cannery has 25lb boxes for $8.45 and are really easy to store.
  • Oats I buy at the cannery. 25lbs for $7.60. Winco also has oats in their bulk area for .58lb!
  • Flour is cheapest during the holiday's but there are also great sales during the year. I like to wait until I can get 5lb for $1.50 with coupons.
  • Hard White Wheat is a great deal at Macey's case lot sale. 45lb bucket with lid sealed for $11.99. LDS cannery 25lb bag for $5.80.
Milk/Dairy
  • Powdered milk from the cannery. #10 cans for $7.05. I bake with it a lot and make yogurt from it. Mozzarella cheese and cottage cheese can also be made from powdered milk. You will need it whether you like to drink it or not. It also has a shelf life of 25-30 years.
  • Morning Moos dried milk alternative. I bought a 50lb bucket a Costco last year for around $60.00, now the best price is a 37lb bucket at Costco for $39.97. #10 cans for $10.99 can be found at Macey's during the case lot sale.
  • Evaporated milk at Smiths case lot sale. 24ct for $15.60
  • Cheese- don't pay more than $1.50 for a pound of cheese. It goes on sale ALL the time and is good for a LONG time. Look at the expiration dates on it when you buy it. Tillamook goes on sale at Winco for $3.98 for 2lbs all the time, and it lasts for months.
  • Dried eggs-I cook with these now instead of real eggs. I only use real eggs for boiled eggs. Canned eggs are best at the Macey's case lot sale, #10 can for $14.00. I found some at Honeville Grain for $12.00 last month, so keep a look out for sales. Don't pay more than .99 for a dozen of eggs. Costco has great deals and so do the grocery stores.
Baking Items
  • Salt is cheapest at Walmart. 26oz for .38
  • Yeast- I use instant yeast and wait until it is $2.99lb. Emergency Essentials had it in May on sale. I stocked up. Yeast keeps indefinitely in the freezer. Costco and Sam's Club have great prices on yeast.
  • Lemon juice, vanilla I get at Maceys during the case lot sales.
  • Cake mixes and brownie mixes from case lot sales at Macey's and also during the holidays. .78 is an awesome price for mixes. With coupons I have gotten them for .50 and less.
  • Baking cocoa is the best at Costco. 23oz for $5.59. It also has an indefinite shelf life.
  • Spices are cheapest at Winco in their bulk area. You can fill a whole spice container for mere pennies. I filled my chive container for .11, it really is an awesome store!!
Oils and Fats
  • Kroger oil was $2.00 for 48oz at the last case lot sale, but they had a sale in April and I got them for $1.48 so watch. (This is why it is great to have the price list printed out and with you)
  • Cooking spray-Pam goes on sale, but Walmart has it all the time for $1.58 for 8oz.
  • Peanut butter is cheapest at Smiths during the case lot sales. 18oz for $1.00 and it is the Kroger brand or Skippy.
  • Olives are cheapest during Thanksgiving time for .88. Case lots and random sales during the year also have that price. I found some at Reams today (5/29) for .88.
  • Ketchup is cheapest during Memorial day and Fourth of July sales. Try not to spend more than .80 for 24oz. Case lot sales have them as well.
  • Mustard is cheapest during summer holiday's as well. Under $1.00 for 32oz is a great price.
  • Salad dressing goes on sale all the time. It doesn't have a long shelf life so watch the dates if you are stocking up. With coupons you can get it free a lot of the times too.
Water
  • 24 packs of water for $2.50 or less is a great deal. It goes on sale all year long, just watch for the price.Costco has a 35ct of water for $3.45 if you don't want to wait for a sale.
Misc.
  • 5 gallon buckets with lids- $3.99 at Macey's during the case lot sales
  • 5 gallon Gamma lids (these are amazing) Don't pay more than $5.99 for these. Macey's and Honeyville have these on sale during the case lot seasons.
  • 55 water drum- don't pay more than $39.99 for these. During conference these go on sale at Emergency Essentials and Macey's has them at the case lot sales.
  • Paper towel and toilet paper I buy at Macey's during the case lot sales. It was $3.98 for 12 double rolls of TP and 8 big rolls of paper towel. I buy enough for 6 months which is the time until the next case lot sale.
  • Laundry det. goes on sale all the time. I wait for sales with coupons so your best bet would be to watch for sales and learn what the bottom line price is for the brand you use.
  • Dishwasher detergent I also get for free with coupons but watch for sales for what brand you like to use.
Ideas to get the best price:
  1. You can't be brand specific, a lot of store brands are made in the same facilities as name brand.
  2. Know what you use. Buying 50 cans of stew because it is cheap and finding out no one likes it, saves you no money.
  3. Know what price you are willing to wait for and pay for.
  4. Be patient and know that food goes on sale about every 3 months. You will catch the good deal the next time around.
  5. Watch the blog on Wednesday's for the weekly grocery sales. Knowing what is a good price will help in saving you a lot of money.

MAY GOALS

  1. PURCHASE VEGETABLES THAT FIT INTO YOUR 3-MONTH MENU. THINK OF CANNED, DEHYDRATED, FREEZE DRIED, AND FRESH. (185lbs per family is a year supply)
  2. PLASTIC BAGS OF ALL SIZES, ALUMINUM FOIL, AND PLASTIC WRAP.
Enjoy the journey!
Enjoy the blessings!
Feel the peace!

Saturday, October 17, 2009

"The Staff of Life"~Week 5

Print Friendly and PDFPrint Friendly


"The time will come that gold will hold no comparison in value to a bushel of wheat."


-Brigham Young


Wheat-so much can be said about this amazing grain. A large part of your food storage will be made of grains and 100lbs of that is wheat. Wheat comes in hard and soft, red and white. I love hard white wheat for its mild flavor and for ease in making bread. It is up to you and your family's taste to what wheat you prefer.


Wheat that is stored properly will last 30+ years. Storing properly means in a #10 can away from light, heat and moisture. Food grade poly buckets also work. I have mine sealed with gamma lids that screw off and on. If you haven't stored wheat and have decided to take the October challenge and purchase 50lbs of wheat, just remember that a wheat grinder is a must. If your budget doesn't allow a grinder right now, don't worry, there are so many ways to use wheat.


Defining Wheat (from iprepared.blogspot.com)

  1. Berries: Wheat is boiled to resemble rice. It is also the name of the uncooked kernel.
  2. Bulgar: Wheat has been parboiled, dried, debranned and ground to make it cook fast.
  3. Cracked: Wheat that is milled at a very coarse setting or is just "cracked". This is good for use in hot cereals.
  4. Flakes: Wheat that is rolled.
  5. Gluten: The protein found in wheat. You can buy/make gluten.
  6. Ground: Wheat is processed in a grinder to make flour.
  7. Sprouts: When wheat is planted and watered as seeds.
So you see that there are ways to be using your wheat without a grinder. One way is to roast the kernels.

Roasted Wheat Kernels
1/4 C. wheat berries (whole kernel)
1/ T. oil
1/3 T salt
Heat oil in a skillet and add wheat. Pop like popcorn. Swirl around so they don't burn-sprinkle with salt while they are still hot. They don't get puffed up like popcorn but do become a little puffy wheat kernels.
Remember to introduce wheat slowly to your family's diet. Your tummies will thank you for it. Also 1 in 100 people are allergic to gluten so don't put off trying your wheat until there is an emergency because if your family is allergic an emergency is not the time to find out!

Sprouting is also a wonderful way to use your wheat. Read the post HERE that goes through sprouting wheat. (Wheat turns into a vegetable when sprouted?!)

Self-Reliant Challenge:
  1. 50lbs of wheat in October.
  2. Purchase extra items on your 3-month menu plan list.
  3. Adding sunscreen, scriptures, extra set of keys to your 72-hour kit.
  4. Keep gathering water until you have at least 14 gallons per person.
Sources for purchasing Grains in the Salt Lake Area:
Dry Pack Cannery- 730 W. 800 S. 801-240-7370
Emergency Essentials-3300 S. 110 W. 801-994-1055
Macey's Food and Drug -7850 S. 1300 E.
Honeyville Grain- 635 N. Billy Mitchell Rd. 801-972-2168
Lehi Mills- 1-800-660-4346
Bosch Kitchen Center- 6265 S. Highland Dr. 801-272-4932
Related Posts Plugin for WordPress, Blogger...