Showing posts with label fruits and veggies. Show all posts

Wednesday, June 8, 2016

Sun Oven Fruit Cobbler

Print Friendly and PDFPrint Friendly
The kids are out of school and the craziness that has been my life over the last 9 months has slowed to a less-crazy life.  Time is on my side for a moment and I thought I would bake a little something in my Global Sun Oven. (click here to read more on the Global Sun Oven) It has been over 90 degrees where I live and that always makes me want to cook with my sun oven.  The sun oven doesn't need the summer heat to work, just the sun, but the heat makes me want to cook outside and not inside my house. (click here to see how the Sun Oven saved my Christmas dinner)


Apple cobbler sounded like a yummy treat, but this recipe is very versatile and other fruit will work as well.  Because I have to change every recipe into a food storage recipe I started off with dehydrated apples from the LDS Cannery, and boiled them in some water to speed up the rehydrating process.  

 I boiled 2 cups of dehydrated apples, 4 cups of water, a dash of lemon juice and 1/3 cup of sugar for about 5 minutes.  It was as easy as that and after draining them I poured them into a greased dark metal pan.  The dark cookware is a good option for sun oven cooking.  It keeps the heat inside the food, where as shiny metal, or glass pans, will reflect the heat outside of the oven.  

To save cleaning another bowl I melted the butter in the same pan that the apples cooked in.  The flour and brown sugar were added to the butter and honestly it was hard not to eat it straight from the pan!! 

Once the crumb topping was mixed well I sprinkled it over the apples and it was ready for the oven. 

The sun oven was preheated for about 20 minutes while I put the cobbler together and when I put the cobbler in, it had reached 375 degrees.  Cover the dish and bake for 2 or more hours. If you aren't familiar with the sun oven you will have to make sure the oven gets turned towards the sun as the day goes on.  A good way to make sure the position is correct is to check the shadows on either side of the oven.  If they are even on both sides of the oven, the oven is correctly facing the sun. I actually forgot about the cobbler cooking and it was in the oven for a little over 3 hours, but what is so great about the sun oven is that most dishes won't burn.  Food stays warm and ready to eat when you are ready!

This cobbler was delicious!!  Kind of warm on a hot day, but I loved that it was made from dehydrated apples.  I'm adding it to my food storage recipe binder. 

Fruit Cobbler
2 C fresh fruit (apples and berries work best) OR
2 C dehydrated apples
1/3 C sugar
1/2 t lemon juice
1/2 C butter
1 C flour
1 C brown sugar
cinnamon
If using dehydrated apples:  place apples plus 4 cups of water in a saucepan and bring to a boil.  Simmer for 5-10 minutes or until soft.  Remove from heat and drain.  Stir in the sugar and lemon juice.  Pour into greased baking dish. 

If using fresh fruit: mix the fruit with the sugar and lemon juice and pour into greased baking dish.

In a saucepan pan melt the butter over low heat.  Remove from heat and stir in flour and brown sugar.  Stir until well mixed.  Sprinkle over the apples in the baking dish.  Sprinkle cinnamon over the crumb topping. Cover the dish and bake in a preheated sun oven for about 2 hours. To cook in a conventional oven bake at 350 for 25-30 minutes.
 

Saturday, April 9, 2016

Storing Complete Meals

Print Friendly and PDFPrint Friendly
Here's a question:  Do you have cans of food in your storage that you don't use? Do you have a case of pasta sauce, but no pasta to go with it?  

The answers to these questions will matter one day when you are hungry for a spaghetti dinner but you only have pasta sauce. If you buy a case of spaghetti sauce you will need to store pasta and maybe grated Parmesan cheese and a vegetable, or fruit, to round out the meal.  Every time you purchase a food item, make sure you are storing all the other items that round out that meal. 


I don't like to have food in my pantry that will only partly make dinner.  I like to have all the ingredients on hand to make a complete meal.  I have found a system that works to have complete meals in my storage. I started out by writing down all the dinners that my family enjoys, then I listed every ingredient needed to make those meals. Now I have created a shopping list, and I know exactly what to buy, and have on hand in my pantry at all times. The list is what works in my food storage plan....I always know what ingredients I need to have in my storage.  This also works for building my 3-month supply of food. I have 5 weeks worth of dinners planned, and if I multiply each item by 3 I then have enough for 3 months worth of meals.  It keeps my meal plan organized in a way that I'll have all the ingredients on hand to make many different meals, without having to go to the store for last minute items. (click here to see my recipe binder)

My ingredient list that becomes my shopping list.

Example:
  1. I have 5 weeks worth of different dinners planned out with side dishes.
  2. I wrote every ingredient on a piece of paper to make each meal, including the side dishes.
  3. The ingredient list now becomes my shopping list.
  4. Multiplied by 3 (to equal 3 months worth) and I now have enough food to make a meal every night for 3 months!
  5. I know how many cans of chicken broth I need to make those meals and also how many cases to buy at the case lot sales.  
  6. COMPLETE MEALS!  I am now storing all the ingredients to make complete meals. Including the side dishes, which include muffins, quick breads, veggies, and fruits.  

It doesn't matter how many meals you have planned out.  I just happened to have 5 weeks worth of recipes that we really like to eat.  Start with one week's worth of meals it that is easier for you.  Multiply your 7 meals by 13 to have 3 months of food storage. There are roughly 13 weeks in 3 months, so if your plan only has 7 different meals in it you'll multiply by 13. Then begin shopping for those ingredients. 

 What If I Want To Eat Fresh Produce....

While we all love to have fresh produce as our first choice when cooking, you'll need to think of a back-up if those fresh items become unavailable.  For longer-term storage of fresh produce, think of dehydrated, freeze-dried, or canned items to fill in for fresh ingredients.  Give freeze-dried foods a taste.  There aren't many that I wouldn't eat.  Fresh dairy is also an area that we don't want to be without.  Freeze-dried cheese, powdered butter, canned butter, and powdered milk are also an important item to have in your storage. 

Back to complete meals....

Once you have your ingredients in your storage you can make many meals with them.  But even with careful planning like my example above there may be times that you''ll have to know how to cook something you would normally buy at the store.

Let's take a look at a breakfast example: 


If you make pancakes, french toast, or waffles, do you have the ingredients to make syrup?  Or have freeze-dried or bottled fruit as a topping?  Do you know how to make the bread to have the french toast?  Do you have all the ingredients to make bread?  

Meals need to be broken down this way. Yes, you may have bread in the freezer as part of your 3-month storage, but if you were in a situation where the grocery store wasn't an option anymore, you'll need to know how to make bread.  Think of all the items that you buy at the grocery store.  Do you know how to make a homemade version of them?  Go through your menu plan and see if there are items that you buy that could also be made at home. Even if you plan on buying them as your 3-month supply, there may be a time when that isn't an option anymore. Here are a few of the things that I know how to make at home instead of buying at the store.
Of course there are many things that you can be bottled.  Grow a garden and save more money by making your own spaghetti sauce, canned fruit, applesauce, salsa, pickles, etc.  Think of how self-reliant you could be! No more running to the store for something for dinner. It's my goal to be that way someday.  As you're shopping, and adding to your storage, always think of what you are purchasing and how you're going to eat it.  It does no good to have 50 cans of tuna, but no mayo, pickle relish, and a bread recipe with all the ingredients on hand to make it. Plain tuna from the can would get old really fast, I promise :)

Saturday, June 13, 2015

Self-Reliant Saturday-- Regrow Your Produce

Print Friendly and PDFPrint Friendly
This is a quick tip I learned several years ago.  There are several kinds of produce that can be regrown in your kitchen and garden.  They include green onions, celery, lettuces, and those funny roots that grow on your potatoes.  I have regrown green onions many times.  Click HERE to see how I have grown green onions in my kitchen.  It is beyond simple to regrow other foods as well and this week I decided to try celery and romaine lettuce.  

Simply cut off the bottoms of your celery and romaine and place them in a shallow bowl of water.  Literally in a day the romaine will start to regrow.  The celery is on the left in the picture and it takes a little while longer to sprout again.  I can now plant them in the garden and hopefully they will grow into a full size plant!  I can't wait!! Simple, fresh food storage!!

Thursday, June 4, 2015

Sun Oven Cooking-- Corn on the Cob

Print Friendly and PDFPrint Friendly
This a re-post from May 2012.  I saw this post on the blog the other day I thought I would share again with those readers who may have missed it. I can't wait to cook summer corn in my Sun Oven.  

Cooking for a crowd can get tricky when you want everything to be cooked and ready at the same time.  Mother's Day dinner was at my house with 17 people.  I didn't want the stove and oven going while everyone was in the kitchen so we decided to grill hamburgers.  That got the main dish outside but we still had all the side dishes to cook.  I used the oven for the sweet potato fries but I didn't want to lug my big pot upstairs from the storage room and use the stove to cook the corn on the cob.  Then I remembered a post I saw on the Global Sun Oven site about cooking corn on the cob in the Global Sun Oven.  I tossed 8 rather large ears of corn, still in their husks, into the sun oven and closed the door.  That was literally the easiest thing I have "cooked" in a long time.  


They cooked for about 1 1/2 hours, and they could have gone for about another 1/2 hour or so to be really done, but I forgot about cooking the corn until right before dinner.  (seriously if my head wasn't attached...) We were ready to eat but I knew the corn was close to being done because the glass had condensation on the inside of it.  That usually means your dish is close to being finished, if not all the way done.  The temperature hovered just above 250 degrees the whole time.  The corn was crisp tender and so sweet when we ate it!  I am really surprised every time I cook something in the Sun Oven and it comes out tasting so good.  I should know by now that it will work but it just makes me happy every time it does!

Saturday, May 9, 2015

Self-Reliant Saturday-- Gardening

Print Friendly and PDFPrint Friendly
"Let every man who has a garden spot, garden it;  every man who owns a farm, farm it."  -J. Reuben Clark April Conference 1937


"We encourage you to grow all the food that you feasibly can on your property.  Berry bushes, grapevines, fruit trees- plant them if your climate is right for their growth.  Grow vegetables and eat them from your own yard." - Spencer W. Kimball Ensign May 1976

Gardening is definitely out of my comfort zone and I don't really know what I am doing, but my sweet husband built my boxes for me last weekend.  The dirt is coming this week and we will be ready to plant after the recommended Mother's Day planting date.  I live at almost 6000ft and we have a very short growing season, but the colder plants like spinach and beans love it up here.  Wish me luck!  How are your gardens coming along?  Do you plant in garden boxes or containers?  I would love to hear what you all plant.

Saturday, August 2, 2014

My Food Storage Week In Review: Dehydrating

Print Friendly and PDFPrint Friendly
The end of summer.  It's always exciting and sad at the same time.  The late nights are coming to a close and early morning school days will begin.  The end of summer also means gardens are producing and we are able to enjoy fresh fruits and veggies.  And hopefully your garden has a surplus that must be canned, dehydrated, or frozen.  My sister has a great garden and was kind enough to share some of her apricots with me.  We ate a few and then I decided to make fruit leather with the rest.

It was really simple.  My son pulled apart the apricots, they were tiny, took out the pit, and we blended it all up in the blender.  I thought I might need to add water, but the pulp was juicy enough to easily pour.  

We poured five trays of apricot fruit leather and stacked them up on the dehydrator.

While the dehydrator was out and running, a tray of grapes were added.  I had a few bags of grapes that were close to expiration and my six year old offered to dehydrate them for me.  I didn't want to pull them all off the stems and poke holes in each one. This is where the eager six year old comes in handy.

She pulled them off the stems, poked a hole in each grape, to allow moisture to escape easier, and placed them on the dehydrator.
 
And a quick 3 days later she had.....
...Raisins!  They were perfect!  And she was so happy with herself.  Self-reliant kids....love it!

The last item to go in the dehydrator was an older package of mushrooms.  I wasn't sure that I should dehydrate them because of their age, but I tried them anyway.  They dried fine, actually really well, but they smelled horrible after.  I threw them away, just in case there was something wrong with them.  I couldn't handle the smell from the jar after they were dried so I definitely didn't want to eat them.  Now I know why the professionals always say to use the best fruits and veggies to dehydrate.  


Here are the mushrooms and fruit leather after drying.

The mushrooms were fail #1 and the fruit leather, although dried really well, was kind of fail #2. They were so tart, I should've added a little bit of honey to the mixture before drying.  I'm going to pulse it into a powder and add it to smoothies and yogurt. 

There were several dehydrating lessons that I learned this time around.  I'll use fresher ingredients next time and I also need to remember that I have a dehydrator and use it more often.  I could be saving a lot more produce, and money, by dehydrating the surplus instead of sending it to it's death in the bottom drawer of the fridge. 

What preps are you working on??

Wednesday, March 19, 2014

Bread Crumbs, Green Onions, and Parmesan Cheese Lids

Print Friendly and PDFPrint Friendly
I'm still here....still prepping.....but life is crazy and I haven't had the time to blog in a long time! 

This will be a quick post of something that I found on pinterest (because who comes up with any idea on their own anymore) and have been using, and I wanted to share it with all of you.

I'm sure all of you recognize this green lid.  It's from a Parmesan cheese container.  BUT it also fits onto the regular mouth mason jars.  I have been keeping these lids "just in case" I might need them, and guess what???  I found a couple of great uses for them.  On a side note....the lids from the name brand cheese containers, like Kraft, fit a little better then the generic brand containers that I also had.  

A little blurry when taken out of the freezer :)
 
I didn't know what I would use these shaker top lids for, but the other day I was shaking my frozen bread crumbs out of a baggie and a light bulb went off in my head!  If I transferred my bread crumbs to a mason jar and added the shaker-type lid, I could just pour out the amount of bread crumbs without messing with a plastic bag!  I was kind of excited! (doesn't take much)

Then, also in my freezer, I noticed my cut green onions that I had been storing in a plastic water bottle.  That was also something I found on pinterest, but trying to get cut green onions into a small water bottle was WAY more trouble then it was worth.  But again, the mason jar and shaker lid were perfect!!  I snipped my green onions into the mason jar, tightened the lid, and store it in my freezer for use in many recipes.  

I have loved the convenience of both these ideas!  It also helps keep my freezer more organized because I can see the jars much more easily then a bunch of plastic baggies all bunched together.  

And don't forget THIS TIP about re-growing your green onions.

After I snipped all my onions into their freezer jar, I put the roots into a jar on the window sill.  This is about 5 days worth of growth. The grow quickly and you can snip off what you need and they will continue to grow!!  Cool, huh?!?!?

I still encourage all of you to continue with your food storage, everyday,  even if it's something small like a Parmesan cheese lid :)

Wednesday, April 10, 2013

Dehydrate Those Leftovers!

Print Friendly and PDFPrint Friendly
One of the many things that I love about my new home is being able to have my larger kitchen appliances stored right in the kitchen area and not in the basement storage room.  I am more likely to use my dehydrator, canner, wheat grinder, etc. when they are accessible.  After preparing dinner tonight I had a half a bag of spinach leftover, so I pulled out my dehydrator, spread out those extra leaves and saved them for another meal.  It was such a chore before when I had to hike downstairs and carry up the dehydrator.  Now it is stored right in my kitchen for use anytime.  I know not everyone will have the kitchen space to store larger food storage appliances, but it has helped me to use them more often. 

When they are finished dehydrating I will have a small amount of dried spinach leaves that I will store in a mason jar and then make air tight with my foodsaver.  They will stay fresh in the mason jar for years.  (This is my estimation and how long I feel comfortable storing my items.  Check dehydrating books for a more accurate guideline.)  One of my favorite tips is to save the leftover veggies from a weeks worth of meals, dehydrate them, and store for use in soups.  There will be a variety of veggies depending on what you serve for dinner, but it saves money when they are being used again because no one really wants leftover veggies from the fridge.  I also keep my eye out for "manager specials" at my local grocery store.  Produce will be marked down that is closing in on its expiration date and that is when I snatch it up for dehydrating.  Many shoppers see that manager's special sticker and they shy away thinking it is rotting veggies, but it works perfectly for dehydrating.  Also, think twice before throwing away leftovers.  Soups, casseroles, even rice can be dehydrated for use in quick dinners, camping food, and 72-hour kit meals.  There are quite a few books out there and online if you are interested in dehydrating your food.  I love the Dehydrator Bible for dehydrating, it is filled with step by step information on every fruit and veggie that you can think of.  Dehydrating is quite a simple process and the results are very rewarding, so think of those leftovers in a new light and dehydrate them!

Saturday, February 16, 2013

Applesauce: A Food Storage Must Have

Print Friendly and PDFPrint Friendly
There are a few items in my food storage that I feel I must have at all times, such as wheat, dehydrated onions, pasta, rice, etc., but one of the most important items that I have in my storage is applesauce.  That may sound funny, but applesauce is so versatile and almost everyone likes it, and that's why it is a food storage must have item in my house.  

 My favorite place to buy applesauce is Costco.  Now, I have to let you all know that I am not a Costco shopper because I feel I can get better deals using coupons, case lot sales, and buying in bulk from Honeyville, but this is one item I feel is such a great price that I ask my sister to buy a few (or 15) when she goes shopping.  The applesauce comes in #10 cans and is unsweetened, which was the BIG selling point for me.  Now, you are probably wondering why I don't have a great photo of this #10 can of applesauce inserted into this paragraph.  I am writing this post because we just used up our very last can of applesause and I am stressing out that it is all gone!!!  I just moved and my storage has been a mess, so now that I am some what settled, I need to ask my sister to get me applesauce the next time she goes to Costco!!

These are the ways that I use applesauce in my house.
  • I use applesauce cup for cup as a substitute for oil in baking.
  • When I have sick kids I need applesauce for sick tummies.
  • Applesauce makes a great side dish at dinner.  We love to eat it with cottage cheese mixed in or with a dash of cinnamon.
  • My children love a small container of applesauce in their school lunches.
  • Use applesauce for baby food.
  • I add applesauce to muffins, smoothies, and quick breads (just a 1/4 C or less) to make the final product moist. If you freeze the applesauce in ice cube trays they can be tossed into smoothies quite easily.
  • I dehydrate applesauce to make apple fruit leather.
  • In an emergency situation applesauce is a great way to have fruit in your diet.
  • I also love to use dehydrated applesauce in my baking and I save the regular applesauce for eating.    
I am sure there are many other ways to use applesauce but as you can see it is a very versatile food.  I remember a comment that Sherida Raddigan from My Year Living On Food Storage  made about applesauce. Her family lived solely on their stored food and  she said she wished she had stored applesauce to break up the monotony of what they were eating.  They ate really well for 3 months and then their diet became really bland without a lot of fruits.  When I read that it really comfirmed to me that it was a smart idea to add more applesauce to my storage. 

Here are some yummy varieties of applesauce that you can bottle at home. 

Monday, July 23, 2012

Prepare Today Homemade- Solar Oven Broccoli

Print Friendly and PDFPrint Friendly
Cooking vegetables can be tricky, but in the solar oven they come out tasty and perfect!  I like to make broccoli in my global sun oven and it goes with so many dishes that we seem to eat it quite often.  If you cook the broccoli in the solar oven round pan, you can stack it with your main dish and cook both at the same time.  I made chicken in the bottom pot and broccoli in the top pot for a complete meal.  

Here is the broccoli ready to go in the sun oven.
Solar Oven Broccoli
1 lb broccoli
1/3 clove garlic
1/2 t salt and pepper
2 T butter or oil

Rinse the broccoli and shake off excess water.  Place in pan while still slightly wet.  Add garlic and stir.  Cook in the sun oven for about 40 minutes.  Add salt, pepper, and butter after cooking.  

 This shows the pots double stacked in the sun oven.  This allows you to cook a complete meal at one time. 

Sunday, July 15, 2012

Dehydrating Fruit

Print Friendly and PDFPrint Friendly
I was so inspired by the dehydrating class that I took at Honeyville that I brought out my dehydrator and filled it up with colorful fruit.  I found  a great grocery store (Rancho Market) that has unbelievable prices on fruits and veggies, and I bought a cart full just to dehydrate. 

When purchasing food to dehydrate you may want to calculate how much time, money, and effort that it will take to get a finished product.  Tomatoes and potatoes are two foods that I think are easier to purchase already dehydrated.  But there are many other foods that are simple to dehydrate.  And if you can get free fruit from your own yard or a friendly neighbor, even better!!

Today I dehydrated oranges, orange zest, limes, lime zest, kiwi, peaches, and Mexican papaya.

This is a Mexican papaya and it was so sweet and juicy.  My kids were so fascinated by the seeds in this fruit.  I can't wait to taste it when it is done!

 On this tray I have the papaya and kiwi fruit.  It is so colorful and pretty.  These fruits also look so pretty sealed in mason jars and lined up on a shelf.

One of the great tips that I learned at the Honeyville class was to dehydrate your orange, lemon, and lime peels.  Then you will always have zest when you need it.  I used my vegetable peeler and it peels off just the colored part of the fruit and not any of the bitter white parts. 

 I sliced limes and oranges on this tray and I can use them to make limeade or an orange drink later.  Just reconstitute them in a pitcher of cold water, add sugar if you want and stir.  We will also eat the oranges and maybe make some into a powder.  We'll see when they are done.  Dehydrated oranges (and pineapple) are so delicious!

 Lastly I cut up some peaches to dehydrate.  My house smells so good right now.  It finally cooled off here in Utah (around 80° instead of 105°) so I felt OK in turning on the dehydrator.  I could have done it outside, but I like to keep my eye on it and I know I would forget about it outside.  

I cut all my fruit about 1/4" thick (well as close as I could with slippery fruit) and they will probably take 6-12 hours to dry.  I will check them after about 4 hours and rotate any trays.  

Here are all my trays ready to go.  I warmed up the dehydrator as I was cutting my fruit. It took me about 35 minutes to have all the fruit cut up and in the dehydrator.  So it wasn't an all day kind of project, like canning, and I felt so productive when it was finished :)

**Just a note about some fruits turning brown while they dry.  Fruits like bananas will need to be sprayed with lemon juice (straight from the bottle, not diluted) before drying. This will keep them from turning black.  Don't worry if you don't do this, the food is still good, just not as appealing. 

Dehydrating is such a great way to have fruits in your long term storage.  If you use oxygen packs or a foodsaver the fruit will last much longer on your shelf.  Fresh produce will be the first food group to disappear in a disaster/emergency.  If you have your shelves lined with dehydrated fruit you will peace of mind. 

Monday, June 11, 2012

Prepare Today Homemade- Easy Spinach Lasagna

Print Friendly and PDFPrint Friendly
All the spinach from my garden was ready at the same time and my family will only eat so many spinach salads.  To help me decide what to make, I went directly to allrecipes.com and searched for a recipe to use up my spinach.  My favorite thing about allrecipes.com is the index search by ingredient.  I typed in spinach into the search engine and got hundreds of ideas.  Each recipe is also ranked and has reviews, so a great tasting meal is almost guaranteed.  

I decided on Easy Spinach Lasagna and it truly was the easiest dinner to put together.  There is no need to boil the noodles, just layer everything into the pan and cook!  That is my kind of dinner!!

Start off by mixing the ingredients in a bowl..
 The original recipe called for frozen spinach but I just tore up some of my fresh spinach and it worked great!  I also substituted cottage cheese for the ricotta cheese because that is what I had on hand.  (remember THIS trick)

Then I started layering the lasagna.
Start by pouring pasta sauce into the bottom of the pan, layer the lasagna noodles and then add the cottage cheese mixture.  I noticed there was a big space at the end of the pan, so I broke one of the noodles and placed it along the short side of the pan to fill up the void.
This was soooo much easier than cooking the noodles and then trying to lay them in the pan while burning my fingers on hot, slippery noodles.  
This is the trick to cooking the noodles, pour 1/4 C hot water around the edges of the pan.  This will give the dry pasta noodles enough liquid to cook.  Every noodle was cooked through and delicious!


Easy Spinach Lasagna
1 15-oz container ricotta cheese or cottage cheese
1 10-oz frozen spinach (thawed and well drained) I used about 1 C chopped fresh spinach (canned would probably work too)
2 C mozzarella (or freeze dried mozzarella)
1 jar pasta sauce
8 uncooked lasagna noodles
1/4 C water


Mix together the ricotta/cottage cheese, spinach, and 1 C cheese.  Spread 1 C pasta sauce into the bottom of a 13x9 pan.  Layer 3 noodles across and break another noodle to fit across the short end of the pan.  Layer about 1/2 of the spinach mixture on top of the noodles, then repeat layers.  Slowly pour the water around the edges of the pan. Cover and bake at 400° for 40 minutes.  Sprinkle the remaining cheese on top and bake uncovered for 10 minutes.  Let stand 10 minutes before serving.


Sorry for the bad photo.  I forgot the take a picture and my daughter was about to eat the last piece and I hurried and snapped this shot.


There are many different ways to add in more veggies and spices to this basic recipe.  I added a sprinkling of onion powder and Parmesan cheese, but you could add mushrooms, zucchini, carrots, meat, tvp meat, etc.  Or use all freeze dried and dehydrated ingredients.  It would be possible with freeze dried mozzarella cheese!  I may even double the cottage cheese mixture next time and make more layers, it was kind of a shallow lasagna, but your imagination and pantry items are your limits.  I also can't wait to try this recipe in my Sun Oven. 

Saturday, April 21, 2012

Sprouting

Print Friendly and PDFPrint Friendly
"Sprouts provide up to 600 percent more vitamins than the full grown plant."  Researchers at the University of Ulster, UK have found. 

Let's say you have been living solely on your food storage for 3 months now and your supplies are dwindling.  If summer has come and gone there isn't time to plant a garden, and your family is going to need vegetables.  I know pirates are quite popular but many of them died of scurvy and I personally don't want to have that in common with them.  With limited options in a survival scenario, your solution is SPROUTING.  When a tiny little seed/grain, with all of its necessary vitamins and nutrients for growing packed inside, is sprouted it becomes a powerful super food!!  


"Sprouts are cheap, easily accessible and an unpolluted source of vitamin C, some protein, traces elements, and B Group vitamins. They are also a true organic food, if they are grown on your very own windowsill, without chemicals."


Sprouting could literally be a life saver.  I grow sprouts because they are so nutritious and also because my children eat them and don't know they are eating veggies.  


I buy sprouting seeds from Honeyville Grain, but the container above I bought at the Self Reliance Expo last year.  


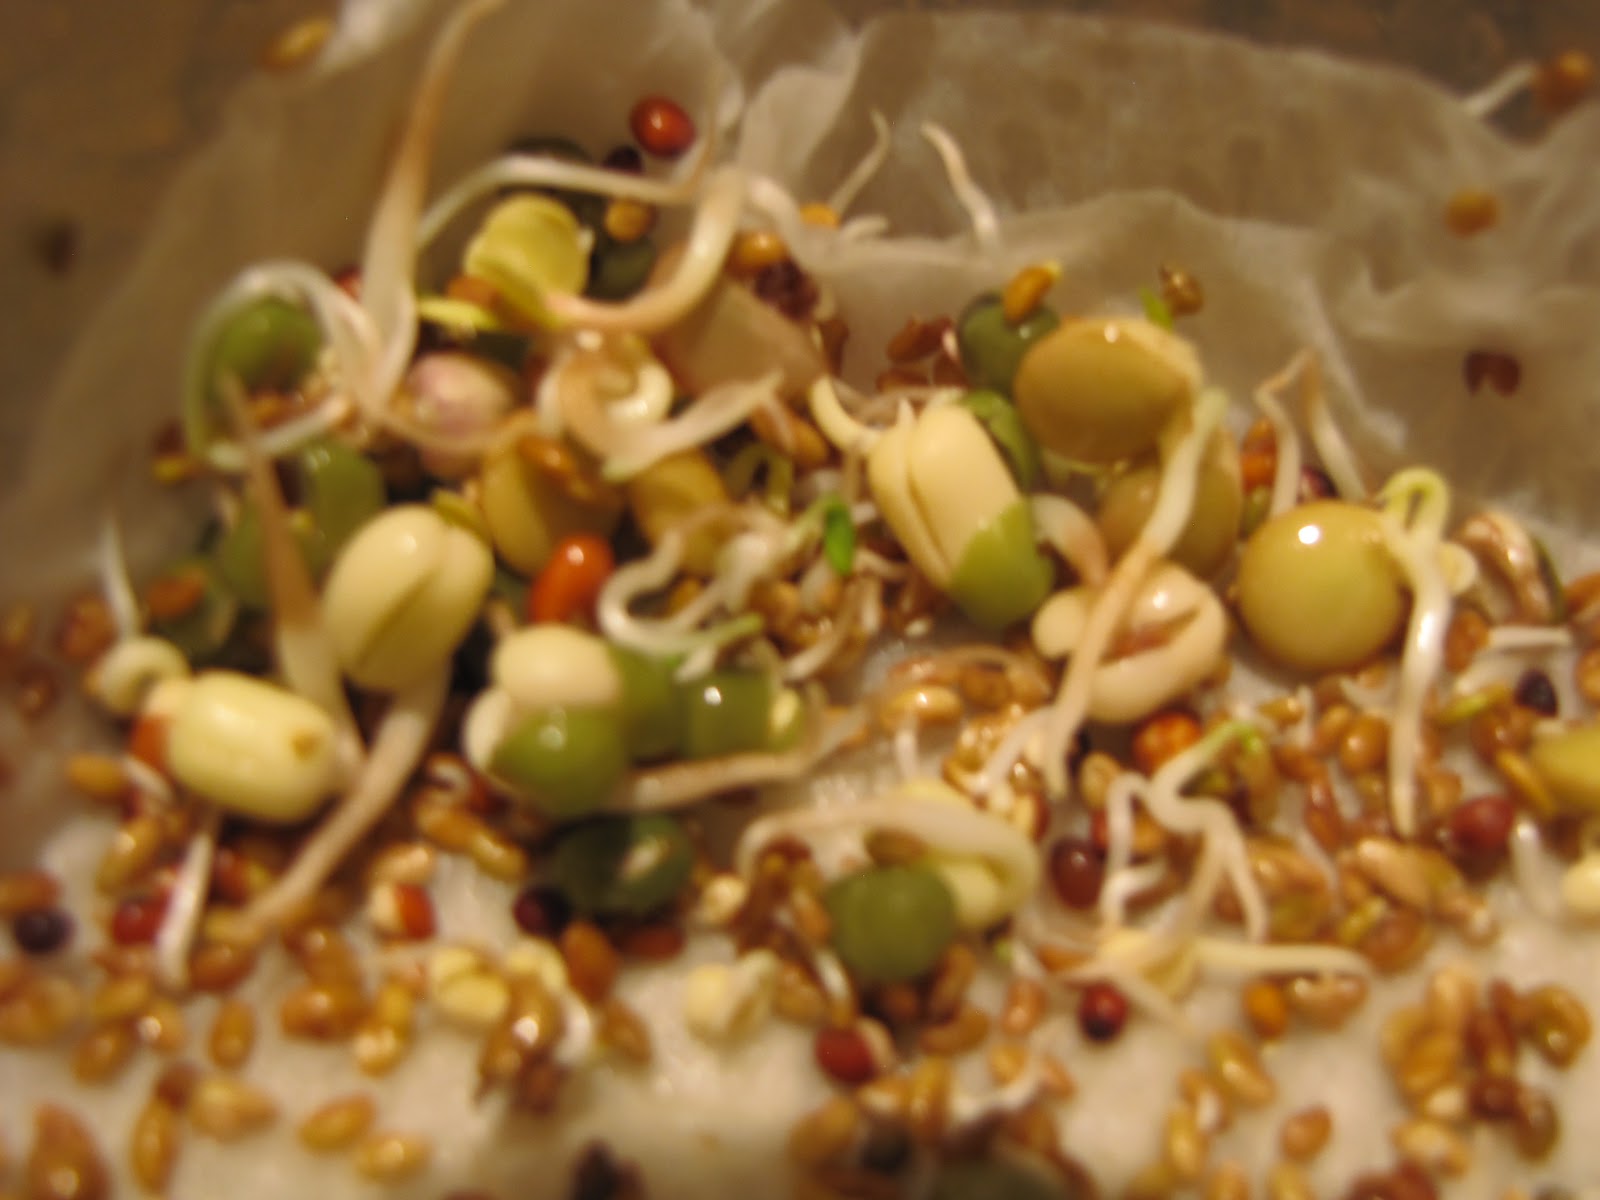
They also come in smaller bags.  You don't need to buy a special bag of sprouting seeds.  There are many seeds and grains that can be sprouted.  Wheat, garbanzo, alfalfa, mung beans, barley, lentils, whole peas, and many more are all able to be sprouted.  Experiment with different seeds and grains and find which ones you prefer.  I really like the salad mix (above) because it tastes like those yummy garden fresh peas.  They just taste fresh and healthy. 


These are the two contraptions that I use to sprout.  The mason jar on the left is quite easy to use and the least expensive (under $5 for the lid).  Put in a tablespoon of sprouts, soak over night (the seeds are soaking in the picture), and just rinse twice a day until sprouts form, about 3-5 days. It can also be done without the plastic straining lid.  I started sprouting with a canning jar, cheese cloth and the canning lid ring.  The other option is a sprouter.  I really love the Victorio Seed Sprouter, on the right, because it pretty much does all the work for you.  You pour the sprouts on each layer (about 1/2-1 T), add 2 C of water twice a day, and it soaks, drains, and grows the sprouts.  There is no need for soaking and rinsing and draining.  With 3 different levels you can stagger your growing or grow different kinds of seed in each one. Remember that sprouts don't like the sunlight.  You can put them in the sun once sprouted to turn them green but they need a warm dark spot to grow.  It really is just that simple!!


We eat our sprouts fresh out of the sprouters, but they need to go in the fridge once they are big enough to eat. (when the sprout is the length of the seed you can eat it).  They should stay good for about 1 week in the fridge.  Mine never last that long because they get eaten.  Sprouts are great for salads, sandwiches, soups, muffins, breads, dinner casseroles, etc, etc.  They can be added to anything.  


If you and your family needed quick nutrition in an emergency, having sprouting seeds is the answer.  Gardening has its place but it can take months.  Sprouting takes only days and allows you to grow your own food storage.  Storing sprouting seeds takes up little space and they last for many years, in the right conditions (dark, cool environment), and are relatively inexpensive.  I don't think I will ever have enough storage space to store the recommended amount of wheat for 7 people, but I can store a years worth of sprouting seeds.  Think of how many sprouts you'll get out of 1lb of wheat, a lot!!  One tablespoon of wheat will create one full layer sprouts in the Victorio Sprouter.  That's quite the bang for your buck!!  This is one area of preparedness that everyone can do and should do today.  The health benefits alone are why everyone should be sprouting.

Saturday, March 31, 2012

How Much Should You Grow??

Print Friendly and PDFPrint Friendly
Early spring garden is planted!!

Spring is here, the snow is behind us (fingers crossed) and that means it's time to get out in the dirt and plant a garden.  I am relatively new at the whole gardening thing, so I am not an expert, but I have had some success in my square foot garden.  (If you don't know what square foot gardening is click HERE for more info)  Gardening is just like everything else in the preparedness world, you need to try it before the emergency.  You need to have seeds properly stored and also know how to grow the seeds in your area. 

There are companies selling seeds that have been sealed in #10 cans, and that is a great option if you want a backup plan.  But you need to be purchasing non-hybrid seeds and using them.  You need non-hybrid, or heirloom, seeds or else you won't be able to extract the seeds for the next year's garden.  Storing your seeds in a Mylar bag in the freezer will extend the life of your seeds for years!!!!

Have you ever thought about how much food our ancestors of past had to grow to sustain their families?  They worked to live everyday.  If the day comes when we don't have grocery stores and farms we may need to grow the food our family eats.  No matter how much food storage you may have, it will eventually run out and you'll need to grow your food.  Supplementing my current food storage with fresh garden food is important for learning how to garden, saving money, and eating healthy food. Gardening is food storage and we have been counseled to grow a garden.  I found a great chart on the Amounts of Vegetables To Be Grown & Preserved to feed a family of 4 for 300 days.  (the other 65 days it is assumed you'll be eating fresh food out of the garden and not need a canned option)

The blog where I found this chart is no longer available and I found the information so valuable that I printed it out last year and I am so glad that I did because I wouldn't be able to do that now that it's gone.  

Amounts of Vegetables To Be Grown & Preserved
(For a Family Of 4 Persons)
The information is a starting point for garden planning with home preservation and cooking from scratch 3x's a day. Food preservation needs are individual and no one can determine your family's specific requirements except for you.  The estimates below are based on a 1/2 C serving 4x's a day for 300 days.  The other 65 days the family will eat fresh produce from the garden.  Canning, freezing, dehydration, salting, fermenting, and pickling are all ways to preserve your food.

Type of Veg.      Pounds to Raise      Quarts/Pints to Preserve
Beets                      30lbs                           12 q/24 p
Broccoli                 75lbs                           48 q/96 p
Cabbage                 150lbs                         40 q/80 p
Celery                    75lbs                            30 q/60 p (dehydrate too)
Carrots                   120lbs                          30 q/60 p
Cauliflower            30lbs                            10 q/20 p
Green Beans             175lbs                         85 q/170 p
Green Peas             100lbs                          25 q/50 p
Green Peppers        50lbs                           25 q/ 50p 
Lima Beans            90lbs                           24 q/48 p
Onions                    125lbs                         25 q/50 p
Potatoes                 500lbs                          400lbs dry storage
Pumpkin                40lbs                            16 q/32 p
Spinach                  90lbs                            35 q/70 p
Summer Squash     200lbs                         40 q/80 p
Sweet Corn            150lbs                          40 q/80 p
Tomatoes/whole     250lbs                         100 q/200 p
Winter Squash       200lbs                          40 q/80 p
{Katherine Grossman Granny Miller}

This information really opened my eyes to amount of food I would have to grow to sustain my family.  It is a great starting point but I really hope the time never comes where I will have to grow that much food.  I always romanticized the life of Little House On The Prairie and I wanted to live with Laura Ingalls on her farm, but actually living it would be a reality I don't think I really want to do.
 
I mentioned above that I use the square foot garden system and so far it has been relatively simple and the harvest last year was a great start for me.  
 You can find this book almost anywhere books are sold and it is my garden bible until I get my gardening legs and I know what I am doing. 

Saturday, February 18, 2012

Long-Term Produce Storage...Kind of...

Print Friendly and PDFPrint Friendly
A few weeks ago I posted about growing green onions on your windowsill and I am still doing this, and the onions are growing for the 3rd time since cutting.  I was seriously so excited when I found that it worked.  Well, this week I found a new tip that I wanted to share.  It is a way to preserve your celery and have it last at least 4 weeks.  

Photo of wrapped celery from 3monthspreparation.blogspot.com
If you wrap your celery in tin foil before placing it in the fridge it will last for weeks, and  it will still be fresh and crisp when you pull it out!!  This is where I learned this from.  Crystal Young, the blogger I learned this from, also stored broccoli for weeks wrapped in tin foil, and heads of lettuce too!!!

Crystal is a Christian mother of 10 and she decided to feed her family from her food storage for 3 months without going to the grocery store.  They didn't go to the store (except for more baby formula and her husband's deodorant) and she cooked all her meals and snacks from scratch.  She also blogged about her success' and failures at 3monthspreparation.blogspot.com.  I sat and read through her 90 day challenge for 2 hours last night.  I was inspired by her words and motivated by her skills!!  Crystal has such wisdom and faith and sees God's hand in all she does for her family.  I strive to have the faith of someone like her.  

There are so many ways to save money and to live frugally and I am still learning everyday.  I get so excited to learn a new trick and I hope you find them useful too!!

Update:  After 2 months of growing the same green onion bulbs they seemed to stop producing.  I started with new bulbs and they are shooting right up.  I'll keep track of how long the next batch lasts. 

Saturday, January 21, 2012

Frugal Food Tips

Print Friendly and PDFPrint Friendly
Part of food storage on a budget is to use all the food that you have in your pantry and fridge before it expires.  Sometimes with produce that is hard to do.  "On average, Americans throw out 25% of the food they bring home, worth an astonishing $2,200 per year!!" (All You Feb. 2012 pg. 18) Think of all the long-term food storage you could purchase with $2000.  

I have a subscription to All You magazine, it's great for clipping coupons, and they had a great article called "Stop Wasting Food". After reading it I knew it would go perfect with our food storage on a budget for 2012 and I had to share their ideas with you.  I love to serve and cook with fresh produce, but if I knew how to make it last longer it would save me a ton of money.  Here are a few tips from All You to help stretch your dollar when using fresh produce.


Broccoli Stems-- Make broccoli slaw.  Shred the stems and mix with coleslaw  dressing to change up your regular salad.

Citrus Peel-- Make a habit of zesting citrus before you juice.  To save zest, cover with water in an ice cube tray and freeze.  To use, add to beverages or defrost and drain.

Mushroom Stems-- Finely chop and use to stretch ground beef.


Parsley Stems-- Toss into a juicer, or add to simmering chicken broth.  (Strain both before using)


Wilted Carrots-- Refresh soft carrots in ice water for a few hours before eating.


About-to-Expire Eggs-- If they're just at their expiration date, hard-boil for a nutritious snack.  (eggs do last a couple of weeks beyond the expiration dates)


Softening Fruit-- Freeze bananas to use in baked goods.  If you have extra apples or pears, peel, core, and cook until soft.  Mix with jam and spread on toast for a breakfast treat.


Fennel Fronds-- Use fennel fronds as you would dill--on top of salads, in soup or to flavor coleslaw.


Limp Spinach or Arugula-- Blend past-their-prime greens with walnuts or pistachios, olive oil, and garlic for a nontraditional pesto.

Extending the Life of Lettuce-- I learned this from Lisa at Honeyville Grain.  Chop your Romaine lettuce and then seal it in a jar with your food saver.  You can have fresh salad for up to 14 days.  It has to be sealed with a vacuum sealer for this to work though.  Click HERE to see more info on sealing a salad in a jar.


And my favorite new tip is for green onions.....you can grow them inside on a window sill!!!  I have tried this and it works.  I may be the last person to know this but if I didn't know maybe someone else out there can use this tip too.

 Don't throw away your green onions after using the green parts.  Place the white part of the onion in water and place in a window.  I just added water when it would get low and didn't do anything else.  I don't have a green thumb so this was so exciting for me to learn.

This is a week and half of growth.  I would have grown more in the glass but I couldn't find the bag of green onions that were in my fridge.  (no one would admit to throwing it away)  I am excited to have green onions on hand all the time now. I used to dehydrate my green onions to have some on hand, but this is so much better.  Next time green onions are on sale I am buying a bunch and growing new ones all together in a glass!!

--One more tip for green onions is to use an empty water bottle, chop the green onions and store them in the water bottle in the freezer. Just use what you need and put back in the freezer.

There are so many ways to stretch your dollar and these are only a few ideas.  If you have any great ideas please leave a comment and I'll write another post about stretching the food dollar. 
Related Posts Plugin for WordPress, Blogger...