Showing posts with label cooking. Show all posts

Wednesday, June 8, 2016

Sun Oven Fruit Cobbler

Print Friendly and PDFPrint Friendly
The kids are out of school and the craziness that has been my life over the last 9 months has slowed to a less-crazy life.  Time is on my side for a moment and I thought I would bake a little something in my Global Sun Oven. (click here to read more on the Global Sun Oven) It has been over 90 degrees where I live and that always makes me want to cook with my sun oven.  The sun oven doesn't need the summer heat to work, just the sun, but the heat makes me want to cook outside and not inside my house. (click here to see how the Sun Oven saved my Christmas dinner)


Apple cobbler sounded like a yummy treat, but this recipe is very versatile and other fruit will work as well.  Because I have to change every recipe into a food storage recipe I started off with dehydrated apples from the LDS Cannery, and boiled them in some water to speed up the rehydrating process.  

 I boiled 2 cups of dehydrated apples, 4 cups of water, a dash of lemon juice and 1/3 cup of sugar for about 5 minutes.  It was as easy as that and after draining them I poured them into a greased dark metal pan.  The dark cookware is a good option for sun oven cooking.  It keeps the heat inside the food, where as shiny metal, or glass pans, will reflect the heat outside of the oven.  

To save cleaning another bowl I melted the butter in the same pan that the apples cooked in.  The flour and brown sugar were added to the butter and honestly it was hard not to eat it straight from the pan!! 

Once the crumb topping was mixed well I sprinkled it over the apples and it was ready for the oven. 

The sun oven was preheated for about 20 minutes while I put the cobbler together and when I put the cobbler in, it had reached 375 degrees.  Cover the dish and bake for 2 or more hours. If you aren't familiar with the sun oven you will have to make sure the oven gets turned towards the sun as the day goes on.  A good way to make sure the position is correct is to check the shadows on either side of the oven.  If they are even on both sides of the oven, the oven is correctly facing the sun. I actually forgot about the cobbler cooking and it was in the oven for a little over 3 hours, but what is so great about the sun oven is that most dishes won't burn.  Food stays warm and ready to eat when you are ready!

This cobbler was delicious!!  Kind of warm on a hot day, but I loved that it was made from dehydrated apples.  I'm adding it to my food storage recipe binder. 

Fruit Cobbler
2 C fresh fruit (apples and berries work best) OR
2 C dehydrated apples
1/3 C sugar
1/2 t lemon juice
1/2 C butter
1 C flour
1 C brown sugar
cinnamon
If using dehydrated apples:  place apples plus 4 cups of water in a saucepan and bring to a boil.  Simmer for 5-10 minutes or until soft.  Remove from heat and drain.  Stir in the sugar and lemon juice.  Pour into greased baking dish. 

If using fresh fruit: mix the fruit with the sugar and lemon juice and pour into greased baking dish.

In a saucepan pan melt the butter over low heat.  Remove from heat and stir in flour and brown sugar.  Stir until well mixed.  Sprinkle over the apples in the baking dish.  Sprinkle cinnamon over the crumb topping. Cover the dish and bake in a preheated sun oven for about 2 hours. To cook in a conventional oven bake at 350 for 25-30 minutes.
 

Friday, October 9, 2015

Prepare Today Homemade- Easiest Muffins EVER!

Print Friendly and PDFPrint Friendly
Self-Reliant Saturday Recipe

 We are a family that loves a good muffin.  We eat them for dinner about 3 times per week.  Muffins are pretty simple to make, but sometimes getting all the ingredients out on a busy night is just too much for me.  I do try to bake a double batch to freeze but I don't always remember to do that.  I think I have found my secret weapon to make muffins quick and SO easy!!  I thought cake mix cookies were easy to make, this recipe is even easier!

You may have heard of the 2 ingredient pumpkin cookies, which include a box of spice cake mix and a small can of pumpkin.  You mix and bake, so easy!  Well, I thought why couldn't that dough also be made into pumpkin muffins??  And guess what?  It worked and the whole family loved them!

  In the fall the grocery stores will generally have spice cake mix for a great price.  Last year I stocked up on them because we really like pumpkin cookies made out of it.  Having all the ingredients on hand added to the simplicity of this recipe. In the picture I used only half of that can of pumpkin because it is the bigger can.  The recipe only calls for a 15oz can of pumpkin. 

 Mix the cake mix, pumpkin, and a few chocolate chips and you have muffin batter!!!  And with no oil or eggs, these muffins are a low-fat option for dinner.  They do have sugar from the cake mix, but not nearly as much as when I make muffins from scratch.

Pumpkin Cake Mix Muffins {or Cookies}
1 box spice cake mix
1 15oz can pumpkin
1 C chocolate chips

Mix the cake mix and pumpkin together with a hand mixer, add the chocolate chips and divide into 12 muffin cups.  (I had extra batter and I made about 8 mini muffins too)  **Bake at 375° for 18-20 minutes.   They could also be baked in a sun oven or volcano stove in a situation without electricity.
**I live at an altitude that I need to follow the high altitude directions and my cake mix said to bake the cake mix at 375°.  If you are below 5000ft you might need to adjust the temperature to 350°.

To make cookies:  Mix as directed above and bake at 350 for 8-10 minutes.  Let cool for a few minutes on the cookie sheet, then remove to a cooling rack.

And if you need a dessert idea, we made these tonight and they were so good and again....only 2 ingredients!!!  Click here for Pumpkin Brownies!!

Tuesday, July 14, 2015

Prepare Today Homemade- Applesauce in the Saratoga Jacks

Print Friendly and PDFPrint Friendly
This is a yummy recipe re-post from 2012....it's easy and smells sooooo good....I hope you enjoy it!

Applesauce in the Saratoga Jacks Thermal Cooker is simply delicious!  I have made it several times and my kids love it!  I also made it for a class I taught at Honeyville Grain and they loved it too!

 Cutting up the apples is the hardest part of this super easy recipe.  The spices and sugar slow cook with the apples and it smells like Christmas.  My kids kept thinking I was baking something for them and it was the applesauce.

 Just like all the other Saratoga Jacks recipes I boiled the apples for 2 minutes and also had the smaller pan boiling.  The apples didn't quite fill the larger pan enough, so the smaller pan used up the air space.

 After slow cooking for several hours the apples were ready to be mashed.  I wish you could smell this picture because it smelled just like the holidays.

My daughter used a potato masher and smashed the apples into applesauce.  You could also use an immersion blender.

 Applesauce
3lbs (8-9) apples, peeled, cored, and cut into 1 1/2" chunks (dehydrated or freeze dried also works!!!)
1 C apple juice or apple cider
2 T sugar, plus more to taste
pinch salt
2  (3") cinnamon sticks or 1/4 t ground cinnamon- optional but so good!  (remove sticks before mashing)

Combine all ingredients in the larger Saratoga Jacks pan.  Bring to a boil with the lid on for 2 minutes.  Also fill the smaller pan with water and bring it to a boil.  After 2 minutes place the pans together and put into the cooker base.  Cook for 2 or more hours.  When apples are soft, mash using a potato masher or immersion blender.  Add more sugar or apple juice if desired.  Serve warm, room temp or chilled.  Store in the fridge for up to 1 week.
*This recipe was originally for a slow cooker and would work just as well.

Saturday, September 6, 2014

Prepping In September: My Week In Review

Print Friendly and PDFPrint Friendly
September is...

What are you doing to become more prepared?

This week in Utah several grocery stores are having case lot sales.  We are able to by food by the case for a discounted price. I was running low on several things and I purchased:
  • tuna
  • pasta sauce
  • creamed soups
  • black beans
  • bottled water
  • chicken broth
  • paper towel 
  • toilet paper

We were running low on toilet paper so I have been buying a few every time I go to the store.  The sale goes for two weeks so I'll have plenty of time to stock up!

After shopping I had a baking day.


My kids love bagels and bagel sandwiches in their school lunches, so I cooked up a batch.  Click HERE to see the recipe that I use


A big money saver is making my own crackers. Wheat thins are a hit at my house and making them is pretty simple.  My issue with making crackers was always getting the dough uniform so they cooked evenly.  My friend Megan over at myfoodstoragecookbook.com is a genius!  She uses her pasta roller to roll out the cracker dough so it will be the same thickness and cook evenly.  It's the only way I make crackers now!  Here is the recipe that I have been using lately for wheat thin crackers.


Wheat Thin Crackers
1 C. whole wheat flour
1 C. white flour
1/2 C. sugar (or 1/2 C. honey, use less milk when mixing)
1/4 t salt
2 T. butter softened
approx. 1/2 C milk
salt for the tops
 ranch dressing mix, cheese powder, garlic powder, etc for seasoning the crackers*

Combine the flours, sugar, and salt in a bowl.  Cut in butter until it looks like coarse meal.  (I use my hands for this) Add the milk a little at a time and mix the dough until it forms a ball and the dough holds together.  (I have never used all the milk, so slowly add it in) If you are using honey, the dough will be slightly sticky and you'll need to work it a little more to get it to stick together.

*if you would like to make a flavored cracker this is the point to divide the dough and add in the spices.  I added a package of ranch dressing mix (homemade) to one batch, and cheese powder to another batch.  Start with a tablespoon or two and see how cheesy you like them.  Mix the dough with the desired flavor until incorporated.

Divide the dough into fourths and roll the dough using a pasta roller, or rolling pin, to 1/16-1/8" thick.  Lay the pieces of dough on a sprayed cookie sheet.  Cut into cracker sized pieces. (no need to move the cut squares apart, they will separate a little on their own) Spray with cooking spray and add salt to the tops, if desired.  (I use the tool on the right to cut my crackers.  Very easy and takes only seconds to cut a whole tray of crackers)


Bake at 325° for 15-20  minutes.  Really watch the oven after about 12 minutes.  All ovens vary and they will burn very easy.  The tops should be slightly browned.  Cool on the cookie sheets a few minutes.  The crackers will harden as they cool.  Remove to a cooling rack.  Store in airtight container or bag.
 

I cooked up part of the dough in my Global Sun Oven and they were delicious!  Perfectly cooked.  Don't walk away from them though.  Even though the sun oven won't burn most foods, crackers and cookies will burn.  These took about 11 minutes to cook.

I love the feeling of being well stocked after shopping at the case lot sales and baking all day. Now, I only wish the food didn't disappear as easily as I accumulated it.  :)

Wednesday, June 12, 2013

The All American Sun Oven Newsletter- June Edition

Print Friendly and PDFPrint Friendly
The Global Sun Oven company sends out a free newsletter once a month entitled, Every Needful Thing.  It is full of emergency prep information along with Sun Oven tips and tricks, and of course, Sun Oven recipes.  In the June newsletter I found this tip too good to not share.  


 Use your Sun Oven as a wonderbox cooker!!!!

From the June issue of Every Needful Thing....
Use Your Sun Oven® as a Food Wonder Box
Sometimes the best laid plans, like cooking in your Sun Oven®, get messed up. We
were all set to bake pork chops in our Sun Oven®. The oven had been preheated to
250 degrees on a partly sunny day. Previously skillet browned chops, placed in a
graniteware pan over sliced, raw sweet potatoes, were on their way to the oven when
we noticed that our partly sunny day had become a much less sunny day. We put the
chops in the Sun Oven®, left it for about an hour, checking from time to time. The
weather deteriorated, so we closed the oven reflector and took it inside, leaving it
closed until dinner time. When opened, the potatoes were soft and the chops were
“melt in your-mouth” tender. What a concept-use your SunOven® as a wonder box.
A Wonder Box is a heat retention cooker. Once you heat your food to boiling,
place it in the insulated cooker. It will keep your food at cooking temperature for
hours. This can be done with gas cookers outside as well as starting food on your
stovetop. The other night, we prepared old fashioned oatmeal and cracked barley in
coconut milk for breakfast, just bringing it to a boil. Into the Sun Oven® it went.
Next morning all we had to do was add some warm milk, stir and eat.


I thought this was a great idea for all those cloudy days.  I don't know if this happens to anyone else, but whenever I set out my Sun Oven, the clouds roll in.  Now I have a back up plan if this happens again!!  For all other questions and for a great collection of Sun Oven recipes check out their website HERE!

Tuesday, May 14, 2013

"Soup In A Bag" Review

Print Friendly and PDFPrint Friendly
One of the benefits of having a blog is meeting new friends over the internet in the blogoshpere.  Megan, from My Food Storage Cookbook, is one of my food storage blog friends.  The reason her website caught my eye was her amazing food storage recipe organization.  Her recipes are organized into several catagories, cross referenced, color coded, so at any given time she knows what recipes her family eats and what she needs to shop for. If there was an emergency and she had no power, Megan can look at her recipe book and can see exactly which recipes are for a Wonder Box, or cook top, etc. It really is a great system for rotating and using your food storage!!  Plus, she shows you how to make your own recipe book with instructions and videos!  She is also truly inspired when it comes to finding new ways to prepare and cook every day food by using your food storage and shelf stable ingredients.  I have learned so much from her website. Take a look at My Food Storage Cookbook and you'll see why I was so impressed with her organization and recipes. 


Megan had a giveaway for the book "Soup In A Bag" and I was lucky enough to win a copy in return for reviewing a few recipes from the book. The concept of "Soup In A Bag" is a cookbook collection of soup recipes that use all dehydrated and shelf stable ingredients that can be stored together, in a bag or jar, to have on hand for food storage emergencies, busy nights, etc.  I selected a few recipes, spent one day dehydrating ingredients for the different soups, another afternoon making up the recipes and sealing the soups in mason jars using my Foodsaver. I made four different soups from the book and my family let me know which one was their favorite one.  

Check out my review HERE and watch Megan's website for reviews from the other giveaway winners all week.   

Wednesday, May 8, 2013

Thrive Life Butter Powder

Print Friendly and PDFPrint Friendly
There are a few foods that will make or break a recipe when it comes to food in #10 cans.  Powdered cheese, butter, sour cream, eggs, etc. will be different from one company to another, and that will determine the outcome of a dish. I usually don't mind using a generic version of grocery store foods because I don't see a big difference in quality, but I have learned, by trial and error, that there is a big difference between the many food storage companies out there today.


One example is butter powder.  I really don't like to mention company names when I don't like a certain product, so I am just going to say that I have 3 different butter powders at my house right now that I don't like to use in my cooking.  They have an obvious non-butter taste and don't even smell close to real butter.  I have read on several blogs that Thrive Life has a really good butter powder.  I finally broke down and paid the $25.49 + shipping and ordered a #10 can of it.  I am so glad that I did!!!!  

The first thing I noticed right away when I opened the can is it smelled like butter.  It was light in color and not a fake yellowy color.  I mixed a small amount with a little bit of water and it reconstituted into a buttery spread.  It spread onto bread so easily and tasted good too!  It won't make a cube of butter but if you need some butter on your toast, this would work!!  I have since made brownies and cookies with the butter powder.  The brownies worked great and I couldn't taste any fake buttery flavor at all.  But the cookies were another story.  My one complaint for butter powder from all companies are the reconstituting directions!!!!  There are none for baking!!  I want to know how much water I add to the butter powder for say, 1 C of butter in a recipe.  I tried looking online and I couldn't find anything.  So if any of you know, please send me in the right direction :) That is how I messed up my cookie recipe.  It called for 1 C of butter, so I added 1 C of powder to my bowl and slowly added water.  I added too much water and then had to add extra flour.  I couldn't ever get the batter to form a cookie dough, so I baked it in a 13x9 pan and we had cookie brownies.  It still tasted good, but I need to research the water to powder ratio some more.  Again the "cookies" tasted like they should without an off taste that I noticed with other butter powders.

Out of the several butter powders that I have used I highly recommend Thrive Life's Butter Powder.  Click here to see more information.

Monday, April 29, 2013

Prepare Today Homemade: Oatmeal Pancake Mix

Print Friendly and PDFPrint Friendly
I have been on a mix making kick lately and this recipe for Oatmeal Pancake Mix has been on my pinterest food board for a little while now.  My two oldest children get up for school and leave before I get up and one of them will "forget" to eat breakfast many mornings.  She claims milk makes her stomach hurt, so I have been trying to think of things she will eat instead of cereal.  This may sound easy, but this child is incredibly picky.  I don't usually give in to a picky eater, you eat what I prepare, but I feel so guilty when they go to school without having eaten anything!!

I found this recipe for Oatmeal Pancake Mix from Mel's Kitchen Cafe and I couldn't wait to try it out.  It has had rave reviews from so many people that I decided to give them a try.  


I followed Mel's directions exactly as she explained, but I used powdered eggs and buttermilk powder instead of the fresh variety.  And I may, or may not have, switched the powdered buttermilk measurements and added 1 C of powdered and 1/4 C water instead of the other way around.  Sheesh, it's always something with me and cooking!! I think I salvaged the mistake and cooked up 38 pancakes.  I was going to just make the mix and 1 batch of pancakes, but I figured, since I had everything out already I may as well cook up the whole batch.  The pancakes are light yet hardy!  They will keep you feeling full until lunch for sure!! Next time I make them I will add ground flax seed and maybe some chia.  They will be delicious with some peanut butter slathered on top and hopefully make it easier for a certain daughter to grab her breakfast and go.

Click HERE to get the recipe.

Tuesday, April 16, 2013

Using My Food Storage: Soup In A Bag (Jar)

Print Friendly and PDFPrint Friendly
Today I ended up with several uninterrupted hours and I found the perfect project to tackle. I recently won a giveaway on Megan's blog, Myfoodstoragecookbook.com, and I received the book Soup In A Bag.  I needed to review a few of the soups and in my few uninterrupted hours I made several jars filled with dehydrated and freeze-dried foods.  When I reconstitute them I will have almost instant soups.  I made them in an assembly line type of process and it really helped that I could get out all of the ingredients, make the jarred meals, seal them, and get them put away, without children interruptions.  I love to look at the jars all finished and ready for a busy night when I can pull out a jar, heat up some water and have dinner ready in minutes. 
 
 One of the recipes called for dehydrated rice and tomatoes and I needed to dehydrate them before I could make jarred soup mix with them, but I had all the other ingredients to make Carrot Yam and Potato Cheese soup mix.  I sealed the jars with my foodsaver and they are good on the shelf for at least a year.  

This is a great book if you want to make your own Soups In A Bag or jar.  The author uses mylar bags and jars to preserve her soups, but you can choose which way works best for you. Find the book HERE


Monday, April 15, 2013

Prepare Today Homemade: Homemade Butter

Print Friendly and PDFPrint Friendly
In times when food storage may be our sole source of food, dairy foods will become few and far between, unless you have a cow.  I know that I could give up quite a few foods, but cheese and butter are two that I am not going to let go of quietly.  Cheese can be found in many forms for storage but butter is a little trickier.  Butter powder is available and works for baking but sometimes you just want some creamy goodness on a piece of bread!!!  There is a way to make butter and it is very simple to make. My sister was making us dinner the other night and the soup recipe called for cream.  We used my Gossner's shelf stable cream in the recipe and we had about a half of box leftover. I was lazy and was just going to throw it away, but my sister was appalled and she told me to make butter.  It really isn't hard so I don't know why I didn't just get out the mixer and make the butter in the first place.

 Let me introduce you to Gossner's Shelf Stable Whipping Cream.  While it is great for dessert it also whips up into butter in about 2 minutes!!! For times when the grocery store isn't an option, or if you don't have a friend with a cow, this stuff is gold!! 


Fresh Butter from Whipping Cream
1 container Gossner's shelf stable whipping cream
stand mixer

Mix cream in mixer until a liquid begins to separate (that's the buttermilk) from butter.  Watch carefully, don't let it mix too much or it will ruin your batch of butter.  Save or drain off the buttermilk and rinse the butter in cold water until water runs clear.  The buttermilk will cause the butter to go rancid so make sure to rinse the butter well.   Store the butter in a container in the fridge.  You can add salt if desired.

It spreads just like butter and I think the taste was much better then the butter from the store.  It tasted so fresh! The butter can also be made with a manual mixer for times of no electricity. I bought the whipping cream at Honeyville in Salt Lake City. It isn't available on their website but you can purchase it HERE online.  It also lasts much longer then the expiration date.  I have used it a year past the date with great results. 

Friday, April 12, 2013

Using My Food Storage: Making Mixes

Print Friendly and PDFPrint Friendly
My goal when grocery shopping is to stock up when an item is at its lowest price point.  This way I am getting the most bang for my buck.  I usually can keep my pantry stocked using this method but lately I haven't been able to find brownie mixes for under $1.00.  I  know it isn't that difficult to make brownies from scratch, but my children usually want them after dinner and I don't want to mess up the kitchen again getting all the baking ingredients out.  So my goal for today was to mix up a big batch of brownie mix and only make the big mess one time.  Now we have a container of brownie mix that will make at least 7 batches of 8x8 size pans.  

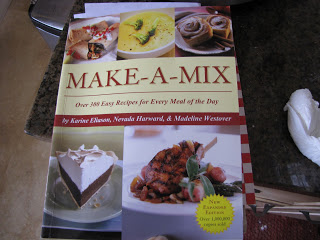
I am not a huge user of  homemade mixes, but there are a few that make my life a little easier.  I use the book "Make-A-Mix" for most of my recipes and mixes. The brownie mix has always sounded so good, and....
...the brownie mix can be used for more than brownies too!!!  How about chocolate chewy cookies, Texas sheet cake or Brownie Alaska. These all sound so good, can you tell I really love dessert!!!  (Click HERE to view a previous post I wrote on making mixes.)

The original recipe calls for melted butter and eggs when you mix up the brownies, but I food storagized the recipe and used powdered butter and powdered eggs.  If I was a math whiz I would've figured out how much to add to the dry mix, but I freely admit math isn't one of my talents, so I just added it in when we mixed up the batch of brownies.   It worked great and the brownies cooked up fluffy and looked just as brownies should.  Although as I type this I remembered that I totally forgot to add the vanilla in.  I had "help" making this (my 5 year old was mixing) so I can blame it on that :)


My other new find that I am using all the time is chalkboard contact paper.  This may be too crafty for some of you but stay with me.  I bought the chalkboard contact paper, chalk paint pen, and a cute punch out stamp on amazon.com and I have been labeling everything.  It started with my flour and sugar canisters and now I am labeling my food storage containers.  What is so wonderful about the contact paper is it is removable and the chalk pen ink is erasable!!!!  

 All the items in the picture (not the container) were purchased on Amazon, but I assume craft stores would carry these supplies as well.  When the brownie mix is all gone I may want to fill the container with corn meal, and all I have to do is rub the chalk ink with a damp paper towel and rewrite the label.  I am in love with this stuff!  I even made labels for my dehydrated food...
My dehydrated food jars will always be changing depending on what I am dehydrating and the labels are so easy to change.  Plus I can peel off the contact paper label so easily if I need to water bath or pressure can with these jars.  Maybe I am a little to excited but this has been so fun to do!  And I am not usually a crafty person, but I like to be really organized and this system really makes the pantry look put together. 

Here are our brownies made from a mix using butter and egg powder.  They are definitely more of a cake-like brownie, but we did add chocolate chips to our batch and that helped to make them more fudge-like.  (and I had no idea how to reconstitute the butter powder.  I probably did it wrong and so the brownies aren't that fudgy )And I don't know if it is me or the butter powder but I can totally taste it, even when it is cooked.  I have heard great things about Thrive's butter powder so I may look into trying that brand.  For the next batch I will make them with real melted butter and see if I can taste the difference. And as I was putting this in the oven I mentally smacked myself because I could've made this in the sun oven today, it was so sunny outside.  Next time....

I'm sorry that there is no mix recipe in this post, but I highly recommend buying the Make-A-Mix book for all of the recipes in it. I just wanted to give you all an example of what I do daily to use my food storage.  This may inspire you to do something today with your storage!!  If you would like a brownie mix recipe, I found this one on pinterest and it seems to be really popular.  CLICK HERE  to view it. 

Monday, April 8, 2013

Prepare Today Homemade: Cheesy Kale Crisps

Print Friendly and PDFPrint Friendly
It seems that when you try to eat healthy organic foods the price tag tends to go upwards.  For example, I bought a small 6oz. bag of kale chips at a health food store for $6.97 the other day.  That is beyond the limits of my budget and normally I would never spend that kind of money on such a small bag of snacks, but I wanted to make sure that we really liked them before committing to baking a whole batch of them.  I am always trying to find ways of making a store bought item at home, to save my family money, and to also emlimate processed ingredients from our diet. Kale is a super food and I really want my family to eat it, so I am always trying to find a new way of cooking it. It turned out that we really did like them and my sister and I decided to try out our kitchen skills and make a batch of cheesy kale crisps. 

The original recipe is from Real Foods market and they shared it on Good Things Utah (a local tv show) and I have wanted to try it for awhile now.  You can find it HERE.  

The ingredients called for in this recipe are items you probably have on hand, except for Nutritional Yeast.  I have heard of nutritional yeast, but I have never used it before.  It is used mostly by vegans to add a cheesy flavor to food.  It is also full of vitamin B12 and is gluten-free.  I found a bottle of nutritional yeast at Real Foods market in Heber, UT.  It can also be found at health food stores and online at amazon.comTo find out more info about nutritional yeast and recipes click HERE.


Once you have the nutritional yeast the rest of this recipe is almost too simple.  My sister and I couldn't believe how easy this was to put together and the results were amazing.  My sister is diabetic and she was excited to have a snack food that was crunchy and satisfying.   


Cheesy Kale Crisps
1 head of kale washed and torn into bite sized pieces
1/3 C cashews soaked for 1-2 hours to soften
2 T lemon juice
3 T water
1/4 C olive oil
1/2 t Real Salt
1/4 C nutritional yeast
2 green onions chopped
1/4 t chili powder
1/4 t tumeric
1 clove garlic
black pepper to taste

Blend all ingredients except kale in a blender until smooth.  Place kale in a large bowl and toss with blended mixture.  Place coated kale onto dehydrator trays and dry 4-6 hours or until crispy. (I dehydrated mine at 125° for about 4 hours)

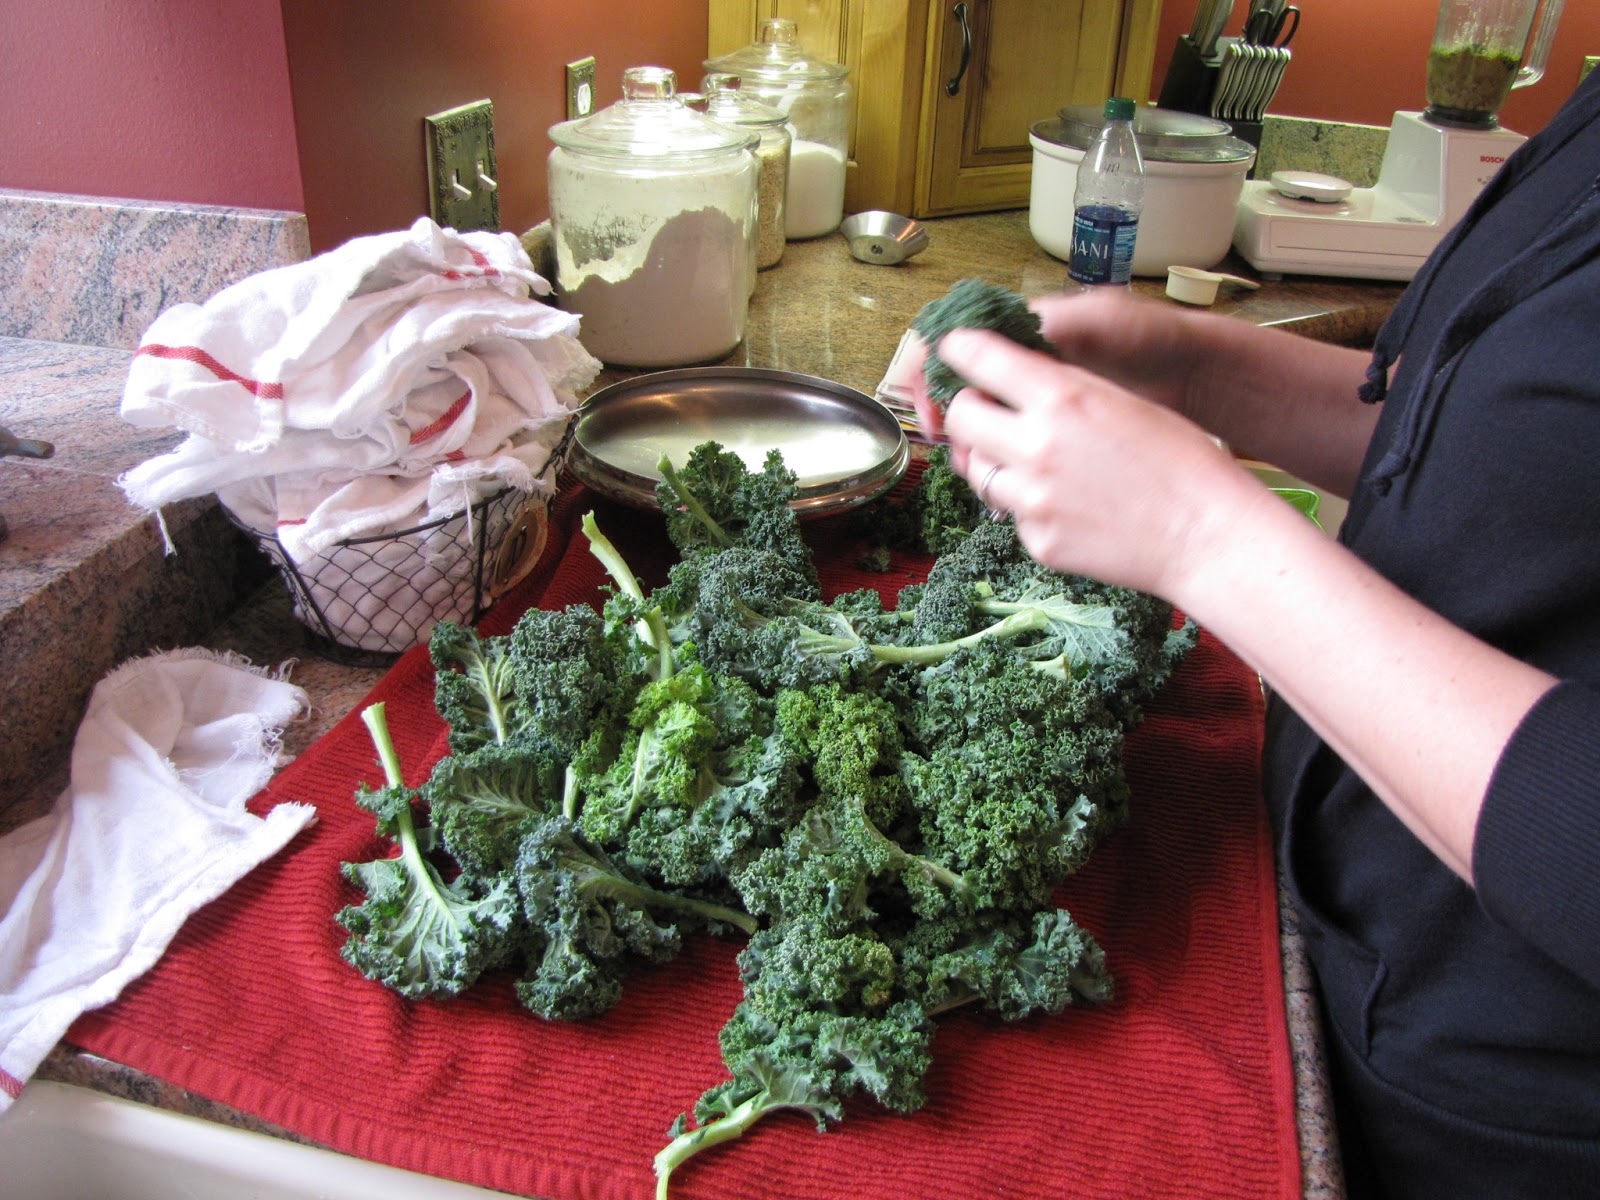
  1. Wash kale and break into bite sized pieces
   
 2.   Blend all ingredients but kale in blender. Toss with kale pieces.


3. Dehydrate for 4-6 hours until crispy.  Don't crowd the pieces on the trays, they need to have air circulation for even drying.

4. Enjoy!!  They have a cheesy popcorn taste and crunch to them.  A very healthy snack!!
 Kale is quite simple to grow in a garden and now you have a way to make it edible ;) 
Related Posts Plugin for WordPress, Blogger...