Saturday, November 26, 2011

Your Car As A Shelter

Print Friendly and PDFPrint Friendly

There are many stories of people who have been stranded in their cars and had to survive with only the supplies they had in their vehicles.  How well could you survive right now with what is in your car??  I have suggested making a car kit before (check it out HERE), so get those car kits assembled and placed in all of your vehicles.  If you have college students that travel back and forth on weekends and holidays, they especially need to have a car kit with them.  


If you do get stranded and have to use your car as a shelter there are a few things that you can do that will help you stay warm until you are rescued.
  • First and foremost, stay where you are!!  Don't start wandering off!!  You will most likely get lost and make a rescue even harder.
  • Only run your car heater every 10 minutes out of every hour and only do this if your exhaust pipe is clear.  Crack a window open as well.
  • Don't place your head right against the window.  Use a blanket or other item to block the cold.
  • You can use the stuffing from the seats of your car to keep warm.  Stuff them in your socks, sleeves, and pants to stay warm.
  • If you have enough blankets, use one to make a partition between you and the back seat to keep the most heat around you.
  • If you can't access the trunk from inside your car, you will need to get out quickly and get everything you'll need from your trunk.
  • If you travel in rural areas you may consider carrying a common flare so aerial searchers will be able to see you. 
  • Tie something to your antenna so searchers will see you.
  • Staying warm is important, move your arms and legs to keep the circulation going. 
  • This one is for the ladies:  keep a pair of hiking or running shoes in your car.  Your cute heels will only get you so far :)
  • Always be driving on the top half of a tank of gas.  This is great advice not only for winter driving, but for all year driving.  If there was an earthquake or other disaster you would want to have a full tank to be able to drive to safety.


One way to stay warm is to make a heater out of a #10 can or a new paint can.  They are cheap and simple to make.  They also make great gifts.  Follow the instructions HERE or HERE to make one for your car. The second link even has a great printout label to use if you are making your heater as a gift.  


If you need blankets for your car kits, IKEA sells some inexpensive fleece blankets for around $2.30. They aren't fancy but will work great for a car kit.  Keep one for every person that normally travels in your car.  Click HERE to see where I heard of them.


Planning ahead will save your life!!  I can't imagine I will ever be driving in the middle of nowhere during a snowstorm and get stranded, but stranger things have happened!!  I have used my car kits for first aid (kids go through so many band aids),blankets for cold kids in the back seat, water bottles for my kids after soccer, a diaper for the baby (totally an emergency when I realized I didn't have one in my purse!!) and even food for a snack when I have forgotten the kid's snacks.  I have needed my kit for everyday "emergencies"  and have been grateful for it every time I have used it!!

Monday, November 21, 2011

Prepare Today Homemade- Homemade Yogurt

Print Friendly and PDFPrint Friendly
My sister and I are both active preppers and she will send me links to fun new preparedness ideas.  This time she sent me a link to a yogurt starter that once you start it, it goes on forever.  I thought it sounded too good to be true so I had to purchase it and try it.  Normally when you make yogurt you have to buy plain yogurt at the store with active yogurt cultures in it to use as a starter for making homemade yogurt.  You then heat milk, cool it, add the starter and then incubate for 8-12 hours.  So when I found out about Viili yogurt starter I couldn't believe that all you had to do was mix the powder starter (only 1/8th of a teaspoon) into 1 cup of milk and after incubating for 8-12 hours you have yogurt!!

 Let me introduce you to Viili Yogurt Starter.  It comes from the Cultures For Health company.  Click HERE to see the website.  When you get the starter it has a tiny amount of powdery stuff that you need to make into your forever starter.  

 That is the actual amount that comes in the package!!  Measure out 1/8th of a teaspoon and stir it into 1 C of milk.  Pour into a mason jar and use a coffee filter and rubber band to cover the jar.

 The only requirement of the yogurt is that it needs to stay around 72 degrees for it to cultivate.  The easiest way to do this is to put your jar in the oven with the light on and the oven door cracked open.  I do this overnight and the yogurt is set up in the morning.  


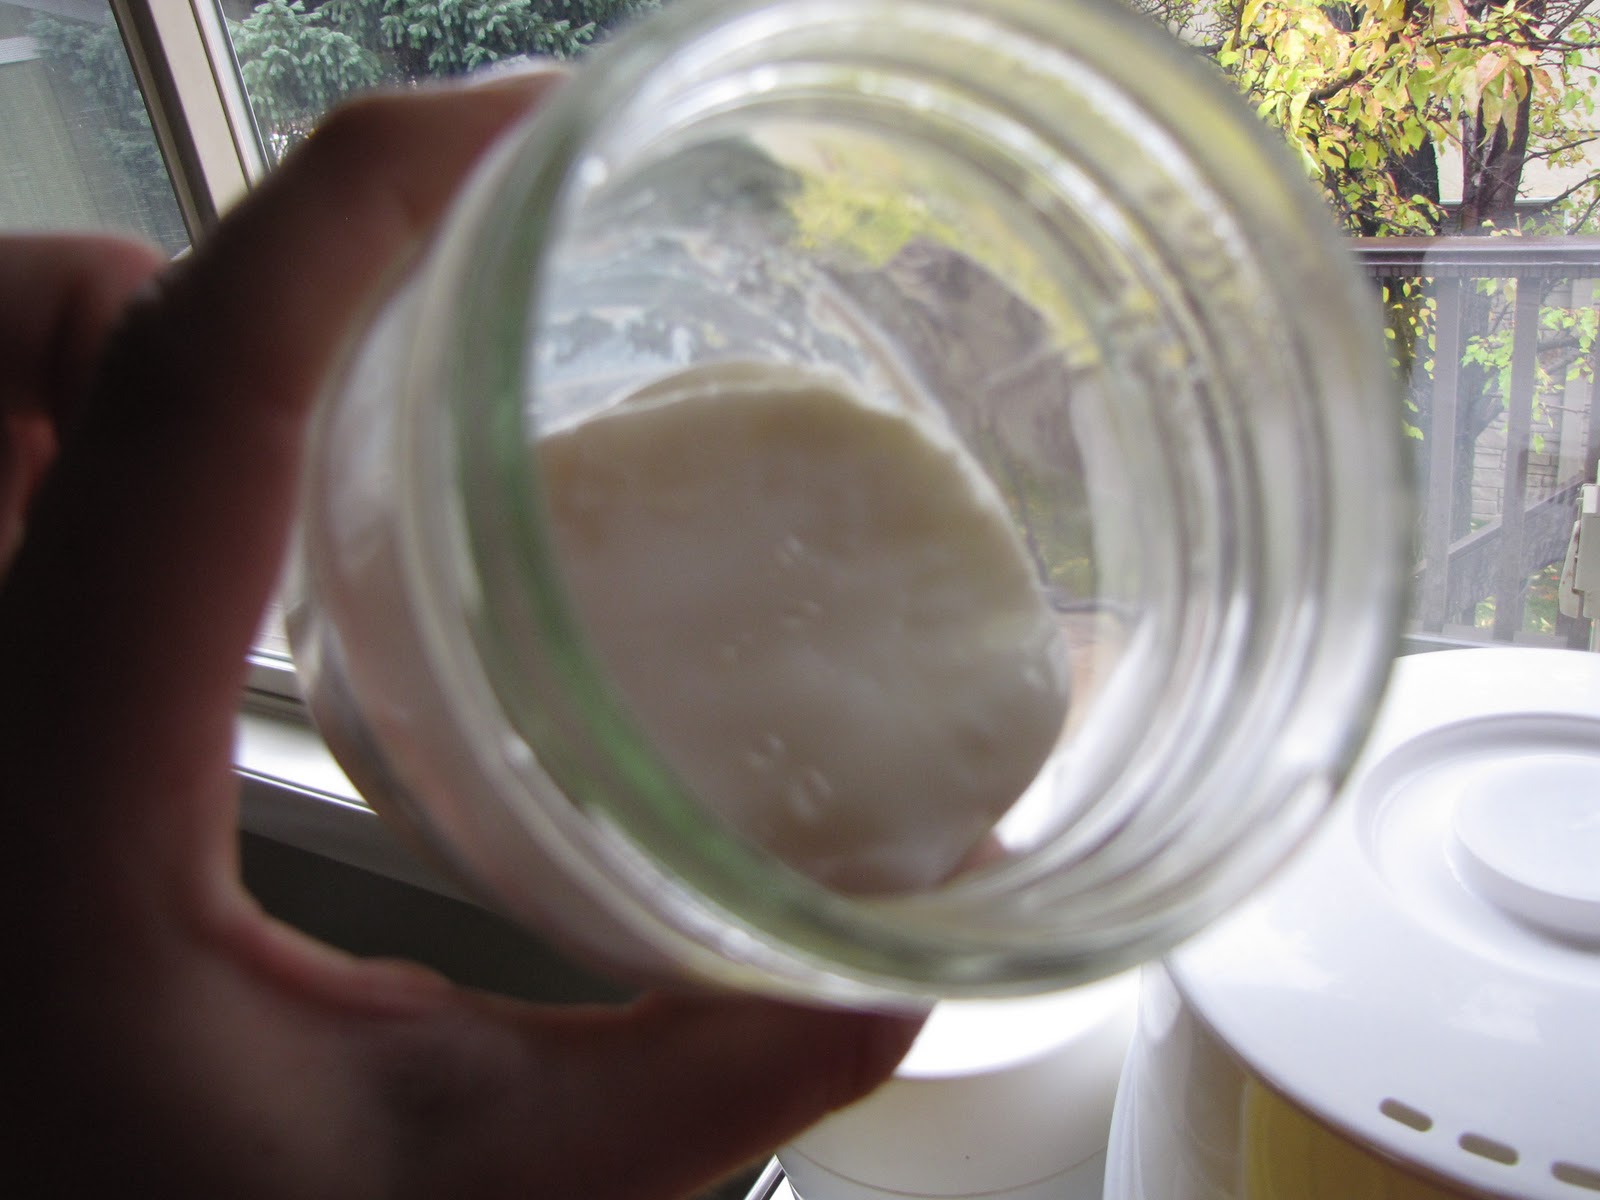
Once the yogurt is set (the yogurt will pull away from the side of the jar in one single mass) you need to use a mason jar lid to cover it and place in the fridge for about 6 hours before you will want to eat it.  

Now you have a starter that will go on and on, kind of like a sourdough starter.  You do need to use the starter about once a week to make new yogurt or it will get old, but other than that it is so simple.  To make your yogurt just use 1 T of the starter to 1 C of milk and stir, then incubate in the oven just like the starter.  You can do up to 4 T and 4 C of milk at one time.  The 4 C of milk will fit nicely into a quart mason jar.  Just remember to take out your 1 T for each cup of milk to use for your next batch before you eat it.  Every Sunday night I make at least one more cup of yogurt to have ready to go.  Watch the video for detailed instructions.


 I have used this yogurt in baking and it works so well!  My kids also loved it.  My 3 year old even ate it when I didn't set it long enough and it was soupy.  My only advice in making this yogurt is to not let it get to hot or too cold or it won't set up.  To order the starter click HERE.

"Have Faith, Unencomber your life, Lay up in store"  Keith B. McMullen

Monday, November 14, 2011

Prepare Today Homemade- Yogurt Pancakes

Print Friendly and PDFPrint Friendly
I love to make yogurt, but sometimes we don't eat it as fast as I think we will.  That is when I turn to one of my favorite food storage cookbooks, The Essential Food Storage Cookbook, and make Yogurt Pancakes.  I really like these pancakes because they are not just white-flour-fluff pancakes, but nutritious pancakes.  The yogurt adds some added protein so you won't feel hungry 20 minutes later. 

Yogurt Pancakes
(from The Essential Food Storage Cookbook)

2 eggs
1/4 C sugar
1 C white flour
1 C whole wheat flour
1 1/2 t baking soda
1 t salt
1/3 C oil
1 t vanilla (if you use vanilla yogurt omit the vanilla flavoring)
1 C water
1 C plain yogurt (or vanilla flavored)

Mix all ingredients in a bowl and combine until blended.  Cook on preheated griddle at 350 degrees.  


Cook until bubbles form and flip over. These are so yummy with fruit, peanut butter, or homemade syrup!! My kids love to eat these as an after school snack.  (I feel like a lot of these posts involve after school snacks, kids are always hungry:)  I found a great way to make yogurt that doesn't involve buying yogurt at the store to use as a starter.  I will post about it next week.  I am still trying to get the consistency that I like in yogurt before I share it with you.  Enjoy!!

Saturday, November 12, 2011

Rub-A-Dub-Dub Laundry Without Electricity

Print Friendly and PDFPrint Friendly
The emergency preparedness goal for November is all about sanitation.  Fun..I know!!  But in all seriousness in most cases it isn't the emergency that kills people, it's the sanitation afterwards.  Our goal is to have emergency portable toilets with all necessary items stored inside. Read more about luggable loos HERE.  For this post I want to focus on having the supplies on hand to be able to do your laundry if there was no electricity, or if the water mains were broken.  I have written about the porta-potty before and doing our laundry, but reviewing never hurt anyone, right?  There are actually several options that will help make doing laundry by hand easier.  


One way is to use a contraption that looks a lot like a toilet plunger, but it is made for your laundry.  It has sections throughout the bottom to help the water and soap move through the clothes.  It is quite simple and inexpensive.  Add a bucket, gamma lid (with a hole for the handle) and you are ready to do the laundry.  The washer plunger costs about $14 and can be found at Emergency Essentials or in a complete bucket set at Honeyville.


After the plunger, the only other item you will need will be the laundry detergent.  Making your own laundry detergent is easier than you think, and it is a lot cheaper too!  There are many recipes and videos online.  I found a video that is easy to follow, but feel free to google and find what works for you.
If you feel finding all the ingredients for a laundry bucket kit are too time consuming.  There are several options out there for you.  Tami Girsberger has an amazing company of preparedness items all ready to go!  You don't have to hunt for all the items you will need for a porta-potty or wonder how to decide which bags or sanitizer are the best.  Tami has tested and compared all the products in her kits and has selected only the very best.  Tami has done all the research for you.  Check out her porta-potty HERE and her laundry bucket HERE.  She really has found the best products to go in her kits.  Take a minute to look through her site, it is amazing the time she has spent in her research to find the best products.  Her website is preparemylife.com and Tami was also at the Self Reliance Expo that I attended in Oct.  Click HERE to see the cool products she is coming out with next!!
Tami Girsberger's complete laundry bucket!!
Honeyville Grain also sells Tami's complete buckets for laundry and portable potties for $69.95 each.  You can see the buckets in person and look at exactly what goes in them.  Check them out at the Salt Lake Honeyville location 635 N. Billy Mitchel Rd. 


One other option would be the manual washer from Emergency Essentials.  It is called the wonder washer and you would be able to wash several items at once.  It runs about $47.00.  Click HERE to see more info on the wonder washer.

Doing laundry and having a portable toilet are not hard to put together but you do need to see what works for you and your family.  Don't wait for an emergency to try and make laundry detergent or assume you'll have garbage bags for your toilet.  Have all the items for these kits put together and ready to go!!!

"Be faithful, Unencomber your life, Lay up in Store"  Keith McMullin

Monday, November 7, 2011

Prepare Today Homemade- Squirmy Wormy Sandwiches

Print Friendly and PDFPrint Friendly
This recipe comes from our Halloween stash, but my kids LOVE it and they are also able to make it themselves!!  My children took a few cooking classes during UEA in Oct. at Honeville Grain , and this was one of the recipes they learned to make.  My 10 year old made this for her whole classroom on Halloween and they devoured it!

Squirmy Wormy Sandwiches
1 package hot dogs (16oz)
1 T oil
1/2 C Ketchup
1 T brown sugar
2 t Worcestershire sauce
1/2 t spicy brown mustard
Dash liquid smoke (opt.)
6 hamburger buns

Cut each hot dog lengthwise into 8 strips (worms:)  and saute them in the oil until lightly golden brown.  In a small bowl mix together the ketchup, sugar, Worcestershire sauce, mustard, and liquid smoke.  Stir in the sauce with the hot dogs and heat through.  Serve on buns.  Enjoy!!

Monday, October 31, 2011

Prepare Today Homemade-Candy Corn Crackers

Print Friendly and PDFPrint Friendly
I found a really fun recipe that doesn't use sugar and it is still a really great Halloween treat.  This recipe is from one of my favorite bento lunch blogs called Lunches Fit For A Kid.  Bento lunches are an Asian inspired lunch where the food is placed into compartments and usually has a theme.  


My kids have a kind of a bento lunch for school lunch everyday and I was looking for ways to add Halloween fun without it being sugary.  So when I saw the "Candy Corn Cracker" recipe, I was really excited to try it!!

Start off by making the dough from a recipe by King Arthur's Flour. (I followed it just as written) Click HERE to see that recipe.  The recipe calls for Vermont powdered cheese, but cheddar cheese powder (that's what I used) works just fine.  (Click HERE to see the recipe I found for the crackers) When your dough has come together you will need to divide it into thirds.  Spread out a piece of plastic wrap and place one third of the dough in a small rectangle in the middle of the plastic wrap.  With the other 2 pieces of dough you will need to color one third yellow, and one third orange.  I used regular old food coloring drops from the grocery store.  Layer the orange layer on top of the plain dough and the yellow on top.  Wrap up the dough and let it cool in the fridge for a half hour. 

Layered dough ready to go into the fridge.
After chilling in the fridge for a half hour, slice the dough very thin, about 1/16" and cut into candy corn shapes.  I didn't think that the small rectangle dough would make very many crackers, but it did!  It made a whole tray and about another half of a cookie sheets worth.  Place the crackers on a greased cookie sheet.
Ready to into the oven!!


Bake the crackers at 400 degrees for 6-8 minutes.  They will puff up slightly but not really spread out.  

 My crackers came out light and puffy, but I think they were suppose to be kind of crunchy.  It was hard to slice them thin enough, but I still think they are really yummy!!  Happy Halloween!!

Saturday, October 29, 2011

Gimme Somethin' Good To Eat!!

Print Friendly and PDFPrint Friendly
I don't know about you, but chocolate has a place in my home food storage.  We have been counseled to store familiar food, comfort food, food that will keep us sane in an emergency.  So maybe I took that literally :) and I found a great way to store chocolate and candy for long term storage!!

There are only a few things that you will need to be able to store candy on your pantry shelf long term.  I have talked about using a FoodSaver before and it is essential to long term candy storage.  You will also need mason jars, lids, and of course candy.  This time of year is a great time to find candy on sale.  Look for sales after Halloween, Thanksgiving, and Christmas, and stock up for a great price.

The process is simple:  buy candy, place in a mason jar, and seal with your FoodSaver.  Easy, almost too easy to have candy preserved!!

I keep my FoodSaver plugged in so it's ready to use.
 There are two ways to seal your jars with the FoodSaver. The first way, and the way I like to do it, is to use a FoodSaver canister (I got mine on Amazon.com). I place the lid and ring on my jar and set it in the FoodSaver canister and put the lid on the canister and plug in the hose.  
If you use the FoodSaver canister you have to put a ring on the jar first or it won't seal.
 Then I press the button and the FoodSaver  does all the work.  The machine will stop on its own and you will need to hit cancel, release the air with the button on top of the canister, and then check to see if your lid sealed.  You can take the ring off and if it sealed, place on your pantry shelf!  I do this with all kinds of candy;  chocolate bars, suckers, M&M's, candy canes, candy corn (leave in bag and seal the bag in the jar), Werther's, Tootsie Pops, etc. 


Another way to seal is to use the FoodSaver jar attachments to seal your jar.  In the picture of my FoodSaver above you can see one leaning against the canister.  They are a lid that fits over the mason jar (don't put a ring on your mason jar, only the lid) and you attach the hose to the top of it.  I haven't had consistent luck in sealing jars with the attachments, but sealing with the canister I rarely have a jar not seal.  And if it doesn't seal it is usually because I need a new jar lid, not because of the canister. 


What a lovely picture :)

Just at note though ***Don't store chocolate with any other kind of candy.  The chocolate will absorb the taste of other items. ***   You don't want fruity tasting Butterfinger bars, at least I don't.  This goes for chocolate chips as well.  I put my chocolate chips in mason jars and seal them up.  Ace Hardware sells the 2 gallon jars and they hold A LOT of chocolate chips!!

The 2 gallon mason jar from Ace Hardware.
After Halloween this year save some of the kiddies candy and store it for a later date.  It would be a great way to make the candy stretch so your children don't eat it all at once.  You may wonder how long the candy will last, and I know it's at least a year.  I just used some M&M's to make cookies and they tasted as fresh at when we got them on Halloween in 2010.  

"Be faithful.
Unecomber your life.
Lay up in store."  Keith B. McMullin
Related Posts Plugin for WordPress, Blogger...