This is a yummy recipe re-post from 2012....it's easy and smells sooooo good....I hope you enjoy it!
Applesauce in the Saratoga Jacks Thermal Cooker is simply delicious! I have made it several times and my kids love it! I also made it for a class I taught at Honeyville Grain and they loved it too!
Cutting up the apples is the hardest part of this super easy recipe. The spices and sugar slow cook with the apples and it smells like Christmas. My kids kept thinking I was baking something for them and it was the applesauce.
Just like all the other Saratoga Jacks recipes I boiled the apples for 2 minutes and also had the smaller pan boiling. The apples didn't quite fill the larger pan enough, so the smaller pan used up the air space.
After slow cooking for several hours the apples were ready to be mashed. I wish you could smell this picture because it smelled just like the holidays.
My daughter used a potato masher and smashed the apples into applesauce. You could also use an immersion blender.
Applesauce
3lbs (8-9) apples, peeled, cored, and cut into 1 1/2" chunks (dehydrated or freeze dried also works!!!)
1 C apple juice or apple cider
2 T sugar, plus more to taste
pinch salt
2 (3") cinnamon sticks or 1/4 t ground cinnamon- optional but so good! (remove sticks before mashing)
Combine all ingredients in the larger Saratoga Jacks pan. Bring to a boil with the lid on for 2 minutes. Also fill the smaller pan with water and bring it to a boil. After 2 minutes place the pans together and put into the cooker base. Cook for 2 or more hours. When apples are soft, mash using a potato masher or immersion blender. Add more sugar or apple juice if desired. Serve warm, room temp or chilled. Store in the fridge for up to 1 week.
*This recipe was originally for a slow cooker and would work just as well.
Showing posts with label thermal cooker. Show all posts
Tuesday, July 14, 2015
Wednesday, June 10, 2015
Kitchen In A Box-- An Emergency Essential!
Before we get to the kitchen in a box, let me give you a little background on why I made one. If you have read the blog for awhile you know what a big fan I am of the Saratoga Jacks Thermal Cooker. The thermal cooker is great for emergency preparedness BUT it is also one of my favorite kitchen appliances to use daily. Click HERE to view a post on the thermal cooker. I have had fun experimenting with the thermal cooker but it is always helpful to have a cookbook to guide me along. Cindy Miller has recently published a brand new thermal cookbook called "Let's Make Sense of Thermal Cooking". (click here to see her website)
It is a gorgeous cookbook with color photos, spiral bound binding, and so many helpful tips and tricks to use with the thermal cooker. There are also recipes that will help you gather and use your food storage. She has recipes for grains, beans, pastas, meat, and veggies. It is the most complete book on thermal cooking to date!! I highly recommend you own this book if you own a thermal cooker or wonderbox/oven.
I have attended several classes taught by the owners of Saratoga Jack's thermal cookers, Amy & Jack, and they are always so organized with everything they need to cook, and demonstrate the thermal cookers. Amy calls it her kitchen in a box. I always thought it was a great idea for them because they travel and teach so often, but I never really considered making one for myself. While reading Cindy's book she writes about using a kitchen in a box as well when she teaches, but it also is part of her 72-hour kit. When I read that I felt prompted that I really needed to have one of these kitchens in a box for my emergency kits.
It really just makes sense to have all the basic cooking utensils in a grab-n-go type container. What was I planning on using in an evacuation type situation to cook our food in our 72-hour kits? I really hadn't thought this through very well. The kitchen in a box is very easy, and inexpensive to put together.
If you have a Wal-Mart or Dollar Store near your home you can find everything you need for your own kitchen in a box. Wal-Mart had most items for around .88 each. I bought a stack-able plastic container (in the office supply area of Wal-Mart) and it was the perfect size to fit the longer spoons. I really want a stack-able container that has separate layers that snap together, but this will work until I can save up for that. This is what I included in my kitchen in a box. It isn't finished quite yet, but I found the basics.
My kitchen in a box now sits along side my butane stove and fuel. They are ready to go with our 72-hour kits. These along with my thermal cooker will allow me to prepare and serve meals to my family in any situation. The days following a disaster will be filled with chaos and making meals will be a huge stress for everyone. But preparing beforehand and knowing that you have a 72-hour kit, food, and a way to prepare the food will give you peace of mind.
It is a gorgeous cookbook with color photos, spiral bound binding, and so many helpful tips and tricks to use with the thermal cooker. There are also recipes that will help you gather and use your food storage. She has recipes for grains, beans, pastas, meat, and veggies. It is the most complete book on thermal cooking to date!! I highly recommend you own this book if you own a thermal cooker or wonderbox/oven.
I have attended several classes taught by the owners of Saratoga Jack's thermal cookers, Amy & Jack, and they are always so organized with everything they need to cook, and demonstrate the thermal cookers. Amy calls it her kitchen in a box. I always thought it was a great idea for them because they travel and teach so often, but I never really considered making one for myself. While reading Cindy's book she writes about using a kitchen in a box as well when she teaches, but it also is part of her 72-hour kit. When I read that I felt prompted that I really needed to have one of these kitchens in a box for my emergency kits.
It really just makes sense to have all the basic cooking utensils in a grab-n-go type container. What was I planning on using in an evacuation type situation to cook our food in our 72-hour kits? I really hadn't thought this through very well. The kitchen in a box is very easy, and inexpensive to put together.
If you have a Wal-Mart or Dollar Store near your home you can find everything you need for your own kitchen in a box. Wal-Mart had most items for around .88 each. I bought a stack-able plastic container (in the office supply area of Wal-Mart) and it was the perfect size to fit the longer spoons. I really want a stack-able container that has separate layers that snap together, but this will work until I can save up for that. This is what I included in my kitchen in a box. It isn't finished quite yet, but I found the basics.
- kitchen scissors
- can opener
- jar opener
- vegetable/fruit peeler
- complete set of measuring spoons/cups
- small knife with a cover
- large stirring spoon
- smaller wooden spoons
- cutting board (found in the camping section)
- whisk
- two dish towels
- plastic gloves
- sanitizer
- spices
- spatulas
- pancake turner
- camping pots
- hot pads
- cleaning scrubbies and soap
- grater
My kitchen in a box now sits along side my butane stove and fuel. They are ready to go with our 72-hour kits. These along with my thermal cooker will allow me to prepare and serve meals to my family in any situation. The days following a disaster will be filled with chaos and making meals will be a huge stress for everyone. But preparing beforehand and knowing that you have a 72-hour kit, food, and a way to prepare the food will give you peace of mind.
Tuesday, May 26, 2015
How To Make Ice Cream Out Of Wheat
Yes, the title is correct! I made ice cream out of wheat. It may seem impossible and maybe even a little gross (according to two of my kids it was), but it was a very interesting process.
I came across this recipe in the "Passport To Survival" book that I found at a local thrift store. Click here to see my review of the book.
There are only four survival foods used in the recipes in this book, wheat, powdered milk, honey, and salt. It is truly amazing what can be made out of them!
There are a few steps to actually get ice cream out of wheat, but they are simple. Start off by steaming your wheat. This can be done in a crock pot, thermal cooker, wonder box, or in a double boiler. I would've made this in my Saratoga Jacks thermal cooker, but I wanted to try this exactly as Esther Dickey's recipe said to do it.
You will need two pots, one that fits inside the other. You will also need some sort of metal ring, or small can, to elevate the inside pot off the bottom of the bigger pan.
I used my trivet from my Saratoga Jacks thermal cooker to raise up the blue pot.
Pour in enough water to come to 1" below the blue pot.
Add 5 C of wheat kernels, 7 C of water, and 1 T salt to the inner pot. Cover, bring to a boil, then lower heat to a simmer, and steam the wheat for 4 hours.
You will end up with 12 cups of cooked wheat berries. For a smaller recipe use 2 C of wheat, 1 3/4 C water, and 1 t salt. That will produce about 5 C of cooked wheat berries.
Once you have cooked wheat berries, the fun begins. In a blender add 3 C steamed wheat berries, 3 C water, 3/4 C powdered milk, and 1/3 C honey. Blend until mixed. There will be bits of bran that won't blend up, but they get strained out in the next step.
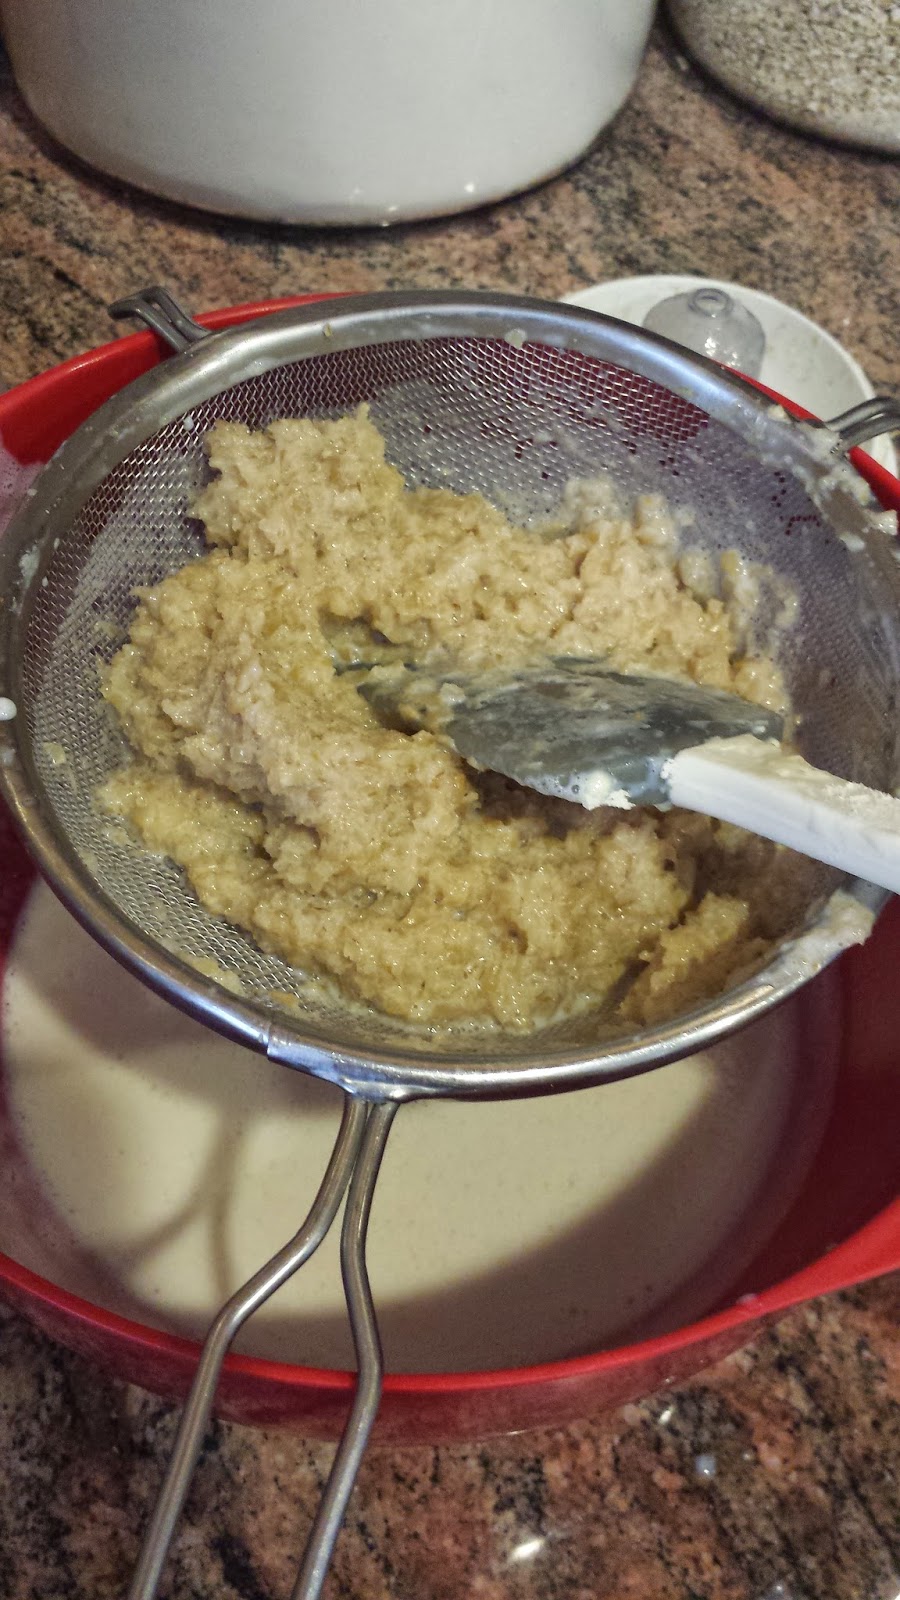
Once the mixture is blended well it needs to be strained. The bran will be left in the strainer and the whey mixture will be used for the ice cream. Save the bran for a recipe later.
This is the bran left over after all the liquid has been drained off.
Pour the liquid onto a large rimmed cookie sheet and freeze until solid.
When you are ready to make ice cream, pull out the cookie sheet from the freezer and let it warm up for a minute or two. I used a spatula to scrape up pieces and then used my Bosch with the cookie paddles to mix it into ice cream. It will seem like it won't work but once the mixture softens enough it will mix into an ice cream looking substance.
Here is my honest review. It was pretty good. It really tasted like a frozen yogurt. My first two kids that tried it thought it was really ice cream and shoved a big mouthful of it in their mouths. They weren't expecting the flavor that it was and spit it out just as fast. It has a wheatie, honey flavor to it, but it was cold and creamy. My husband and 3 other children ate it and liked it. I have to say, that in an emergency, without all the modern foods from the grocery store, this would be a treat! What made it even better was stirring in a bit of cocoa powder to make it chocolate ice cream. That flavor disappeared! Chocolate makes everything better :)
Out of 12 cups of cooked wheat I made a dessert, 2 snacks, breakfast muffins, and a dinner. The bran is in the green bowl above in the picture. There was quite a bit left-over after making the ice cream and it went a long way in making A LOT of crackers and 24 bran muffins. Wheat really is the staff of life!! The whole book "Passport to Survival" is filled with recipes that start off as one recipe and then lead into several other ways to prepare it. Wheat is so versatile and truly is a survival food!!
I came across this recipe in the "Passport To Survival" book that I found at a local thrift store. Click here to see my review of the book.
There are only four survival foods used in the recipes in this book, wheat, powdered milk, honey, and salt. It is truly amazing what can be made out of them!
There are a few steps to actually get ice cream out of wheat, but they are simple. Start off by steaming your wheat. This can be done in a crock pot, thermal cooker, wonder box, or in a double boiler. I would've made this in my Saratoga Jacks thermal cooker, but I wanted to try this exactly as Esther Dickey's recipe said to do it.
You will need two pots, one that fits inside the other. You will also need some sort of metal ring, or small can, to elevate the inside pot off the bottom of the bigger pan.
I used my trivet from my Saratoga Jacks thermal cooker to raise up the blue pot.
Pour in enough water to come to 1" below the blue pot.
Add 5 C of wheat kernels, 7 C of water, and 1 T salt to the inner pot. Cover, bring to a boil, then lower heat to a simmer, and steam the wheat for 4 hours.
You will end up with 12 cups of cooked wheat berries. For a smaller recipe use 2 C of wheat, 1 3/4 C water, and 1 t salt. That will produce about 5 C of cooked wheat berries.
Once you have cooked wheat berries, the fun begins. In a blender add 3 C steamed wheat berries, 3 C water, 3/4 C powdered milk, and 1/3 C honey. Blend until mixed. There will be bits of bran that won't blend up, but they get strained out in the next step.
Once the mixture is blended well it needs to be strained. The bran will be left in the strainer and the whey mixture will be used for the ice cream. Save the bran for a recipe later.
This is the bran left over after all the liquid has been drained off.
Pour the liquid onto a large rimmed cookie sheet and freeze until solid.
When you are ready to make ice cream, pull out the cookie sheet from the freezer and let it warm up for a minute or two. I used a spatula to scrape up pieces and then used my Bosch with the cookie paddles to mix it into ice cream. It will seem like it won't work but once the mixture softens enough it will mix into an ice cream looking substance.
Here is my honest review. It was pretty good. It really tasted like a frozen yogurt. My first two kids that tried it thought it was really ice cream and shoved a big mouthful of it in their mouths. They weren't expecting the flavor that it was and spit it out just as fast. It has a wheatie, honey flavor to it, but it was cold and creamy. My husband and 3 other children ate it and liked it. I have to say, that in an emergency, without all the modern foods from the grocery store, this would be a treat! What made it even better was stirring in a bit of cocoa powder to make it chocolate ice cream. That flavor disappeared! Chocolate makes everything better :)
Wheat Ice Cream
3 C steamed wheat
3 C water
3/4 C powdered milk
1/3 C honey
Mix in blender until smooth. Strain out the bran and save in a separate bowl. Pour the liquid onto a rimmed cookie sheet and freeze until solid. Let thaw a few minutes before mixing with cookie paddles or beaters to make it creamy and smooth. Makes about 1 1/2 C ice cream. Optional: Add cocoa powder for a chocolate flavor!
Wheat is amazing! Here's what I made out of the original 12 cups of steamed wheat.....
- I used 6 cups of wheat berries in a double recipe of the ice cream.
- The left-over bran was used to make wheat crackers, recipe from the same book. (1 3/4 C bran & about 2 C wheat flour, 1 C water, 1/2 t salt. Roll out thin, cut, sprinkle with ground up baked wheat kernels and bake at 375 for 15 min. I just kept adding flour until the bran was able to be rolled out into a dough.)
- I broiled, then slowly baked a few cups of steamed wheat into crunchy snack kernels. I ground up a handful to use as a topping on the wheat crackers, and we snacked on the rest. (Broil cooked wheat berries for 10 min or until they start popping, then bake at 250 for 30 min, or until lightly browned.)
- I made 24 bran muffins out of 3 C of the bran leftover from the ice cream. (I used this recipe: bran muffins)
- The last of the wheat berries were made into a salad for dinner that night. click here for that recipe
Out of 12 cups of cooked wheat I made a dessert, 2 snacks, breakfast muffins, and a dinner. The bran is in the green bowl above in the picture. There was quite a bit left-over after making the ice cream and it went a long way in making A LOT of crackers and 24 bran muffins. Wheat really is the staff of life!! The whole book "Passport to Survival" is filled with recipes that start off as one recipe and then lead into several other ways to prepare it. Wheat is so versatile and truly is a survival food!!
Wednesday, April 29, 2015
Baked Cheesecake in the Thermal Cooker
You're going to think I am obsessed with cheesecake but I came across a recipe for cheesecake in a slow cooker and I wanted to try it out in my Saratoga Jacks Thermal Cooker ( Click HERE to see what a thermal cooker is.) using the smaller cake pan insert for the cooker. I haven't had the best of luck baking cake in the cake pan so I was hoping this cheesecake recipe would break my losing streak.
All good cheesecakes start off with a graham cracker crust. I used homemade graham crackers from this recipe HERE. Melt 3 T butter and mix with the graham cracker crumbs. I mushed it all together in the bag...less mess...easy clean up.
Three ingredients...that's it...three! That's all this recipe needs.
Mix the cream cheese, sugar, and eggs, pour over the crust and it's all ready for the boiling stage.
The thermal cooker is all about the hard boil. Bring the food to a hard boil, place in the thermal base, and it will slow "cook" for hours.
This cheesecake was DELICIOUS!!! It was creamy and had just enough sweetness! My husband and kids loved it! It's a keeper!!
All good cheesecakes start off with a graham cracker crust. I used homemade graham crackers from this recipe HERE. Melt 3 T butter and mix with the graham cracker crumbs. I mushed it all together in the bag...less mess...easy clean up.
Three ingredients...that's it...three! That's all this recipe needs.
Mix the cream cheese, sugar, and eggs, pour over the crust and it's all ready for the boiling stage.
The thermal cooker is all about the hard boil. Bring the food to a hard boil, place in the thermal base, and it will slow "cook" for hours.
- Fill the larger pot with water to about 1 cm above the trivet (it comes with the cake pan).
- Place the covered cake pan on top of the trivet and bring the water to a hard boil.
- Lower the heat but keep the water boiling and boil for 20 minutes.
- Place the pot into the thermal base.
This cheesecake was DELICIOUS!!! It was creamy and had just enough sweetness! My husband and kids loved it! It's a keeper!!
Thermal Cooker Cheesecake
3 packages cream cheese, softened (I used low-fat)
3/4 C white sugar
3 Eggs
6 graham crackers, crushed
3 T melted butter
Mix the graham cracker crumbs and melted butter and press into the bottom of a greased Saratoga Jacks cake pan. Blend the cream cheese and sugar in a bowl using a hand mixer. Mix in each egg one at a time, blending well after each egg. Pour mixture over graham cracker crust. Place the cover on the cake pan and lock. Put the cake pan into the larger cooking pot with the trivet in place and water filled to just 1 cm above the trivet. Cover the cooking pot and bring to a boil. Keep boiling for 20 minutes. Remove pot from heat and place in thermal cooker base and close the lid. Let sit for at least 1 1/2 hours or up to 8 hours. Remove the cheesecake from the large cooking pot and let cool on the counter for 30-60 minutes. Then cool for several hours in the fridge. Slice and serve with fruit toppings.
My next challenge will be making this with shelf stable cream cheese powder, butter, and eggs :)
For the slow cooker recipe click HERE.
Sunday, October 6, 2013
Tailgating With The Saratoga Jacks Thermal Cooker
The Saratorga Jacks Thermal Cooker has been a favorite preparedness item, as well as an everyday cooking appliance, of mine for awhile now. I have mentioned it once or twice before on the blog. ;) I haven't been blogging as much as before I moved, but I still practice what I preach, and I use my food storage and preparedness items almost daily. Now that fall is here, I am cooking more often in the slow cooker, and those recipes work so well in the SJ Cooker. My son plays football and when he has away games, we are driving at least 30 minutes to the closest game. This also happens right in the middle of the dinner hour.
Well, the Saratoga Jacks cooker has come to the rescue again and we have had warm, yummy meals on the road.
I made minestrone soup and we ate it with crusty sourdough bread. One of the other football moms was walking by and she said it smelled so good! It WAS good and so much cheaper, and healthier, then stopping by a fast food joint.
The soup was piping hot and was STILL warm after I closed it up and drove home. My son ate some when he got home from the game and I didn't even have to reheat it. I also noticed something and I am not sure if it's the stainless steel pan or what, but I stored the soup in the fridge over night, and when we ate it for lunch the next day the noodles hadn't absorbed the liquid. Usually when I make this soup we store the leftovers in a plastic container. I always have to add more chicken broth the next day, and the noodles are kind of soggy. I had to test my theory and try a different soup. I made chicken noodle soup and stored it in the SJ pan in the fridge. For two days it sat in there and the noodles didn't soak up the liquid. This makes me wonder what is really wrong with the plastic that we are using. So, along with just loving my SJ cooker, it is also a great way to store soups in the fridge.
Well, the Saratoga Jacks cooker has come to the rescue again and we have had warm, yummy meals on the road.
I made minestrone soup and we ate it with crusty sourdough bread. One of the other football moms was walking by and she said it smelled so good! It WAS good and so much cheaper, and healthier, then stopping by a fast food joint.
The soup was piping hot and was STILL warm after I closed it up and drove home. My son ate some when he got home from the game and I didn't even have to reheat it. I also noticed something and I am not sure if it's the stainless steel pan or what, but I stored the soup in the fridge over night, and when we ate it for lunch the next day the noodles hadn't absorbed the liquid. Usually when I make this soup we store the leftovers in a plastic container. I always have to add more chicken broth the next day, and the noodles are kind of soggy. I had to test my theory and try a different soup. I made chicken noodle soup and stored it in the SJ pan in the fridge. For two days it sat in there and the noodles didn't soak up the liquid. This makes me wonder what is really wrong with the plastic that we are using. So, along with just loving my SJ cooker, it is also a great way to store soups in the fridge.
Labels:
cooking without power,
food storage,
thermal cooker
Wednesday, June 26, 2013
Saratoga Jacks Thermal Cooker Cake Pan
Since moving 6 months ago, I haven't had many chances to shop at Honeyville Grain in Salt Lake City. Although I have kept a running list of items that I needed, I didn't have a chance to shop until yesterday. Honeyville was having a 15% off everything sale and I was ready to shop!! While perusing the aisles I saw two new products that got me really excited!! They were stainless steel pans and a trivet made for the Saratoga Jacks thermal cooker.
I have tried many times to bake in my thermal cooker with no luck. Now there is hope!! There were two pan sizes to choose from, the round cake tin, and the oval bread tin. I chose the round cake tin because it looked like it would take up more space in the cooker and wouldn't allow as much air space as the oval shape. That is totally my observation and I have no clue if it's true, but I went with it :) You'll also notice the trivet that I purchased. That allows the pan to stay up out of the water so your food won't turn out mushy.
If you aren't familiar with the Saratoga Jacks Thermal cooker I'll quickly go over it for you. The idea of the cooker is to boil food for 2-4 minutes, depending on a raw meat dish, just veggies, or dehydrated foods, then closed in the thermal base the food will "cook" inside. The thermal base is not electric, the heat retained from boiling the food will slow cook the meal. This is great from a preparedness standpoint because it saves precious fuel in times of emergency. I have made soups, meats, muffins, applesauce, and even kept my cold dishes chilled,etc. Click HERE to view all my previous posts on the Saratoga Jacks Thermal Cooker. And click HERE to visit the Saratoga Jacks website.
I must also say I was disappointed when I opened the cake tin box and realized there were no instructions included. Thank goodness for the amazing Lisa at Honeyville. She explained how to use the cake tin in the cooker. Once the trivet and cake pan are in place, you only fill water up to the bottom of the tin, or else the food will not cook through and be mushy. I would have thought I had to fill the water up the the edge of the cake tin lid, but there was nothing included with the cake pan explaining how to use it or even how full to fill the pan with food. I am not sure how much cake batter or bread dough to use in the tin. It'll be a trial and error kind of experiment. I think I have some more questions for Lisa!!
*Update: Amy from Saratoga Jacks contacted me and filled me in on all the cooking instructions.
Add far as making a cake with the round cake pan.
-The round cake pan you purchased was designed to hold ONE box cake... any box of cake mix will work.
-Spray the stainless steel pot and the inside of the lid first.
-Mix the cake mix exactly as the instructions on the back of the box say... except subtract out 1/4 cup of the liquid.
-And add a tablespoon of flour.
-Pour the batter into the oiled stainless steel pan... clamp lid on.
-I put the trivet into the thermal cooking pot... and fill with water to about one cm... above the top of the trivet. Set the cake pan on top.
-Place the lid on the cooker... and boil for 20 minutes and transfer to thermal base.
-The cake is ready in about an hour and a half. ..but as always... I have left it in for longer... and pulled it out hot and perfect hours later.
The round pan produces a cake... similiar to the size of a wedding cake topper.
Delicious and moist!
I have done all sorts of different cakes in it.
When you bake bread...
It only needs a ten minute boil... once the dough has risen.
The oblong loaf pan... is exactly 1/2 of one loaf of bread...
So about 25% of a standard Two loaf recipe... will fill one of those oblong loaf pans.
I'll have to report back when I try out the new cake tin!
I have tried many times to bake in my thermal cooker with no luck. Now there is hope!! There were two pan sizes to choose from, the round cake tin, and the oval bread tin. I chose the round cake tin because it looked like it would take up more space in the cooker and wouldn't allow as much air space as the oval shape. That is totally my observation and I have no clue if it's true, but I went with it :) You'll also notice the trivet that I purchased. That allows the pan to stay up out of the water so your food won't turn out mushy.
| Cute little cake pan!! |
| See how it will fit into the stainless steel cooking pan! |
| I can't wait to try this out!! |
I must also say I was disappointed when I opened the cake tin box and realized there were no instructions included. Thank goodness for the amazing Lisa at Honeyville. She explained how to use the cake tin in the cooker. Once the trivet and cake pan are in place, you only fill water up to the bottom of the tin, or else the food will not cook through and be mushy. I would have thought I had to fill the water up the the edge of the cake tin lid, but there was nothing included with the cake pan explaining how to use it or even how full to fill the pan with food. I am not sure how much cake batter or bread dough to use in the tin. It'll be a trial and error kind of experiment. I think I have some more questions for Lisa!!
*Update: Amy from Saratoga Jacks contacted me and filled me in on all the cooking instructions.
Add far as making a cake with the round cake pan.
-The round cake pan you purchased was designed to hold ONE box cake... any box of cake mix will work.
-Spray the stainless steel pot and the inside of the lid first.
-Mix the cake mix exactly as the instructions on the back of the box say... except subtract out 1/4 cup of the liquid.
-And add a tablespoon of flour.
-Pour the batter into the oiled stainless steel pan... clamp lid on.
-I put the trivet into the thermal cooking pot... and fill with water to about one cm... above the top of the trivet. Set the cake pan on top.
-Place the lid on the cooker... and boil for 20 minutes and transfer to thermal base.
-The cake is ready in about an hour and a half. ..but as always... I have left it in for longer... and pulled it out hot and perfect hours later.
The round pan produces a cake... similiar to the size of a wedding cake topper.
Delicious and moist!
I have done all sorts of different cakes in it.
When you bake bread...
It only needs a ten minute boil... once the dough has risen.
The oblong loaf pan... is exactly 1/2 of one loaf of bread...
So about 25% of a standard Two loaf recipe... will fill one of those oblong loaf pans.
I'll have to report back when I try out the new cake tin!
Thursday, June 28, 2012
Chilling With My Saratoga Jacks Thermal Cooker
I am not shy when I talk about the Saratoga Jacks Thermal cooker here on my blog. It really is a favorite kitchen appliance that I use in my daily cooking. All of my posts on the thermal cooker have been heating the food up to a boil and then slow cooking it in the cooker base. Well, yesterday I needed to take a pasta salad to a neighborhood party and guess what I used as my cooler?? Yup, my Saratoga Jacks Thermal Cooker!!
While I prepared my salad I placed my pots into the freezer. Normally if I had the time I would have had them in the fridge chilling, but I forgot to do this beforehand. They were only in the freezer about 15 minutes so I don't think it hurt the pans. I made THIS pasta salad. Then I chilled the salad in the larger pan in the fridge until we left for the party. Since my salad didn't take up all the room in the larger pot, I added some chilled mini carrots to the smaller pan and stacked them together. This way my pots will stay colder longer.
Into the fridge went the pots and I was set for the party. I can't tell you how easy it was to transport this salad too. The pans went right into the cooker base and I carried it easily to the car. I noticed all the other salads at the party with the plastic wrap and tin foil covers. I loved just opening the cooker and serving my salad from the larger pot. Plus I didn't have to search for my missing plastic wrap after the party, I just closed up the cooker and took it to my car.
There are multiple ways you can use the thermal cooker for cooling; popsicles at the pool or park, ice cream, or ice cream sandwiches, pasta and potato salads, cut up veggies and dip, greens for a salad in the larger pot and veggies in the smaller top pot (no wilting and can mix salad when ready to serve), water or sports drinks at the kids sporting events, and the list could go on and on!! I love this thermal cooker, I mean cooler :)
Click HERE to view other posts on the Saratoga Jacks Thermal cooker.
While I prepared my salad I placed my pots into the freezer. Normally if I had the time I would have had them in the fridge chilling, but I forgot to do this beforehand. They were only in the freezer about 15 minutes so I don't think it hurt the pans. I made THIS pasta salad. Then I chilled the salad in the larger pan in the fridge until we left for the party. Since my salad didn't take up all the room in the larger pot, I added some chilled mini carrots to the smaller pan and stacked them together. This way my pots will stay colder longer.
Into the fridge went the pots and I was set for the party. I can't tell you how easy it was to transport this salad too. The pans went right into the cooker base and I carried it easily to the car. I noticed all the other salads at the party with the plastic wrap and tin foil covers. I loved just opening the cooker and serving my salad from the larger pot. Plus I didn't have to search for my missing plastic wrap after the party, I just closed up the cooker and took it to my car.
There are multiple ways you can use the thermal cooker for cooling; popsicles at the pool or park, ice cream, or ice cream sandwiches, pasta and potato salads, cut up veggies and dip, greens for a salad in the larger pot and veggies in the smaller top pot (no wilting and can mix salad when ready to serve), water or sports drinks at the kids sporting events, and the list could go on and on!! I love this thermal cooker, I mean cooler :)
Click HERE to view other posts on the Saratoga Jacks Thermal cooker.
Labels:
recipes,
thermal cooker
Monday, May 14, 2012
Prepare Today Homemade- Baked Chicken in the Saratoga Jacks Thermal Cooker
Making preparedness a way of life involves a great deal of cooking for me. For every meal that I prepare I think of how it could be made without electricity. The Global Sun Oven and my Saratoga Jacks Thermal Cooker are my go-to powerless emergency cookers. I used my Sun Oven about 3 days a week last summer and I became accustomed to making our meals and bread in it, but even though I live in Utah, and we are supposedly a desert, we don't have sun every day. I need an alternative cooking source for those sunless days. I found a chicken recipe that my family absolutely loved in the Sun Oven and I decided to replicate it in my thermal cooker.
Thermal cooking works best when your pans are filled with food or water, like soups, stews, and sauces, and for this recipe I didn't want a chicken soup, I wanted baked chicken. I solved this problem of needing to fill the whole pan with food with a......
.....cereal bag!! That's right a plain old plastic insert from a cereal box. They make wonderful cooking bags for thermal cooking. They work great for the Wonderbox as well. No need to spend money on pricey steam bags. Just use something that would be thrown away and save some $$. (the plastic bags also make great fruit leather roll ups)
I started off with my free chicken (you heard me...free chicken...there was a rebate at the grocery store for $10 when you bought $10 or more of poultry) and cut each breast into fourths. The meat will cook faster in smaller pieces.
I added my spices and oil to the bag and dumped in the chicken. Give it a good massage and they're ready to go.
The chicken is ready to be placed into the boiling water.
Place the bag into the water with the edge of the bag hanging over the edge. (this would work in a pot over an open flame but watch the plastic, Volcano Stove, butane stove, etc. just boil until the chicken is done. The thermal cooker will save your fuel!) Bring the water to a boil with the lid on.
Boil for 4 minutes (for raw meat) and place into the Saratoga Jacks thermal base.
The cereal bag will fold nicely over the top of the pan lid. Close the cooker and wait about 1 hour at the earliest to open and eat. I made this at 1:38 PM and we ate it for dinner at 5:45 PM.
This picture was when I opened the cooker at 5:45. It was STEAMING hot and I needed a hot pad to raise the pan out of the base.
I drained the broth off (I know I know, I should have made mashed potatoes in the smaller Saratoga Jacks pan and made a gravy out of the juices) and served it for dinner. My kids loved it! It was moist, juicy, and fall apart tender.
Chicken Wings (or breasts, thighs, etc)
10 chicken wings (I used 3 chicken breasts)
3 T oil
3 garlic cloves
2 t chili powder
1 t garlic powder
salt and pepper to taste
Add the chicken, oil, and spices into a bag. Shake to combine. Place in baking dish and bake at 375 for 1 hour or until juices run clear.
Sun Oven Instructions
Place all ingredients into a dark enamelware pot with a lid and stir. Bake for 2 or more hours at 250 degrees or higher in the sun oven.
Saratoga Jacks or Wonderbox Directions
Place all ingredients into a cereal insert bag or an oven bag and rub until combined. Place in a pan of hot water, boil for 4 minutes, (boil longer for wonderbox @ 10 min) place in thermal cooker or wonderbox and, "cook" for 2-8 hours. When using a wonderbox you will need to check the temperature of your food beyond 6 hours to make sure it hasn't fallen below 145 degrees. If it has you need to reheat it or put it in the fridge. It is safe to eat if above 145 degrees. The Sartatoga Jacks thermal cooker will maintain a steady temperature, because of its insulation, for up to 8 hours.
Bonus Material!!!!
What to do with your pot full of hot, steaming water? You could use the water to wash dishes, wash your face, clean, make soup, or how about Hot Chocolate! I thought I was being brilliant and added some of the Morning Moo's chocolate milk powder to my hot water.
We whisked it up and my children were so excited to have some delicious chocolatey milk for dessert. That was until...they took the first swallow. I am writing this because I want to be totally honest and....the hot chocolate tasted like our chicken dinner...go ahead and laugh because we all were too!! I even added more chocolate powder and it still tasted like chicken.
But guess what??? They ALL drank it and asked for more. I was laughing that they would still drink it, but because it was chocolate they gulped it down. My son drank 4 glasses full. So lesson learned, next time I will make a chicken noodle soup out of the boiled chicken dinner water :) (or maybe the lesson learned was my kids will eat or drink anything with chocolate in it)
Thermal cooking works best when your pans are filled with food or water, like soups, stews, and sauces, and for this recipe I didn't want a chicken soup, I wanted baked chicken. I solved this problem of needing to fill the whole pan with food with a......
.....cereal bag!! That's right a plain old plastic insert from a cereal box. They make wonderful cooking bags for thermal cooking. They work great for the Wonderbox as well. No need to spend money on pricey steam bags. Just use something that would be thrown away and save some $$. (the plastic bags also make great fruit leather roll ups)
I started off with my free chicken (you heard me...free chicken...there was a rebate at the grocery store for $10 when you bought $10 or more of poultry) and cut each breast into fourths. The meat will cook faster in smaller pieces.
I added my spices and oil to the bag and dumped in the chicken. Give it a good massage and they're ready to go.
The chicken is ready to be placed into the boiling water.
Place the bag into the water with the edge of the bag hanging over the edge. (this would work in a pot over an open flame but watch the plastic, Volcano Stove, butane stove, etc. just boil until the chicken is done. The thermal cooker will save your fuel!) Bring the water to a boil with the lid on.
Boil for 4 minutes (for raw meat) and place into the Saratoga Jacks thermal base.
The cereal bag will fold nicely over the top of the pan lid. Close the cooker and wait about 1 hour at the earliest to open and eat. I made this at 1:38 PM and we ate it for dinner at 5:45 PM.
This picture was when I opened the cooker at 5:45. It was STEAMING hot and I needed a hot pad to raise the pan out of the base.
I drained the broth off (I know I know, I should have made mashed potatoes in the smaller Saratoga Jacks pan and made a gravy out of the juices) and served it for dinner. My kids loved it! It was moist, juicy, and fall apart tender.
Chicken Wings (or breasts, thighs, etc)
10 chicken wings (I used 3 chicken breasts)
3 T oil
3 garlic cloves
2 t chili powder
1 t garlic powder
salt and pepper to taste
Add the chicken, oil, and spices into a bag. Shake to combine. Place in baking dish and bake at 375 for 1 hour or until juices run clear.
Sun Oven Instructions
Place all ingredients into a dark enamelware pot with a lid and stir. Bake for 2 or more hours at 250 degrees or higher in the sun oven.
Saratoga Jacks or Wonderbox Directions
Place all ingredients into a cereal insert bag or an oven bag and rub until combined. Place in a pan of hot water, boil for 4 minutes, (boil longer for wonderbox @ 10 min) place in thermal cooker or wonderbox and, "cook" for 2-8 hours. When using a wonderbox you will need to check the temperature of your food beyond 6 hours to make sure it hasn't fallen below 145 degrees. If it has you need to reheat it or put it in the fridge. It is safe to eat if above 145 degrees. The Sartatoga Jacks thermal cooker will maintain a steady temperature, because of its insulation, for up to 8 hours.
Bonus Material!!!!
What to do with your pot full of hot, steaming water? You could use the water to wash dishes, wash your face, clean, make soup, or how about Hot Chocolate! I thought I was being brilliant and added some of the Morning Moo's chocolate milk powder to my hot water.
We whisked it up and my children were so excited to have some delicious chocolatey milk for dessert. That was until...they took the first swallow. I am writing this because I want to be totally honest and....the hot chocolate tasted like our chicken dinner...go ahead and laugh because we all were too!! I even added more chocolate powder and it still tasted like chicken.
But guess what??? They ALL drank it and asked for more. I was laughing that they would still drink it, but because it was chocolate they gulped it down. My son drank 4 glasses full. So lesson learned, next time I will make a chicken noodle soup out of the boiled chicken dinner water :) (or maybe the lesson learned was my kids will eat or drink anything with chocolate in it)
Monday, May 7, 2012
Prepare Today Homemade- Italian Herbed Chicken
Today I had one child at soccer practice, one at cheer practice, one child at scouts then football practice, and the finale was a football game. Here's the kicker....my husband is out of town and I have been up since 4:45 AM. I will be driving from 3:55 PM until 8:00 PM tonight and I knew I would be exhausted. Everything just seemed to fall on Tuesday and I needed a plan for dinner. I had heard of Amy & Jack from Saratoga Jacks Thermal Cookers taking their thermal cooker on the road and today was my chance to have "fast food" for dinner with mine. I made an Italian Chicken with Rice in my Saratoga Jacks thermal cooker (Wonderbox and Slow Cooker instructions below) and it will feed my children whenever they end up in the car tonight. Having 2 pans in the thermal cooker allows me to cook a complete meal ready-to-go when I am on-the-go.
Italian-Herbed Chicken
2-2 1/2 lbs chicken breasts, thighs,and/or legs, skinned (or home canned chicken) (if using the Saratoga Jacks thermal cooker cut up the chicken into bite sized pieces so they will cook faster)
2 C sliced fresh mushrooms (I used 2 cans of mushrooms)
1 14oz can diced tomatoes
1 can artichoke hearts, cut into bite sized pieces *see tip*
1/2 C sliced olives
3 T quick cooking tapioca (I used 3 T or more of Clear Gel to thicken the dish)
1 can chicken broth
1 T dried Italian seasoning
Rice or Pasta for serving.
*Tip* Don't drain your canned veggies and use that water instead of the broth. That will conserve your canned broth in an emergency.
Saratoga Jacks directions for cooking rice:
Saratoga Jacks Directions:
Combine all ingredients in large pot and bring to a boil for 4 minutes with the lid on. Boil water for rice in smaller pan, stir in rice, boil 2 minutes, after boiling large pot for 4 minutes place smaller rice pan on top and close in the cooker. Cook for 4-8 hours in the base without opening the lid. (If you use canned chicken you can serve dinner whenever you are ready but with raw chicken you'll want to cook at least 2 hours before serving. Use a meat thermometer test if done) If you want a thicker sauce add the clear gel until you reach desired consistency. Serve with rice or pasta.
WonderBox Directions:
In a pan that fits the amount of food you have, boil all ingredients for 10 minutes. Place in wonderbox. Cook rice or pasta to serve with it.
Slow Cooker Directions:
Combine mushrooms, tomatoes, artichoke hearts, and olives in the bottom of the slow cooker. Sprinkle with tapioca or clear gel. Place chicken on top the veggies. Combine the broth and Italian seasoning and pour over the chicken. Cook on low for 7-8 hours or on high for 3 1/2-4 hours. Serve over pasta or rice.
Now I can serve a fast and healthy dinner even if we are on the road. As Amy of Saratoga Jacks says "It's not what's for dinner, it's where is dinner tonight". Having a Saratoga Jacks Thermal Cooker gives me freedom as a mom to have home cooked meals for my children anywhere we happen to be.
| A great shelf stable recipe too! |
Italian-Herbed Chicken
2-2 1/2 lbs chicken breasts, thighs,and/or legs, skinned (or home canned chicken) (if using the Saratoga Jacks thermal cooker cut up the chicken into bite sized pieces so they will cook faster)
2 C sliced fresh mushrooms (I used 2 cans of mushrooms)
1 14oz can diced tomatoes
1 can artichoke hearts, cut into bite sized pieces *see tip*
1/2 C sliced olives
| Clear Gel for thickening. |
1 can chicken broth
1 T dried Italian seasoning
Rice or Pasta for serving.
*Tip* Don't drain your canned veggies and use that water instead of the broth. That will conserve your canned broth in an emergency.
Saratoga Jacks directions for cooking rice:
- 4 C water brought to boil with salt
- Add 2 1/2 C rice and boil 2 minutes and place in cooker.
Saratoga Jacks Directions:
Combine all ingredients in large pot and bring to a boil for 4 minutes with the lid on. Boil water for rice in smaller pan, stir in rice, boil 2 minutes, after boiling large pot for 4 minutes place smaller rice pan on top and close in the cooker. Cook for 4-8 hours in the base without opening the lid. (If you use canned chicken you can serve dinner whenever you are ready but with raw chicken you'll want to cook at least 2 hours before serving. Use a meat thermometer test if done) If you want a thicker sauce add the clear gel until you reach desired consistency. Serve with rice or pasta.
| It was good with rice, but it was really good with fettuccine. |
WonderBox Directions:
In a pan that fits the amount of food you have, boil all ingredients for 10 minutes. Place in wonderbox. Cook rice or pasta to serve with it.
Slow Cooker Directions:
Combine mushrooms, tomatoes, artichoke hearts, and olives in the bottom of the slow cooker. Sprinkle with tapioca or clear gel. Place chicken on top the veggies. Combine the broth and Italian seasoning and pour over the chicken. Cook on low for 7-8 hours or on high for 3 1/2-4 hours. Serve over pasta or rice.
| (Please ignore the crazy hair and outfits, it was a run around sports day.) |
| Can you tell which child doesn't like my food :) |
Now I can serve a fast and healthy dinner even if we are on the road. As Amy of Saratoga Jacks says "It's not what's for dinner, it's where is dinner tonight". Having a Saratoga Jacks Thermal Cooker gives me freedom as a mom to have home cooked meals for my children anywhere we happen to be.
Saturday, March 17, 2012
Muffins In A Thermal Cooker
I try really hard to make preparing a lifestyle. I usually find something to do everyday that relates to preparing. Some days it is a big project, like cooking outdoors, or sometimes something small like picking up a few items at the store. Either way I like to always try new things and find what works for my family. I have been using my Sartatoga Jacks thermal cooker and have been experimenting with new recipes. One of my goals is to be able to make bread in the thermal cooker, and it is definitely a trial and error kind of project.
One of my favorite food storage websites is myfoodstoragecookbook.com and it is where I find inspiration for cooking with a thermal cooker. Megan is the author and she uses a wonder box to cook in (click here to view more on a wonderbox) and it is the same concept as the Saratoga Jacks thermal cooker. I have been trying to cook bread in my thermal cooker for awhile now and Megan has, what I think is, divine inspiration because she finds the coolest gadgets to use in her wonder box for making bread. She made muffins using Dredger Cups from Sur La Table instead of soup cans. (that I had been using which are ok, but they get rusty really easy) A Dredger Cup, I think, is used for shaking powdered sugar, etc onto food. I just went with it, and I'm still not sure what is really is :) Click HERE to see more info on Dredger Cups. What makes these so amazing is they are stainless steel, reusable, rust-free, and fit so well into the thermal cooker.
They are only about 3 1/4" high, so pretty small, but I could fit 5 into the thermal cooker.
The lids of the Dredger Cups are a wire mesh so I put tin foil on top of the lids to keep the moisture out. They are just tall enough that the small thermal cooker pan fits right on top to fill in the dead air space. Thermal cooking only works well when the pan is full of warm food or water.
I mixed up a batch of blueberry muffins (click here for that recipe) and I have a secret that will make your muffins come out cooked and not mushy. When thermal cooking, the moisture isn't released from the food because it is all enclosed, and sometimes the food comes out mushy. The secret is to use less water in your recipe. In this recipe I used powdered shortening and powdered eggs. Normally I would add water to my recipe to reconstitute these, but I only added the 1 C of milk called for in the muffin recipe and no water for the shortening and eggs. The dough was really thick and I wasn't sure it was going to work but it did!! Every time I have tried wheat bread in my thermal cooker it has come out slightly mushy, so I was so excited to see the muffins come out fully cooked sans the mush!! You'll have to play around with your recipes but I think 1/4-1/3 C less water should work.
I sprayed the inside of the cups with cooking spray and filled them about 2/3rd's of the way full. I placed the wire mesh lids on and then covered them with foil.
Place the cups into the pan and fill with warm water to about the bottom of the Dredger Cup lid. Bring to a boil for 10 minutes!! This gets the food warm enough to cook the muffins. Place the lid on the pan while it's boiling so it gets warm too. My lid went on after the picture was taken. I stacked my thermal cooker pans (the smaller pan was filled with boiling water) placed them in the thermal cooker and "cooked" the muffins for 3-4 hours.
I opened mine up at the 3 hour mark because my dinner was ready and they were perfect!!! You may be wondering how I got muffins out of a bunch of cylinders but watch....
They come out in a loaf and....
You slice them into "muffins"!!! I cut each loaf into 4 "muffins" and my kids gobbled them up with butter and jelly. I was really was so excited that this worked! I can't wait to try wheat bread again using the less water method. This same method works in a Wonder Box as well. My trial and error with using a thermal cooker just keeps proving to myself that NOW is the time for trial and error. Even in an emergency I don't think my family would eat soggy, mushy bread and muffins, but I have figured out what works now. Don't wait any longer!!! Find a food storage project that you have been putting off and try it today!!!
One of my favorite food storage websites is myfoodstoragecookbook.com and it is where I find inspiration for cooking with a thermal cooker. Megan is the author and she uses a wonder box to cook in (click here to view more on a wonderbox) and it is the same concept as the Saratoga Jacks thermal cooker. I have been trying to cook bread in my thermal cooker for awhile now and Megan has, what I think is, divine inspiration because she finds the coolest gadgets to use in her wonder box for making bread. She made muffins using Dredger Cups from Sur La Table instead of soup cans. (that I had been using which are ok, but they get rusty really easy) A Dredger Cup, I think, is used for shaking powdered sugar, etc onto food. I just went with it, and I'm still not sure what is really is :) Click HERE to see more info on Dredger Cups. What makes these so amazing is they are stainless steel, reusable, rust-free, and fit so well into the thermal cooker.
They are only about 3 1/4" high, so pretty small, but I could fit 5 into the thermal cooker.
The lids of the Dredger Cups are a wire mesh so I put tin foil on top of the lids to keep the moisture out. They are just tall enough that the small thermal cooker pan fits right on top to fill in the dead air space. Thermal cooking only works well when the pan is full of warm food or water.
I mixed up a batch of blueberry muffins (click here for that recipe) and I have a secret that will make your muffins come out cooked and not mushy. When thermal cooking, the moisture isn't released from the food because it is all enclosed, and sometimes the food comes out mushy. The secret is to use less water in your recipe. In this recipe I used powdered shortening and powdered eggs. Normally I would add water to my recipe to reconstitute these, but I only added the 1 C of milk called for in the muffin recipe and no water for the shortening and eggs. The dough was really thick and I wasn't sure it was going to work but it did!! Every time I have tried wheat bread in my thermal cooker it has come out slightly mushy, so I was so excited to see the muffins come out fully cooked sans the mush!! You'll have to play around with your recipes but I think 1/4-1/3 C less water should work.
I sprayed the inside of the cups with cooking spray and filled them about 2/3rd's of the way full. I placed the wire mesh lids on and then covered them with foil.
Place the cups into the pan and fill with warm water to about the bottom of the Dredger Cup lid. Bring to a boil for 10 minutes!! This gets the food warm enough to cook the muffins. Place the lid on the pan while it's boiling so it gets warm too. My lid went on after the picture was taken. I stacked my thermal cooker pans (the smaller pan was filled with boiling water) placed them in the thermal cooker and "cooked" the muffins for 3-4 hours.
I opened mine up at the 3 hour mark because my dinner was ready and they were perfect!!! You may be wondering how I got muffins out of a bunch of cylinders but watch....
They come out in a loaf and....
You slice them into "muffins"!!! I cut each loaf into 4 "muffins" and my kids gobbled them up with butter and jelly. I was really was so excited that this worked! I can't wait to try wheat bread again using the less water method. This same method works in a Wonder Box as well. My trial and error with using a thermal cooker just keeps proving to myself that NOW is the time for trial and error. Even in an emergency I don't think my family would eat soggy, mushy bread and muffins, but I have figured out what works now. Don't wait any longer!!! Find a food storage project that you have been putting off and try it today!!!
Subscribe to:
Posts (Atom)