Showing posts with label varitety in food storage. Show all posts

Wednesday, May 18, 2016

Making Yogurt With Acidophilus Tablets

Print Friendly and PDFPrint Friendly
Making yogurt is a skill that will save you money and also allow you to make several other things, like cream cheese or sour cream, out of plain yogurt.  I have been making yogurt for a few years now and I have tried many different ways and have found what works and doesn't work.  I started making yogurt with regular milk from the grocery store but milk started to get expensive so I switched to using powdered milk.  For a yogurt starter I have tried regular, plain yogurt, dried starters, and even a forever starter that gets used over and over.  They all worked but my goal was to be able to make yogurt without having to use a refrigerated starter.  I do keep plain yogurt in 1/2 C measurements in the freezer, but that will still be a problem if there wasn't electricity.  My husband has always laughed at the fact that you need yogurt to make yogurt, but I think I have found a way around needing refrigeration for a starter.  One of my favorite websites is myfoodstoragecookbook.com  and that is where I learned about acidophilus three billion.


Acidophilus Three Billion is a probiotic that aids in digestion, but it is also the live cultures needed to make yogurt.  Instead of using plain yogurt with live cultures, use the acidophilus tablets instead.  (I bought mine on Amazon, but health food stores should have it too) Take note that the incubation period for the yogurt will be quite a bit longer, like 18-24 hours, before it starts to firm up.  Normally, with a plain yogurt starter, I would get the yogurt started in the morning and it would be setting up in the fridge by dinner time.  I made yogurt with the acidophilus and started incubating at 9am and I let it sit until about 10am the next day.  It wasn't bitter, like yogurt can get, it just took longer to set up.  I also made the yogurt in my Saratoga Jacks Thermal Cooker and that was a great option if I didn't have electricity.   I usually use my yogurt maker, and I'll have to try my next batch with my tablets to see if the yogurt comes out any differently.  


This is how I make yogurt.  You will notice that I don't heat up my milk and then let it cool. If you are using powdered milk you can skip that step.  If you use regular milk from the grocery store you will need to heat up your milk to 180 degrees and then let it cool to 100-110 degrees before adding your starter.  Don't let it cool to under 100 degrees or the starter won't "start".  It will stay in kind of a hibernation state.


Start by putting 3 3/4 C water and 1 C powdered milk into a blender.  Blend until combined.  Allow a few moments for the frothy milk to settle to the top.  You can scoop it off at this point and discard.  I add 1/3 C sugar and 1 T vanilla flavoring to my yogurt unless I am planning on making sour cream with it.  My children really like a little sweetness and flavor to their yogurt. I used to give them honey to mix in but the yogurt would get runny and they wouldn't eat it.  If you really don't care to use the sugar you can try a sugar substitute.  


Pill Crusher that I bought on amazon.com.


Using a pill crusher, crush 3 acidophilus tablets and add to a little of the blended milk.  Add it back to the blender and just stir to combine.  


Pour the milk into a clean, warm quart jar.  This recipe makes enough yogurt for one quart.  (I fill my mason jar with hot water while I make up the yogurt.)


There are several ways to incubate your yogurt but I decided to try my Saratoga Jacks Thermal Cooker.  If you don't have one try a small cooler or wonderbox.  Just make sure to have little or no air space around the jar.  I filled my cooker with the hottest water I could get out of my faucet, which was around 125 degrees.  Anything hotter will kill your starter.  After 8 hours I did switch out my water for hot water again.  The yogurt won't set up if it is too cool either.  Try to keep it above 110 degrees.  Don't let all of the temperature info scare you away from making yogurt.  It really isn't as hard as it may seem.  


Here is my yogurt after about 24 hours of incubation.  It is now in the fridge cooling off.  I tasted it and it was smooth, creamy, and just sweet enough.


Powdered Milk Yogurt Recipe
3 3/4 C warm tap water
1 C non-instant powdered milk (milk from the cannery)
2-4 T plain yogurt with active cultures OR 3 Acidophilus tablets, crushed
1/3 C sugar
1 T vanilla


Combine the water and powdered milk in a blender or use an emulsion blender.  Scoop off the foam.  Add the sugar and vanilla and blend.  Add the starter to a little of the milk from the blender and stir to combine, then add back to blended milk.  Use a spoon and stir gently to combine.  Pour into a warmed quart mason jar and incubate.  Wrap tightly in towels and place in a cooler or use a thermal cooker.  Fill the thermal cooker with hot tap water and place mason jar inside.  If using a yogurt starter your yogurt will be ready after about 8 hours.  Place in fridge and allow to firm up.  The thermal cooker can take up to 24 hours.  I checked it about every 8 hours.  


I filled my jars with warm water to heat them up.


Now you can have yogurt anytime, even in an emergency.  The cooling of the yogurt after incubation could be done with a cooler that has been buried under ground (with the lid open at the top) or in cold storage, but that is a whole other post :)


Click HERE to view another post on how I made yogurt in my yogurt maker and even how I made yogurt cream cheese :)

Saturday, May 16, 2015

Self-Reliant Saturday-- Food Storage Basics

Print Friendly and PDFPrint Friendly
Basic Storage is the foundation of any good food storage program. It is composed of life-sustaining foods that store well for long periods of time. 


While shopping at a local thrift store I found a really cool preparedness book. 

Written in 1969 it was a jewel of a find. While it doesn't have all the latest information on food storage it did have over 100 recipes that ONLY used 4 basic foods; wheat, powdered milk, honey and salt.  The whole concept of this book is that by storing only the basics you would be able to stay alive and survive in an emergency.  The author made meat wheat and all forms of gluten, sprouted wheat, candy, cookies, crackers, cereal, cottage cheese, yogurt, etc, and even had a seven day meal plan.  I'll have to read the whole book and do a proper review of it later, but it got me thinking of the basics in any food storage plan.  

The LDS Church does recommend that we store the basics found in the book above and now I know why.  There is so much that can be done with those four foods. I found a chart in my files, and I do not know where I got it from, of the amounts needed for food storage basic supplies.  This includes a more well-rounded meal plan than just wheat, powdered milk, honey, and salt.  Take a look and see where you could maybe fill in the gaps in your storage.  If you bought the amounts listed below once a month, for 12 months, you would have a year supply for one person.  Multiply the amounts by the number of people in your family to have food storage for every member of your family. 

One Month Supply
Based on a suggested amount, a month's supply for one person would consist of the following:
(the amounts are based on a 2300 calorie diet)

Grains (wheat, rice, oats, pasta etc)   25 lbs.
Powdered Milk   6.25 lbs.
Sugar or honey  5 lbs.
Salt  1/4 box
Fats & Oils  1 2/3rd lbs.
Legumes  5 lbs.   

Estimate 1 gallon of water minimum per day/per person

Purchasing in cans would be:
(1 Case of 6 #10 cans)
1 can wheat
1 can rice
1 can rolled oats or macaroni
1 can popcorn 
1 can non-instant dry milk
1 can dry beans 

PLUS:
5lb bag flour
4-5 lb bag sugar
26oz box salt
32oz bottle oil

One Month Supply of Shelf Stable Foods
Based on the MINIMUM of 1600 calories for one adult
18 oz. box oatmeal
1 lb rice
20 oz pasta 
5 lb flour
1 lb popcorn

34 cans vegetables (or freeze-dried equivalent)
26 cans fruit (or freeze-dried equivalent)

2 lb Velveeta (or freeze-dried cheese equivalent)
4 cans evaporated milk (12oz)
3.2 lbs powdered milk 

1 jar peanut butter (18oz)
4 cans tuna
4 cans chicken
4 cans ham 
8 cans cooked beans

PLUS:  oil-shortening-nuts-sugar-syrup-jam-molasses-salt

NOTE:  For a 2400 calorie diet add 1 more box of oatmeal, 1 lbs of rice, 40 oz pasta, 1 lb popcorn, 17 cans of veggies, 8 cans fruit, 1 can chicken, 1 can ham, and 5 cans beans

When the numbers get broken down into monthly amounts it seems a little easier to buy food for a food storage plan.  Don't get frustrated...please just start small and take it a step at a time.  
(watch for a book review this week of  "Passport To Survival" that I found at the thrift store)  

Thursday, November 13, 2014

Post Disaster Meals - No Cooking Required!

Print Friendly and PDFPrint Friendly
*This is a a re-post from Oct. 2012

{While talking to a neighbor last night this post came to mind and I thought it would be a good reminder for everyone. We were discussing what we would eat in the days immediately following a disaster.  Even those of us who like to eat fresh food most of the time, the hours and days after a disaster will require a different approach to eating.  The concept of having at least three days worth of food will go right along side your 72-hour kits.}

Post Disaster Meals--No Cooking Required! 

I read a great post over at Homestead Revival and it got me thinking about the minutes, hours, and first days after a disaster.  What would I be doing?  What would my family be eating, drinking, sleeping on, etc?  Amy, from Homestead Revival, described a situation just like Hurricane Katrina and the aftermath that ensued.  I was inspired by her words and her challenge to come up with enough meals for 3 days that required NO cooking.  This is definitely a challenge!  I do  have ways to cook without power, but in the hours following a disaster I don't know if I will be able to get to my butane stove, and have the sense to even want to think about cooking a meal.  

The first meal that Amy put together was tuna, crackers, a small container of mayo, pickle relish, canned fruit, and small bags of trail mix.  She keeps this in a Rubbermaid type container and has it labeled.  Everything required for the meal would be contained in the box, even a can opener, and there is no cooking needed.  Amy then challenged her readers to come up with their own meals to add to a disaster kit.  I sat and thought what could I possibly have on hand for breakfast, lunch, and, dinner without cooking.  Here is what I came up with......

Breakfast would include:
  • Cereal
  • Shelf-stable milk
  • bowls and spoons


 Lunch  #1 would include:
  • Tuna
  • Saltine crackers
  • Mayo
  • Pineapple (for in the sandwich or a side fruit)
  • Chex Mix


Lunch #2 would include:
  • Peanut butter
  • Jelly
  • Saltine Crackers
  • Oranges


Lunch or Dinner idea:
  •  Soup (different kinds for picky family eaters)
  • Saltine Crackers
  • Spoons & bowls
  • Pears
The soup wouldn't be warm, but it is edible.  


 Dinner would include:
  • Taco shells
  • Black beans
  • Olives
  • Salsa
  • Oranges
  • And I forgot the utensils in this pic :)


Now I need to put all this food into a water safe container with a variety of crackers, more silverware, napkins, and utensils.  I added some peanut butter and crackers at the top of the picture for a snack.  I might just add a few pieces of Halloween candy to keep our sweet tooth happy too!

And don't forget a......


What meal ideas would work for your family??  This is only the beginning, I will have to ponder this subject some more and see what else would work for us!  This idea will supplement our 72-hour kits nicely and having it all in one bin will allow me to rotate it easier, and I know that all our food is in one place.   

Monday, August 4, 2014

Feast or Famine?

Print Friendly and PDFPrint Friendly


Feast or Famine?  Which are you choosing in times of distress or emergency?  I know which one I choose!  

In the LDS church we have been counseled for many, many years to have a one year supply of food and supplies on hand for rough times ahead.  But for so many, a year supply of everything we eat and use on a daily basis is pretty much impossible.  I think we often overlook the fact that the one year supply foods we are counseled to have are meant to be survival foods, foods that will keep us alive in a time of emergency.  We are not to have a year supply of every single food and non-food necessity that we use on a daily basis.  Ingredients such as wheat, oats, rice, beans, powdered milk, sugar/honey, etc. are considered long-term (25-30 years in #10 cans) supply foods. They will keep you fed but they will not fatten you up.  Think of a one year supply as survival food, not the pop tarts the kids like for breakfast. Your 3-month supply will be the normal foods that you use on a regular basis. 

What recipes could you come up with, using only the basic long-term ingredients?  It won't be fancy, but it would keep you alive!

If you read the information in the link below you'll notice that the list of foods for long-term storage come from the grain category. Remember to store the long-term grains your family will eat. But also think of alternative ways to use items that are nutritious but maybe your family doesn't care for.  If your family doesn't like cooked beans, store dried beans and grind them into a bean flour and add them into baked goods.  It will add fiber and protein to breads and other baked goods.  Take stock TODAY and see where you could add a little more.  And learn to use these ingredients, don't store them away for 30 years.  I can only beg for so long for you to get your food storage :)  


Click HERE to read through the very informative booklet put out by the Utah State University Extension services called Cooking With Food Storage Ingredients.  It's full of great information and recipes using basic long-term food storage.

Friday, June 13, 2014

Chilling Food Without Electricity- The Zeer Pot

Print Friendly and PDFPrint Friendly


I just received my Every Needful Thing monthly newsletter, from the Global Sun Oven company, and this article really caught my interest.  Chilling Food Without Electricity by using a Zeer Pot.  A Zer Pot is a grouping of terra cotta pots and wet sand stacked together, and used to keep produce chilled.  It can help produce stay fresh, and edible, for up to 20 days longer than without a fridge.

http://www.sunoven.com/wp-content/uploads/2014/06/zeer-pot-diagram.png
Zeer Pot from Prepare Every Needful Thing

Click HERE to read the full article on how the Zeer Pot is made and why from the Global Sun Oven newsletter....Every Needful Thing.


Click HERE to sign up to receive the newsletter.  It's free and has so much information on preparedness.

And Click HERE for even more information from 4dtraveler.net. This link has great info on how much it cost to build a zeer pot and where to buy the materials. 

Tuesday, May 14, 2013

"Soup In A Bag" Review

Print Friendly and PDFPrint Friendly
One of the benefits of having a blog is meeting new friends over the internet in the blogoshpere.  Megan, from My Food Storage Cookbook, is one of my food storage blog friends.  The reason her website caught my eye was her amazing food storage recipe organization.  Her recipes are organized into several catagories, cross referenced, color coded, so at any given time she knows what recipes her family eats and what she needs to shop for. If there was an emergency and she had no power, Megan can look at her recipe book and can see exactly which recipes are for a Wonder Box, or cook top, etc. It really is a great system for rotating and using your food storage!!  Plus, she shows you how to make your own recipe book with instructions and videos!  She is also truly inspired when it comes to finding new ways to prepare and cook every day food by using your food storage and shelf stable ingredients.  I have learned so much from her website. Take a look at My Food Storage Cookbook and you'll see why I was so impressed with her organization and recipes. 


Megan had a giveaway for the book "Soup In A Bag" and I was lucky enough to win a copy in return for reviewing a few recipes from the book. The concept of "Soup In A Bag" is a cookbook collection of soup recipes that use all dehydrated and shelf stable ingredients that can be stored together, in a bag or jar, to have on hand for food storage emergencies, busy nights, etc.  I selected a few recipes, spent one day dehydrating ingredients for the different soups, another afternoon making up the recipes and sealing the soups in mason jars using my Foodsaver. I made four different soups from the book and my family let me know which one was their favorite one.  

Check out my review HERE and watch Megan's website for reviews from the other giveaway winners all week.   

Tuesday, April 16, 2013

Using My Food Storage: Soup In A Bag (Jar)

Print Friendly and PDFPrint Friendly
Today I ended up with several uninterrupted hours and I found the perfect project to tackle. I recently won a giveaway on Megan's blog, Myfoodstoragecookbook.com, and I received the book Soup In A Bag.  I needed to review a few of the soups and in my few uninterrupted hours I made several jars filled with dehydrated and freeze-dried foods.  When I reconstitute them I will have almost instant soups.  I made them in an assembly line type of process and it really helped that I could get out all of the ingredients, make the jarred meals, seal them, and get them put away, without children interruptions.  I love to look at the jars all finished and ready for a busy night when I can pull out a jar, heat up some water and have dinner ready in minutes. 
 
 One of the recipes called for dehydrated rice and tomatoes and I needed to dehydrate them before I could make jarred soup mix with them, but I had all the other ingredients to make Carrot Yam and Potato Cheese soup mix.  I sealed the jars with my foodsaver and they are good on the shelf for at least a year.  

This is a great book if you want to make your own Soups In A Bag or jar.  The author uses mylar bags and jars to preserve her soups, but you can choose which way works best for you. Find the book HERE


Monday, October 29, 2012

Emergency Food Storage In A Nutshell- A Book Review

Print Friendly and PDFPrint Friendly
I am truly blessed to live near the Honeyville Grain store.  They have so many different classes and I get to meet so many people in the food storage world.  Last week I was able to attend a class taught by Leslie Probert who co-authored "Emergency Food Storage In A Nutshell".  Besides being a very entertaining speaker she makes cooking with your food storage sound so simple.  Simple is her favorite word when it comes to using your food storage.  So I was totally on board when she said she had over 400 simple recipes in her cookbook that used all food storage, shelf stable, ingredients.

 In the cookbook Leslie compares preparing to a squirrel's activity of preparing for winterSquirrels are prepared for each season and we can learn from their persistence. Leslie and Lisa start off their book with planning and gathering your food storage.  They even have several pages that you can use to inventory your food storage, and then several pages where you can write down recipes for each meal.  I was impressed with the organization ideas and explanations on how to gather food storage.  If you are just starting out and need a plan, this may be the book for you!  

The cookbook portion of the book has recipes divided into sections.  The first section are recipes using only stored foods, like wheat, oats, etc.  There is even a section on mixes and recipes that use the mixes.  I made the "Fabulous Cornbread" the other night for dinner and it was delicious!  It was moist and had just enough sweetness to it, plus it didn't crumble when we cut it.  The other chapters include breads, salads soups, main dishes, side dishes, desserts, cookies, and drinks.  I can't wait to make dinner this week. I am going to try a few recipes and because they are so simple to put together I know they will work perfectly for our busy nights.  Tonight I am going to make the Black Bean Ragout over Polenta and Peanut Butter Muffins.  The ragout sounds really fancy, but the instructions are only four lines long!!

  Update after dinner:
Mixed reviews on the black bean ragout-mostly good though.  It needed more spices. Surprisingly my husband loved it!

Peanut Butter Muffins were a hit!!!

Leslie says "With a pool of good recipes, if you eat food storage meals 2 days a week...you can rotate a whole year's supply of food in just 3 1/2 years!!"  And with how yummy her recipes sound, I can image eating complete food storage meals more than 2 days a week. I highly recommend this book to anyone who has bags of wheat, oats, rice, and beans and has no idea what to do with them, or you just want some new ideas to use your food storage.  I am always on the lookout for new recipes and this book has tons of them! 

Monday, September 3, 2012

Prepare Today Homemade- Muffin Tin Mexican Bites

Print Friendly and PDFPrint Friendly
I think I may have a new obsession....making food in muffin tins. I started off making school lunch recipes using a muffin tin for portion sizes, but I now love to use my muffin tin for dinners too.  For some reason my family loves the mini version of whatever I am making versus the same dish as a casserole. 

I found the recipe for Mini Mexican Pizzas on Pinterest, of course, and I have been so excited to make it for several days now.  It was one of the easiest meals that I have made in quite a while now and it will be inserted into our menu rotation!  The kids loved it and I loved that it was vegetarian.  If you don't know, I don't eat red meat or poultry but I do cook chicken for my family.  I have some kids that like meat and others that don't.  This recipe called for ground beef so I substituted TVP (textured vegetable protein) in this recipe.  I have to say that TVP has come a long way since I started eating it in the 90's.  I used to buy Morning Star Farms products quite a bit, but now I use #10 cans from Honeyville instead.  It saves me money and I think they taste better.  The beef flavored bits were what took me to Honeyville a few years ago and I have been hooked ever since. They now have several "flavors" that make adding them to meals so easy! Click HERE to see all the tvp products that Honeyville sells.  (I don't get paid for saying this.  I like to promote products that I feel are amazing and that I use regularly)


 To make this recipe pantry friendly you could make your tortillas from scratch.  I buy tortillas when they are on sale and keep several packages in the freezer.  BUT I do know how to make tortillas from scratch.  Don't forget that you need to know how to make the foods you normally buy from the store!!  I did use fresh cheese in this recipe, but the freeze dried cheese from Honeyville would also work perfectly in this recipe.  


This is the taco flavored TVP that I used for our mini pizzas.  It couldn't be easier to reconstitute.  One part hot water to one part TVP.  I needed 1 cup of meat for the recipe so I used 1/2 cup TVP and 1/2 cup hot water and let it sit for a few minutes. I then added the rest of the ingredients and stirred.  

 Muffin Tin Mexican Bites
3-4 tortillas cut into 12 circles
1 C meat (1/2 C Taco flavored TVP + 1/2 C Hot water)
1/2 C salsa
2 t taco seasoning (if using taco flavored TVP omit this)
1/2 C black beans
1/2 C cheese (I used sharp cheddar and Monterrey jack) + cheese for the top
Sliced olives for the top of each muffin

toppings:  olives, lettuce, sour cream, guacamole, tomatoes

Preheat the oven to 425°.  Brown your meat with the taco seasoning or reconstitute the TVP in hot water.  Add the remaining ingredients and stir until combined.  Cut 12 circles from the tortillas and press into muffin tin. (don't throw away the extra tortillas pieces-see bonus material below)  I baked my tortillas for 5 minutes before adding my mixture, I didn't want a soggy crust.  After the tortillas bake add about 1/8 C mixture into each muffin cup.  Top with a few sliced olives and a sprinkle of cheese.  Bake at 425° for 12-15 minutes or until cheese is melted.  Serve with the toppings listed above. 

Sorry about the pink plate. It was the only pizza still intact when I needed to take the picture.  The rest were eaten!
For a twist on this my friend made these with wonton wrappers instead of tortillas and she said they were delicious!  They were a total hit with my family and they will be a part of our menu from now on.  My child that hates most food ate 3 of them!! I am going to make several batches of these next time and freeze them for lunches or snacks!

Bonus Material!!!
 I couldn't throw away all the scraps after cutting out my tortillas for this dinner so I made a dessert out of them.


Cinnamon Sugar Tortilla Bites
Preheat oven to 400°.  Spread out the tortilla scraps into a single layer in a pie tin or cookie sheet.  Spray with cooking spray and sprinkle with cinnamon and sugar.  We use Chef Tess' Wise Woman of The East for the cinnamon, available at the Honeyville retail stores.  Bake them for only about 5 minutes, or until the edges are starting to turn brown.  I knew they were a hit when I had to pull my 5 kids away from the pie tins.  I should have taken a picture.  They looked like it was feeding time at the zoo! :)

Sunday, July 15, 2012

Dehydrating Fruit

Print Friendly and PDFPrint Friendly
I was so inspired by the dehydrating class that I took at Honeyville that I brought out my dehydrator and filled it up with colorful fruit.  I found  a great grocery store (Rancho Market) that has unbelievable prices on fruits and veggies, and I bought a cart full just to dehydrate. 

When purchasing food to dehydrate you may want to calculate how much time, money, and effort that it will take to get a finished product.  Tomatoes and potatoes are two foods that I think are easier to purchase already dehydrated.  But there are many other foods that are simple to dehydrate.  And if you can get free fruit from your own yard or a friendly neighbor, even better!!

Today I dehydrated oranges, orange zest, limes, lime zest, kiwi, peaches, and Mexican papaya.

This is a Mexican papaya and it was so sweet and juicy.  My kids were so fascinated by the seeds in this fruit.  I can't wait to taste it when it is done!

 On this tray I have the papaya and kiwi fruit.  It is so colorful and pretty.  These fruits also look so pretty sealed in mason jars and lined up on a shelf.

One of the great tips that I learned at the Honeyville class was to dehydrate your orange, lemon, and lime peels.  Then you will always have zest when you need it.  I used my vegetable peeler and it peels off just the colored part of the fruit and not any of the bitter white parts. 

 I sliced limes and oranges on this tray and I can use them to make limeade or an orange drink later.  Just reconstitute them in a pitcher of cold water, add sugar if you want and stir.  We will also eat the oranges and maybe make some into a powder.  We'll see when they are done.  Dehydrated oranges (and pineapple) are so delicious!

 Lastly I cut up some peaches to dehydrate.  My house smells so good right now.  It finally cooled off here in Utah (around 80° instead of 105°) so I felt OK in turning on the dehydrator.  I could have done it outside, but I like to keep my eye on it and I know I would forget about it outside.  

I cut all my fruit about 1/4" thick (well as close as I could with slippery fruit) and they will probably take 6-12 hours to dry.  I will check them after about 4 hours and rotate any trays.  

Here are all my trays ready to go.  I warmed up the dehydrator as I was cutting my fruit. It took me about 35 minutes to have all the fruit cut up and in the dehydrator.  So it wasn't an all day kind of project, like canning, and I felt so productive when it was finished :)

**Just a note about some fruits turning brown while they dry.  Fruits like bananas will need to be sprayed with lemon juice (straight from the bottle, not diluted) before drying. This will keep them from turning black.  Don't worry if you don't do this, the food is still good, just not as appealing. 

Dehydrating is such a great way to have fruits in your long term storage.  If you use oxygen packs or a foodsaver the fruit will last much longer on your shelf.  Fresh produce will be the first food group to disappear in a disaster/emergency.  If you have your shelves lined with dehydrated fruit you will peace of mind. 

Saturday, April 21, 2012

Sprouting

Print Friendly and PDFPrint Friendly
"Sprouts provide up to 600 percent more vitamins than the full grown plant."  Researchers at the University of Ulster, UK have found. 

Let's say you have been living solely on your food storage for 3 months now and your supplies are dwindling.  If summer has come and gone there isn't time to plant a garden, and your family is going to need vegetables.  I know pirates are quite popular but many of them died of scurvy and I personally don't want to have that in common with them.  With limited options in a survival scenario, your solution is SPROUTING.  When a tiny little seed/grain, with all of its necessary vitamins and nutrients for growing packed inside, is sprouted it becomes a powerful super food!!  


"Sprouts are cheap, easily accessible and an unpolluted source of vitamin C, some protein, traces elements, and B Group vitamins. They are also a true organic food, if they are grown on your very own windowsill, without chemicals."


Sprouting could literally be a life saver.  I grow sprouts because they are so nutritious and also because my children eat them and don't know they are eating veggies.  


I buy sprouting seeds from Honeyville Grain, but the container above I bought at the Self Reliance Expo last year.  


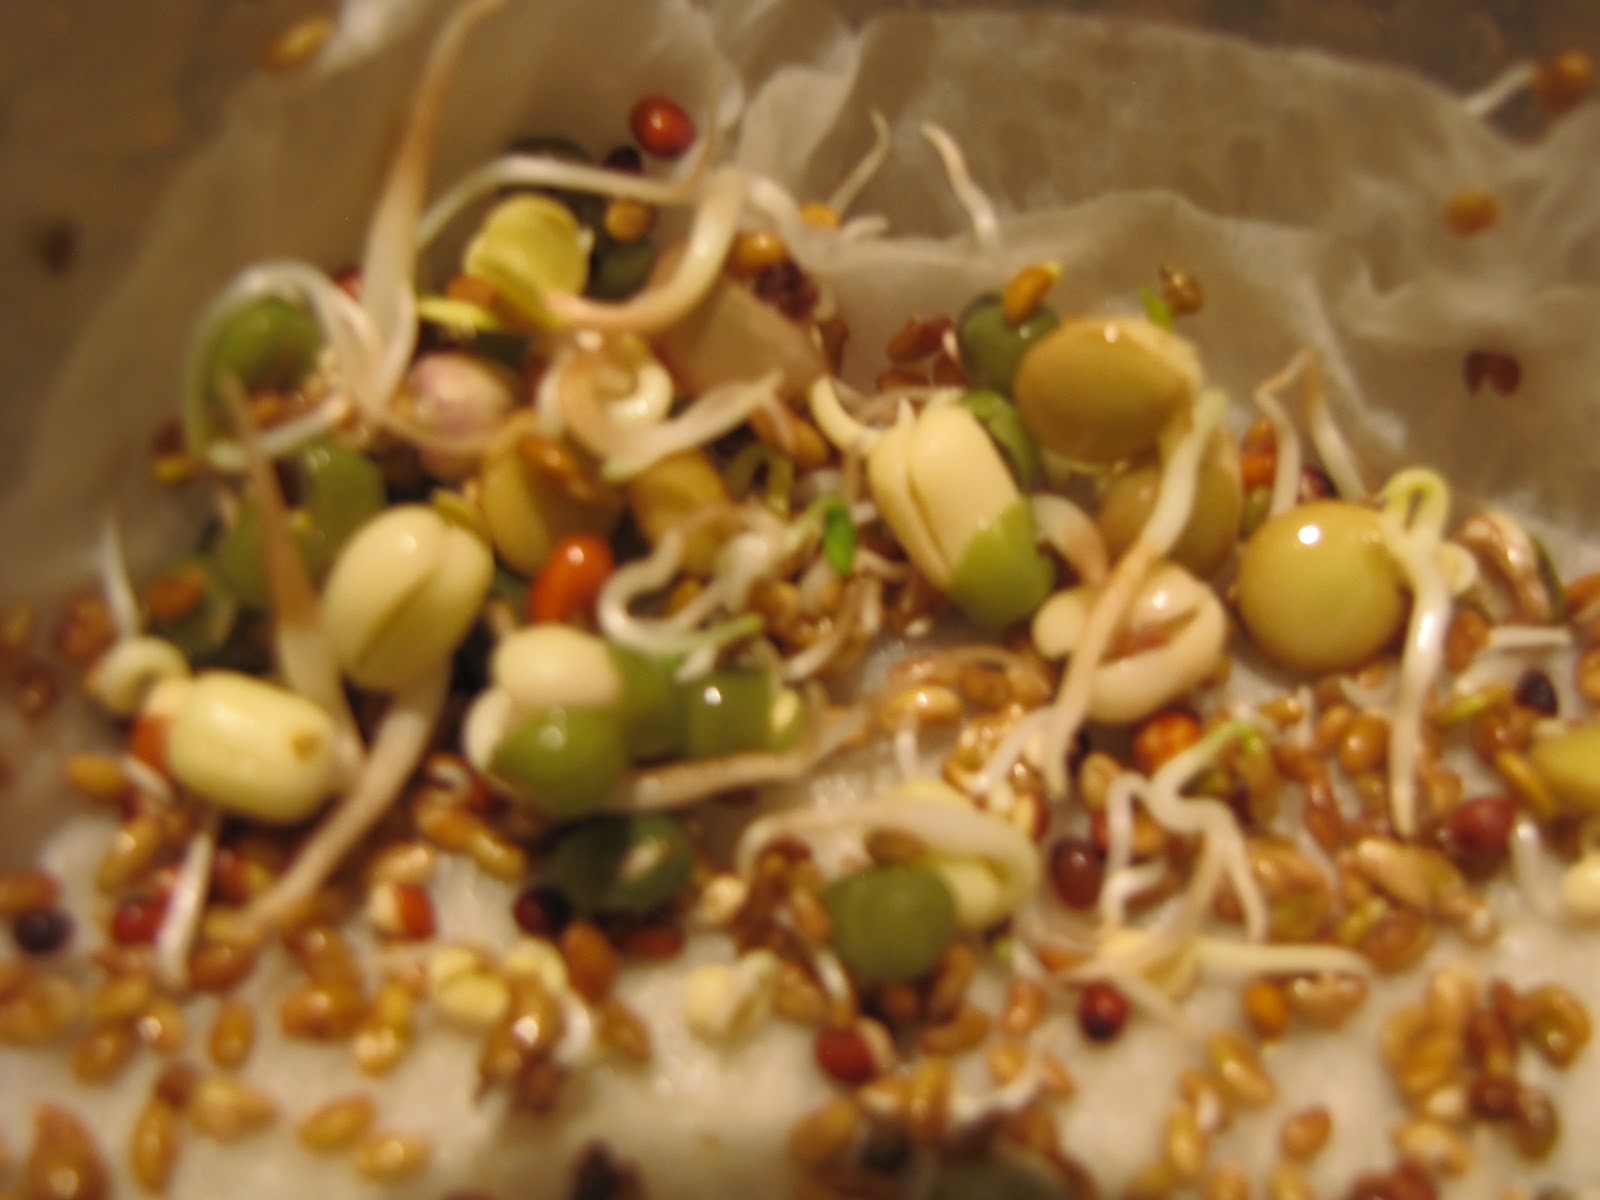
They also come in smaller bags.  You don't need to buy a special bag of sprouting seeds.  There are many seeds and grains that can be sprouted.  Wheat, garbanzo, alfalfa, mung beans, barley, lentils, whole peas, and many more are all able to be sprouted.  Experiment with different seeds and grains and find which ones you prefer.  I really like the salad mix (above) because it tastes like those yummy garden fresh peas.  They just taste fresh and healthy. 


These are the two contraptions that I use to sprout.  The mason jar on the left is quite easy to use and the least expensive (under $5 for the lid).  Put in a tablespoon of sprouts, soak over night (the seeds are soaking in the picture), and just rinse twice a day until sprouts form, about 3-5 days. It can also be done without the plastic straining lid.  I started sprouting with a canning jar, cheese cloth and the canning lid ring.  The other option is a sprouter.  I really love the Victorio Seed Sprouter, on the right, because it pretty much does all the work for you.  You pour the sprouts on each layer (about 1/2-1 T), add 2 C of water twice a day, and it soaks, drains, and grows the sprouts.  There is no need for soaking and rinsing and draining.  With 3 different levels you can stagger your growing or grow different kinds of seed in each one. Remember that sprouts don't like the sunlight.  You can put them in the sun once sprouted to turn them green but they need a warm dark spot to grow.  It really is just that simple!!


We eat our sprouts fresh out of the sprouters, but they need to go in the fridge once they are big enough to eat. (when the sprout is the length of the seed you can eat it).  They should stay good for about 1 week in the fridge.  Mine never last that long because they get eaten.  Sprouts are great for salads, sandwiches, soups, muffins, breads, dinner casseroles, etc, etc.  They can be added to anything.  


If you and your family needed quick nutrition in an emergency, having sprouting seeds is the answer.  Gardening has its place but it can take months.  Sprouting takes only days and allows you to grow your own food storage.  Storing sprouting seeds takes up little space and they last for many years, in the right conditions (dark, cool environment), and are relatively inexpensive.  I don't think I will ever have enough storage space to store the recommended amount of wheat for 7 people, but I can store a years worth of sprouting seeds.  Think of how many sprouts you'll get out of 1lb of wheat, a lot!!  One tablespoon of wheat will create one full layer sprouts in the Victorio Sprouter.  That's quite the bang for your buck!!  This is one area of preparedness that everyone can do and should do today.  The health benefits alone are why everyone should be sprouting.

Saturday, March 3, 2012

Shelf Stable Cheese

Print Friendly and PDFPrint Friendly
Last week I did a post on how to store cottage cheese, sour cream, and yogurt for much longer than the expiration date tells you. Click HERE to view that post.  
My Tillamook cheese in my storage room.


I also promised I would write a post about keeping cheese on your pantry shelf.  I learned this trick in a food storage class at Honeyville Grain last July, in the same class that I learned about the cottage cheese.  
In July my grocery store had these Tillamook cheese blocks on sale for $2.99  (with a $1.00 coupon) and I bought about 10 of them.  I was too chicken to set them all on the pantry shelf, so I started with only this one block.  You'll see in the first picture that I kept the cheese in an old baby wipes box.  I did this to keep any unwanted guests from partaking of my cheese.  (I have never, nor do I now have any kind of bug or rodent in my storage room, knock on wood)  I have read on other blogs that around 7 months the cheese gets very sharp so I thought that 8 months would be a good time to try my cheese out.  
The cheese was still a hard block of cheese and there was a little bit of liquid in the plastic.  It smelled kind of sharp but looked and felt just like a regular block of cheese.  
 You can see the liquid that separated from the cheese in this picture.  The cheese cut just fine and would shred just as well.  I ate a bite and it was totally edible!!  It wasn't too sharp and it would make a really good grilled cheese sandwich or a great topping on top of a casserole.  I will definitely be using the cheese in my meals this week.  I was surprised that it wasn't too sharp and that it wasn't moldy :)  I am sold on keeping Tillamook cheese on my pantry shelf.  Remember that you can't do this with any other brand of cheese, it isn't packaged the right way to do this.  This is another great way to save money by purchasing an item at its lowest price and being able to store it for a long time without refrigeration.  Most cheese has a long expiration date, but this would help in a time of little or no refrigeration.  If I was smart, I would buy smaller packages of cheese so we wouldn't have to use 2lbs of cheese at one time and not have to waste all that cheese without a refrigerator.  I may be a food storage nerd, but I love trying out these food storage tricks and it is so fun to find out the results!!

Saturday, January 28, 2012

Frugal Food Tip- Leftover Reincarnation

Print Friendly and PDFPrint Friendly
Don't waste money by throwing away your food!!
Last week I talked about using all of your produce so it doesn't go to waste. This week is all about using your leftovers in a new way. Honestly I am really not a fan of leftovers.  They just seem to lose that fresh, just-prepared look and taste, but if you use them in a new dish they won't feel like leftovers!
  
Leftovers--Made Over (some ideas from allyou.com)

RICE:  Warm rice with cinnamon, brown sugar, milk and raisins for a delicious breakfast or make into rice pudding.  Adding a little rice to soups/stews will add texture and volume to extend your soup farther. Fried rice is always a favorite in my house. 


JARRED PASTA SAUCE:  When only a few spoonfuls are left heat up and use as a dipping sauce for grilled cheese.

NOODLES:  Toss extra noodles (even with sauce) into a frittata.


GROUND MEAT:  Saute with onions and garlic, add it to jarred tomato sauce and try as a pizza topping.  Or wrap well, label and freeze.  When you've saved up to 1lb make meatballs or meat loaf.  

POTATOES:  Stir mashed potatoes into soup to add body; chop boiled or roasted spuds and saute for a breakfast hash.  Make potato pancakes and fry in a little oil for a yummy side dish.  

VEGETABLES:  Use the extra veggies and turn into leftover soup.  Keep leftover veggies in the freezer until you have enough for a meal. A pot pie is another easy dinner that will use up extra veggies. I keep my veggies in the freezer and then dehydrate them and seal them in a mason jar to save for another meal.

MEATS:  Soups, stews, sandwiches, omelets, casseroles, stir fry, enchiladas, toss into spaghetti sauce, tacos, lasagna, etc.

BREAD:  Store ends in the freezer to use as bread crumbs.  Croutons, toast, and french toast will use up those last few dry bread slices too.

Think outside of the box to save time and money.  Take advantage of leftovers and stop tossing away your food...and money!!
Related Posts Plugin for WordPress, Blogger...