Showing posts with label baking supplies. Show all posts

Tuesday, December 1, 2015

Baking Items in Your Food Storage & Our Favorite Hot Chocolate Recipe!

Print Friendly and PDFPrint Friendly

In November I love to stock up on baking supplies because they go on sale for Thanksgiving. This will continue throughout December so watch the grocery stores for great deals on all of the baking ingredients and spices that you use.  Once you have your food storage basics of wheat, water, beans and rice, there is not much you can do with those items without adding spices and leavening ingredients. Spices tend to sell for a great price point this time of year.  Now is a perfect time to take stock of the spices you have in your cupboard and shop for the ones you are running low on. 
As you purchase your baking items you'll need to rotate them into your pantry at home. Keep a sharpie close by and when you bring your groceries in your house mark the date and place them behind the older item in your cupboard. (remember FIFO- first in first out) That way when you do need to see the expiration date, it will be easy to see and you won't have to search for the teeny, tiny date printed on the food. 
Another way to save money on baking supplies is to be able to tell when their life span has expired. There are several ways to test leavening agents to see if they still work.
Yeast: Add a spoonful in warm water along with a pinch of sugar. It should bubble in 10 minutes. Store yeast in the freezer for indefinite storage. I haven't had yeast go bad since doing this. I use instant yeast and I just add it straight from the freezer to my recipes and it works great.
Baking Powder: Add a pinch in warm water and stir. It should bubble immediately.
Baking Soda: Add a pinch to vinegar or lemon juice and it should bubble immediately. Store baking soda for cooking as well as cleaning.
Other items to store:
  • Another baking item that I keep on hand is Cocoa powder. It has an indefinite shelf life!! 
  • During the week I want you to pay attention to the Spices that you use for cooking. Maybe even jot them down. Could you go a whole year without purchasing more? As bigger sales come upon us in the next couple of weeks look for the spices that you use and buy at least one extra. I know a lot of basic items seem palatable when sprinkled with the right spice.
  • Did you know that you can substitute Unflavored Gelatin (Knox brand) for eggs when you are baking? (1 oz of unflavored gelatin=12 t of gelatin=12 "eggs") To use it in baking use 1t of gelatin + 3 T cold water+2 T hot water=1 "egg".  I store powdered eggs in #10 cans. I love them because they are pasteurized and you can lick the batter without risking salmonella poisoning. You just add the powder egg to your dry ingredients and then the water to your liquids. I save my real eggs for boiled and scrambled dishes.
Along with colder weather and the holidays, my children LOVE hot chocolate. This is our favorite hot chocolate recipe. I whip up a big batch and store it in an airtight container. The kids know how to make it by themselves and it save a lot of money on the pre-packaged hot chocolate mixes. Plus it uses all food storage pantry items.
Hot or Cold Chocolate Mix
(from Cookin' With Food Storage by Peggy Layton)
3 1/4 C. powdered milk
1 1/2 C sugar
1 C cocoa powder
1 1/2 t salt
Mix all in a big bowl and store in an airtight container. To use stir 1/2 C mix with 1 C. boiling water. Stir to dissolve and chill if you want cold milk.

Friday, October 9, 2015

Prepare Today Homemade- Easiest Muffins EVER!

Print Friendly and PDFPrint Friendly
Self-Reliant Saturday Recipe

 We are a family that loves a good muffin.  We eat them for dinner about 3 times per week.  Muffins are pretty simple to make, but sometimes getting all the ingredients out on a busy night is just too much for me.  I do try to bake a double batch to freeze but I don't always remember to do that.  I think I have found my secret weapon to make muffins quick and SO easy!!  I thought cake mix cookies were easy to make, this recipe is even easier!

You may have heard of the 2 ingredient pumpkin cookies, which include a box of spice cake mix and a small can of pumpkin.  You mix and bake, so easy!  Well, I thought why couldn't that dough also be made into pumpkin muffins??  And guess what?  It worked and the whole family loved them!

  In the fall the grocery stores will generally have spice cake mix for a great price.  Last year I stocked up on them because we really like pumpkin cookies made out of it.  Having all the ingredients on hand added to the simplicity of this recipe. In the picture I used only half of that can of pumpkin because it is the bigger can.  The recipe only calls for a 15oz can of pumpkin. 

 Mix the cake mix, pumpkin, and a few chocolate chips and you have muffin batter!!!  And with no oil or eggs, these muffins are a low-fat option for dinner.  They do have sugar from the cake mix, but not nearly as much as when I make muffins from scratch.

Pumpkin Cake Mix Muffins {or Cookies}
1 box spice cake mix
1 15oz can pumpkin
1 C chocolate chips

Mix the cake mix and pumpkin together with a hand mixer, add the chocolate chips and divide into 12 muffin cups.  (I had extra batter and I made about 8 mini muffins too)  **Bake at 375° for 18-20 minutes.   They could also be baked in a sun oven or volcano stove in a situation without electricity.
**I live at an altitude that I need to follow the high altitude directions and my cake mix said to bake the cake mix at 375°.  If you are below 5000ft you might need to adjust the temperature to 350°.

To make cookies:  Mix as directed above and bake at 350 for 8-10 minutes.  Let cool for a few minutes on the cookie sheet, then remove to a cooling rack.

And if you need a dessert idea, we made these tonight and they were so good and again....only 2 ingredients!!!  Click here for Pumpkin Brownies!!

Tuesday, April 21, 2015

LDS Cannery Powdered Milk....Now Online!

Print Friendly and PDFPrint Friendly
Every month I try to order one or two items for my food storage from the LDS Church online. (lds.org) When I got online to order my oats guess what is now available..... non-instant powdered milk!!!  It wasn't previously available online.  I am sooooo excited!  I make yogurt with this milk and many other things, but I am so happy that it can be delivered right to my door, instead of driving all the way to the cannery in Salt Lake....it comes in a case of 12 28-oz pouches for $67.00.

Click HERE to see the milk.  Some don't care for this powdered milk as a drink, but there are so many other ways it can be used.  I use if for...


And any recipe that calls for milk. For 1 cup of milk= 1 cup of water + 3 T of powdered milk.  There have been so many nights of making dinner and I am out of milk.  Powdered milk to the rescue.  It's a great, affordable, powdered milk!!!
 

Thursday, October 2, 2014

Butter Drought

Print Friendly and PDFPrint Friendly


Butter is one amazing food.  Cooking without butter would leave our plates really dry and flavorless.  I'm no Paula Deen but I do love butter in my cookies, quick breads, and on top of baked potatoes.  Have you seen the price of butter at the grocery store lately?!?!  It's almost $4.00 a pound!  That is crazy!  Last fall I bought butter for $1.50 and that was a stock up price.  I saw butter for $2.97 at my grocery store and I bought all I could.  This is a good reminder of why we need to prepare.  Inflation!!  Buy food now while it's affordable.  

*remember to have a back up (or two) for your fresh foods*

Usually I have about 20lbs of butter in my freezer and it is enough to get us through until the next sale at the grocery store. About 2 weeks ago I was down to my last pound of butter.  I didn't worry because I figured a sale was just around the corner.  But, no sale came.  Meanwhile, to get us through the butter drought, I made some butter from shelf stable cream that I had in my storage.  Shelf stable cream is my first choice for spreadable butter.  It's delicious and tastes like fresh butter.  We wanted to savor it though, and so it was only used it for toast.  Click HERE to see how I made the butter. Even though it's delicious, it would take a lot of shelf-stable cream, to make butter, to use every time I needed it for a recipe.


 Powdered butter is my go-to option if fresh butter isn't available.  I still wanted to bake and so my second choice for shelf stable butter is Thrive's butter powder.  I LOVE Thrive's butter powder.  You can read how I taste tesed it HERE.  I was able to bake cookies, make mashed potatoes, pumpkin muffins, and even a cream sauce for macaroni and cheese, and it all worked. It is a really amazing product.  I highly recommend it! Sign up for their emails and buy a can when they have a sale.  (A #10 can is around $28.00 right now on thrive.com and a #10 can equals 24 sticks of butter. Which makes it around $4.60 a pound. I have only purchased my powdered butter when it was on sale to lower my price per pound. )

I am hoping that my butter drought will be over as soon as the holidays are here.  Most baking supplies will be on sale in the next few months.  But if the demand is high and supply is low....our price at the store will skyrocket.  Food storage isn't just for the end of the world. 

Wednesday, May 8, 2013

Thrive Life Butter Powder

Print Friendly and PDFPrint Friendly
There are a few foods that will make or break a recipe when it comes to food in #10 cans.  Powdered cheese, butter, sour cream, eggs, etc. will be different from one company to another, and that will determine the outcome of a dish. I usually don't mind using a generic version of grocery store foods because I don't see a big difference in quality, but I have learned, by trial and error, that there is a big difference between the many food storage companies out there today.


One example is butter powder.  I really don't like to mention company names when I don't like a certain product, so I am just going to say that I have 3 different butter powders at my house right now that I don't like to use in my cooking.  They have an obvious non-butter taste and don't even smell close to real butter.  I have read on several blogs that Thrive Life has a really good butter powder.  I finally broke down and paid the $25.49 + shipping and ordered a #10 can of it.  I am so glad that I did!!!!  

The first thing I noticed right away when I opened the can is it smelled like butter.  It was light in color and not a fake yellowy color.  I mixed a small amount with a little bit of water and it reconstituted into a buttery spread.  It spread onto bread so easily and tasted good too!  It won't make a cube of butter but if you need some butter on your toast, this would work!!  I have since made brownies and cookies with the butter powder.  The brownies worked great and I couldn't taste any fake buttery flavor at all.  But the cookies were another story.  My one complaint for butter powder from all companies are the reconstituting directions!!!!  There are none for baking!!  I want to know how much water I add to the butter powder for say, 1 C of butter in a recipe.  I tried looking online and I couldn't find anything.  So if any of you know, please send me in the right direction :) That is how I messed up my cookie recipe.  It called for 1 C of butter, so I added 1 C of powder to my bowl and slowly added water.  I added too much water and then had to add extra flour.  I couldn't ever get the batter to form a cookie dough, so I baked it in a 13x9 pan and we had cookie brownies.  It still tasted good, but I need to research the water to powder ratio some more.  Again the "cookies" tasted like they should without an off taste that I noticed with other butter powders.

Out of the several butter powders that I have used I highly recommend Thrive Life's Butter Powder.  Click here to see more information.

Friday, April 12, 2013

Using My Food Storage: Making Mixes

Print Friendly and PDFPrint Friendly
My goal when grocery shopping is to stock up when an item is at its lowest price point.  This way I am getting the most bang for my buck.  I usually can keep my pantry stocked using this method but lately I haven't been able to find brownie mixes for under $1.00.  I  know it isn't that difficult to make brownies from scratch, but my children usually want them after dinner and I don't want to mess up the kitchen again getting all the baking ingredients out.  So my goal for today was to mix up a big batch of brownie mix and only make the big mess one time.  Now we have a container of brownie mix that will make at least 7 batches of 8x8 size pans.  

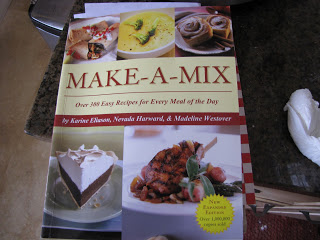
I am not a huge user of  homemade mixes, but there are a few that make my life a little easier.  I use the book "Make-A-Mix" for most of my recipes and mixes. The brownie mix has always sounded so good, and....
...the brownie mix can be used for more than brownies too!!!  How about chocolate chewy cookies, Texas sheet cake or Brownie Alaska. These all sound so good, can you tell I really love dessert!!!  (Click HERE to view a previous post I wrote on making mixes.)

The original recipe calls for melted butter and eggs when you mix up the brownies, but I food storagized the recipe and used powdered butter and powdered eggs.  If I was a math whiz I would've figured out how much to add to the dry mix, but I freely admit math isn't one of my talents, so I just added it in when we mixed up the batch of brownies.   It worked great and the brownies cooked up fluffy and looked just as brownies should.  Although as I type this I remembered that I totally forgot to add the vanilla in.  I had "help" making this (my 5 year old was mixing) so I can blame it on that :)


My other new find that I am using all the time is chalkboard contact paper.  This may be too crafty for some of you but stay with me.  I bought the chalkboard contact paper, chalk paint pen, and a cute punch out stamp on amazon.com and I have been labeling everything.  It started with my flour and sugar canisters and now I am labeling my food storage containers.  What is so wonderful about the contact paper is it is removable and the chalk pen ink is erasable!!!!  

 All the items in the picture (not the container) were purchased on Amazon, but I assume craft stores would carry these supplies as well.  When the brownie mix is all gone I may want to fill the container with corn meal, and all I have to do is rub the chalk ink with a damp paper towel and rewrite the label.  I am in love with this stuff!  I even made labels for my dehydrated food...
My dehydrated food jars will always be changing depending on what I am dehydrating and the labels are so easy to change.  Plus I can peel off the contact paper label so easily if I need to water bath or pressure can with these jars.  Maybe I am a little to excited but this has been so fun to do!  And I am not usually a crafty person, but I like to be really organized and this system really makes the pantry look put together. 

Here are our brownies made from a mix using butter and egg powder.  They are definitely more of a cake-like brownie, but we did add chocolate chips to our batch and that helped to make them more fudge-like.  (and I had no idea how to reconstitute the butter powder.  I probably did it wrong and so the brownies aren't that fudgy )And I don't know if it is me or the butter powder but I can totally taste it, even when it is cooked.  I have heard great things about Thrive's butter powder so I may look into trying that brand.  For the next batch I will make them with real melted butter and see if I can taste the difference. And as I was putting this in the oven I mentally smacked myself because I could've made this in the sun oven today, it was so sunny outside.  Next time....

I'm sorry that there is no mix recipe in this post, but I highly recommend buying the Make-A-Mix book for all of the recipes in it. I just wanted to give you all an example of what I do daily to use my food storage.  This may inspire you to do something today with your storage!!  If you would like a brownie mix recipe, I found this one on pinterest and it seems to be really popular.  CLICK HERE  to view it. 

Saturday, February 16, 2013

Applesauce: A Food Storage Must Have

Print Friendly and PDFPrint Friendly
There are a few items in my food storage that I feel I must have at all times, such as wheat, dehydrated onions, pasta, rice, etc., but one of the most important items that I have in my storage is applesauce.  That may sound funny, but applesauce is so versatile and almost everyone likes it, and that's why it is a food storage must have item in my house.  

 My favorite place to buy applesauce is Costco.  Now, I have to let you all know that I am not a Costco shopper because I feel I can get better deals using coupons, case lot sales, and buying in bulk from Honeyville, but this is one item I feel is such a great price that I ask my sister to buy a few (or 15) when she goes shopping.  The applesauce comes in #10 cans and is unsweetened, which was the BIG selling point for me.  Now, you are probably wondering why I don't have a great photo of this #10 can of applesauce inserted into this paragraph.  I am writing this post because we just used up our very last can of applesause and I am stressing out that it is all gone!!!  I just moved and my storage has been a mess, so now that I am some what settled, I need to ask my sister to get me applesauce the next time she goes to Costco!!

These are the ways that I use applesauce in my house.
  • I use applesauce cup for cup as a substitute for oil in baking.
  • When I have sick kids I need applesauce for sick tummies.
  • Applesauce makes a great side dish at dinner.  We love to eat it with cottage cheese mixed in or with a dash of cinnamon.
  • My children love a small container of applesauce in their school lunches.
  • Use applesauce for baby food.
  • I add applesauce to muffins, smoothies, and quick breads (just a 1/4 C or less) to make the final product moist. If you freeze the applesauce in ice cube trays they can be tossed into smoothies quite easily.
  • I dehydrate applesauce to make apple fruit leather.
  • In an emergency situation applesauce is a great way to have fruit in your diet.
  • I also love to use dehydrated applesauce in my baking and I save the regular applesauce for eating.    
I am sure there are many other ways to use applesauce but as you can see it is a very versatile food.  I remember a comment that Sherida Raddigan from My Year Living On Food Storage  made about applesauce. Her family lived solely on their stored food and  she said she wished she had stored applesauce to break up the monotony of what they were eating.  They ate really well for 3 months and then their diet became really bland without a lot of fruits.  When I read that it really comfirmed to me that it was a smart idea to add more applesauce to my storage. 

Here are some yummy varieties of applesauce that you can bottle at home. 

Wednesday, November 21, 2012

Homemade Pumpkin Pie Spice

Print Friendly and PDFPrint Friendly
Happy Thanksgiving everyone!!  I hope you all have a wonderful holiday!  We are getting ready for the big day today by making all of our pies.  And wouldn't you know it, we are out of pumpkin pie spice.  It's a good thing I have been hanging onto a homemade recipe in my food storage recipe binder.  We made a little batch of homemade pumpkin pie spice in just a few minutes.  

 Homemade Pumpkin Pie Spice
1/4 C cinnamon
1 T allspice**
1 1/2 t ginger
1 1/2 t nutmeg
1 t cloves
Mix all until blended and store in an airtight container.  

  The recipe makes enough to fill this 1.2oz container plus about 1 teaspoon.  Use it in your favorite pumpkin pie recipe or wherever pumpkin pie spice is called for.  

We made 2 pumpkin pies (my 11 year actually made most of it!) and we can't wait until tomorrow to dig in!!

Bonus:
Apple Pie Spice
1/4 C cinnamon
2 t nutmeg
1 t allspice**
1 t ginger
Mix all until blended.  Store in an airtight container.

**1 teaspoon Allspice= 1/2 t cinnamon, 1/4 t ginger 1/4 t cloves     

Saturday, May 5, 2012

Hand Crank Bosch Handle

Print Friendly and PDFPrint Friendly
Preparedness hasn't always been a priority in my life, imagine that, but it has always had a small part.  When I started making food storage a bigger part of my family's life I started making whole wheat bread, and it was my first obstacle.  I call it an obstacle because I didn't have a grinder, or a Bosch to knead the bread, and I was doing it all by hand.  I literally tried and tried different recipes for 2 years before I was consistently making edible bread.  In that two years I received a Bosch mixer as a Christmas present and it changed my life!!  I was able to make my bread quicker and easier than kneading by hand.  Having preparedness in the back of my mind I kept thinking, I love my new Bosch mixer, but if the electricity ever went out I would be back to hand kneading my bread.  I went on Google and searched for a manual mixer to use in an emergency situation, and I eventually found a company that sold an attachment for a Bosch mixer that would allow you to knead or mix without power.  I was beyond excited!  (again doesn't take much)


The store that I purchased my handle from no longer sells them but you can see the handle HERE. They run about $20 but I think that is a very reasonable price to turn an electric appliance into a manual one.  

From the instructions that came with the handle:  
"The hand crank is for use with the plastic bowl or new stainless steel bowl of the Universal or Universal Plus and allows you to easily finish kneading your dough in the event of a power failure.  With the bowl on the motor base, the transmission and motor would normally be engaged.  To avoid the drag of trying to turn the motor while kneading, a spacer is provided to lift the dough hook up above the cross-pin on the drive shaft, allowing the shaft to spin freely.  The Bosch dough hook still kneads very effectively, even when raised up this much (about 1/2")"

This would make a great gift for anyone with a Bosch..Mother's day is coming up..hint..hint. But seriously I love little gadgets like this and it's fun to find them and find that they work!  (this is the bread recipe that I make)

Sunday, March 25, 2012

Make-A-Mix Cookbook

Print Friendly and PDFPrint Friendly
Do you know what I love about taking a preparedness class??  I get so motivated to do something!!  Yesterday I took a Mix A Meal class at Honeyville Grain and I felt inspired to make a few of these mixes for my family.  I feel that preparedness is personal and is different for everyone, and you need to pray for guidance and inspiration for your family.  I have felt promptings during classes, at the store, at a garage sale and when I follow those promptings I find the items I purchased were meant for me to use in making preparedness that much easier. 

After the class I returned home to find a delivery from Amazon.com and it was my new Make-A-Mix cookbook.  Don't get it confused with the Mix-A-Meal cookbook and class that I attended at Honeyville.  Both books have the same idea, making mixes in bulk to save time and money.  I have an original copy (1978) of the Make-A-Mix book and I wanted the updated version, so when it showed up on my doorstep yesterday it was confirmation that I needed to make some mixes. Click HERE to see a previous post on the old book.

The updated Make-A-Mix cookbook.
 This is what I did today and I can't wait to save time making dinner this week!!
I am not going to publish the recipes because that would infringe on the rights of the authors, but I suggest you either look this book up at your local library or order one from Amazon.  It will save you time and money!!  The book starts off with how to put the mixes together and then gives you recipes for using the mixes. (the mixes last about 12 weeks)  This is what I plan on making with my mixes above.


Hot Roll Mix
-French bread
-Crescent rolls
-Hamburger Buns
-Pizza Crust
-Bagels
-English Muffins
There are many more but those are the ones I want to try first!


Quick Mix
-Crispy Breadsticks
-Biscuits
-English griddle scones
-Morning Muffins
-Quick pancakes
Many, many more recipes in the book!


Corn Bread Mix
-Corn Bread (I have several meals that I need corn bread for)
-Corn Dogs


There are 328 pages of recipes and ideas and I can't wait to implement them into my daily cooking.  I'll do almost anything to make dinner time easier and I hope these mixes are the way to go!!

Hot Rolls from the Hot Roll Mix
 Here are my rolls for dinner tonight using the Hot Roll Mix. They were delicious!!  


Rice cooked with onion soup mix.
I also made some of the "best rice ever", according to my daughter, using the Onion Soup Mix from the Mix-A-Meal book.  The owners of the book allowed me to share this recipe.

Onion Soup Mix
2/3 C dehydrated onions
1/2 C beef bouillon (I used Shirley J's)
1/2 C dehydrated butter or margarine (I used Honeyville's powdered butter)
2 T cornstarch
2 t onion powder
2 t parsley flakes
Mix well and store in an airtight container.  Use in any dry onion soup recipe.  About 1/3 C equals one packet of Lipton soup mix.

Onion Steamed Rice
Combine:
1 C rice to 3 C water
2 t onion soup mix
Cover and steam 20 minutes or  until rice is tender.  (I used my rice cooker and did 2 C rice, 3 1/4 C water, and 4 t onion soup mix)

(click HERE to view a  previous  post on the Mix-A-Meal cookbook)

Monday, March 19, 2012

Prepare Today Homemade- Muffin Mix

Print Friendly and PDFPrint Friendly
A great way to save time and money when making meals is to use mixes.  If you purchase ingredients in bulk and use them to cook your meals you are saving money.  If you make mixes with your bulk ingredients you are saving time.  I use mixes for pancakes, waffles, white cream sauce, cakes, and now muffins.  

I like to make muffins with my dinners because I can sneak in whole wheat flour, ground flax seed, chia, fruits, and even pureed or dehydrated veggies.  Plus I know my kids will eat at least the muffin for dinner.  Our dinner rule is you get what you get and you don't throw a fit.  They get to eat what I make for dinner, nothing else. They have to try at least one bite of everything.  They usually always will eat a muffin, or two.  

This is the old cover, it has since been revamped.


I found a cookbook from 1978 called "Make-A-Mix Cookery" and have really liked the recipes in it.  My family really loves the pancake mix from this book.  They cook up so fluffy and thick.  So I thought I would try the muffin mix and it turned out pretty good.  I still need to tweak it with filler ingredients but it is a good base for adding on.  

Shortening powder is the way to go with mixes!!
Freeze-dried fruits are perfect for muffins!!
 Muffin Mix
8 C flour (I need to experiment more with whole wheat)
2/3 C sugar
1/3 C baking powder
1 T salt
1 C shortening powder

In a large bowl combine the ingredients and mix well.  I use a whisk to get it all mixed up.  Makes about 10 cups of mix.  I keep mine in a #10 can in the fridge because of the shortening powder and it should last at least 12 weeks. (see comments below if you want to add powdered milk and egg to your mix)


Use the mix to make many kinds of muffins.  I made the Melt-In-Your-Mouth Muffins from the cookbook. 


2 1/3 C muffin mix above
1 C milk (1 C water + 3 T powdered milk)
1 egg (1 T powdered eggs + 2 T water)
Combine the above ingredients and stir.  Add in 1/2-1 C dried or fresh fruit.  Fill muffin pans 2/3 full and bake in 400 degrees oven for 15-20 minutes or until golden brown. 

"Muffins" in my thermal cooker using the muffin mix.


The possibilities are endless with what you could add to these muffins.  Apples, bananas, cheese, apricots, pineapple, jelly, etc.  I used this mix to make muffins in my Saratoga Jacks thermal cooker. Click here to see that post.

Saturday, December 3, 2011

Live Your Best Self-Reliant Life in 2011

Print Friendly and PDFPrint Friendly
It's December and I am in denial!!  I really cannot believe how fast this year has flown by!! Back in January we started the year off by setting goals so we could Live Our Best Self-Reliant Lives in 2011.  My intention was to help everyone to live a self-reliant life everyday and not just in relation to an emergency.  I hope you were able to accomplish some of (if not all of:) the monthly goals that were handed out in church and also written about on the blog.  I tried to make it as simple and clear cut as I could, so everyone would be able to accomplish one or more of the monthly goals.  Don't worry if you didn't quite accomplish everything this past year, we will be continuing our emergency preparedness in 2012!!


Since it is a new month we do need a new set of goals.  December is usually the month most people do a lot of baking and the grocery sales usually reflect great prices on baking items.  In November our goal was to store baking essentials and this month we are going to focus on SUGARS.  


3-MONTH SUPPLY GOAL:
  • Look through your pantry and see what items you aren't using as quickly as you thought you would.  Try out a few new recipes using that stored ingredient so you don't waste your food storage.  Last year I bought a lot of canned pumpkin and I didn't use as much as I thought I would.  I have been trying out pumpkin waffles, bread, muffins, and soups so I don't waste the money I spent on the canned pumpkin.  
WATER STORAGE GOAL:
  • Continue to store water for your family!! Pick up a case of water bottles the next time you go to the store.  At Smith's this week (until 12/6) they have a 24 pack of water for $2.50.  
FINANCIAL RESERVE GOAL:
  • Look back at your budget from 2011 and see where you could make changes to improve your budget for 2012 or set in place the things that did work for you.  
LONG-TERM GOAL:
  • This month we are going to store SUGAR.  This category includes HONEY, SUGAR, BROWN SUGAR, MOLASSES, CORN SYRUP, JAMS/JELLIES, FRUIT DRINK POWDER, & FLAVORED GELATIN.  It is recommended that for 1 adult you should store around 60lbs of sugar.  You can mix and match the different sugars to meet the needs of your family.  I know my family doesn't really care for flavored gelatin and so I only store a few boxes in case I need them.  We do use a ton of brown sugar and honey.  I have been making bread every week this whole year and I can't believe how much more honey we go through.  
EMERGENCY PREPAREDNESS GOAL:
  • Our goal for this month is LIGHTING.  This includes FLASHLIGHTS, CANDLES, MATCHES, LANTERNS, BATTERIES FOR YOUR FLASHLIGHTS, LAMPS/OIL, etc.  A great idea is to keep a flashlight inside a pair of sneakers and store it under your bed.  If an emergency happened in the middle of the night, then you would be prepared to light the way and not injure your feet stepping on glass.  I also like this tip because I always know where a flashlight is.  Emergency candles (100 hour candles) are also a great, inexpensive item to have on hand.  They would make a great stocking stuffer as well.  A really fun idea is to make a candle holder out of a mason jar.  Click HERE to see how to make one.  They would make a great neighbor gift or for your visiting teaching ladies.  If you haven't heard of Lehman's, you need to check them out!  They have anything and everything related to preparedness.  They also have great kerosene lamps and all the necessary items you would need to use them.  Click here to see their kerosene lamps.  I am sure you can find these items locally but checking online first will give you an idea of what you need to purchase.  I bought some battery operated lanterns (pictured above) that will work in a pinch, but I would have go store quite a few batteries to use them regularly. Find what lighting works for you and start from there.  I have a little of everything just in case!

** Remember to always have batteries on hand and to rotate them, they do expire. 

There you have it, the last set of goals for 2011!!!  Finish up the year on a good note and fill in the gaps of your storage if you need to.  


"Have Faith, Unencomber Your Life, Lay Up In Store" -Keith B. McMullen
Related Posts Plugin for WordPress, Blogger...