Showing posts with label cost of food storage. Show all posts

Saturday, June 6, 2015

Self-Reliant Saturday-- Don't Forget The Flavor In Your Food Storage!

Print Friendly and PDFPrint Friendly
Summer is here and that means BBQ's, picnics, and outdoor fun!  This is also the perfect time to stock up on all the foods that go along with those cook-outs.  Watch the grocery ads for ketchup, mustard, salad dressing, bbq sauce, relish, mayo, and spices.  These types of foods add flavor to your cooking.  Basic food storage will only be tolerated for so long by a hungry family.  Don't forget to stock up on the condiments and spices that add flavor to your food storage!  Paper products like plates, bowls, napkins, cups, plastic utensils, and paper towels are also on sale.  Who wants to do dishes in an emergency?!  Your challenge is to stock up now while the prices are LOW!

 And don't forget about all the camping deals out there. Take advantage of the great prices on tents, camp stoves, sleeping bags, and all the gear that goes along with camping.  Restock your 72-hour kits and car kits with camping tools, gloves, collapsible shovels, tarps, etc.  Father's Day and Fourth of July sales are the best time to purchase larger items for a great price.  Sometimes you can find great deals at the end of the summer season, but if you really need a tent and find a great price, buy it!

Saturday, November 2, 2013

Ever Wonder What Products Are Best of The Best.....

Print Friendly and PDFPrint Friendly
I have a favorite food storage website.......


myfoodstoragecookbook.com, and I have learned so many things from Megan.  She comes up with the most inventive ideas when it comes to using food storage.  Her latest post is one that should be read by everyone.  It is titled "Food Storage Products That I Buy", and it is chock full of her recommendations for the best food storage products on the market today.  And, she isn't sponsored by any of these companies, so you know her reviews are unbiased.  And I have to say, I agree with everything she reviewed!

Check out Food Storage Products That I Buy, from myfoodstoragecookbook.com.

Saturday, March 9, 2013

Frugal Emergency Preparedness

Print Friendly and PDFPrint Friendly
Emergency preparedness can be an overwhelming and expensive, but there are ways around each of those barriers.  I covered the overwhelming feeling of food storage HERE a few weeks ago.  But today I want to cover the expense of emergency preparedness

Most of you probably recognize this store front from the Dollar Tree Dollar Store.  I noticed a sign they had in the window advertising their emergency supplies.  They do have quite a few items that work great for emergency preparedness.  I have found duct tape, bungee cords, water, batteries, canned food (they carry canned strawberries that are really great for pureeing and dehydrating into fruit leather), small organizing containers for my storage room, lots of first aid items, baby items, solar yard lights, etc.

Some of the items from the dollar store may have fewer in a box or not as much tape on a roll, but the quality, I feel, is pretty close to other brands.  

Don't shy away from discount stores like Big Lots and the Dollar Stores.  There is nothing to be afraid of shopping at these stores and no one is judging you for it either.  Big Lots even has 20% off days where everything in the store is 20% off.  Read about one of my shopping trips to Big Lots HERE.  Just sign up for email alerts and you'll know when the next sale day will be.  

If you don't have a Dollar Store or Big Lots try your local Army Navy store, or camping store.  In Utah, Recreation Outlet carries a large variety of camping and emergency prep items for a fraction of retail prices.  I purchased all 7 of our sleeping bags from them and they were all under $60 dollars.  The children's bags were only $39.95, and they are quality sleeping bags with a -20 rating.
 
Keep your eyes open wherever you shop for clearance bins and percent off baskets.  Especially check stores the week after a holiday for deeply discounted items.  I found LED small flashlights at Walgreens after Halloween for .50.  They had vampires on them, but they were the same as any other LED flashlight. They had the same metal casing that non-vampire flashlights have and work just as well.  Plus, they are kind of fun to talk about when people give you weird looks :)

After holiday sales are also a great time to stock up on candy.  I store my candy in mason jars and then I seal it with my foodsaver. 

Have an open mind when you are shopping and don't look over something because it may have a vampire picture on it :) Think outside of the box when it comes to prepping and you'll be able to save money.

Friday, September 21, 2012

Honeyville Grain's New Store!!!

Print Friendly and PDFPrint Friendly
If you don't know, I am a HUGE Honeyville Grain fan :)  I love the people, the products, and the preparedness mindset that Honeyville promotes.  I have been attending cooking and preparedness classes at Honeyville for over a year and a half now out by the airport.  Some people have commented to me that it is too far to go for a class, so NOW you have NO excuses!!  The new Honeyville Retail store will be open on Monday, September 24th!!  I had the privilege of attending the grand opening ribbon cutting ceremony and I couldn't wait to let you all see the brand new store!!  Lets take a tour....
 
The ribbon was cut and excitement was felt all through the crowd.  I wish you could have seen the smiles on all the faces there, we were all so happy to be a part of this day!

 Honeyville is located very conveniently between Home Depot and Costco in Salt Lake City (right between Zurchers and The Dollar Store in the strip mall).  If you visit Costco frequently then you will have no reason not to stock up on your food storage, Honeyville is right next door!  The address is 389 West 1830 South.  You can take the 21st south exit off of I-15 if you are coming from the south, OR take the 13th S exit if you are coming from the north off of I-15.  

 The new store is beautiful and has all of your food storage, bulk grains (go in just to look at all the different grains), and emergency preparedness items that you may need.  They even carry gluten free items as well.  The new store is light, bright, and so well stocked!

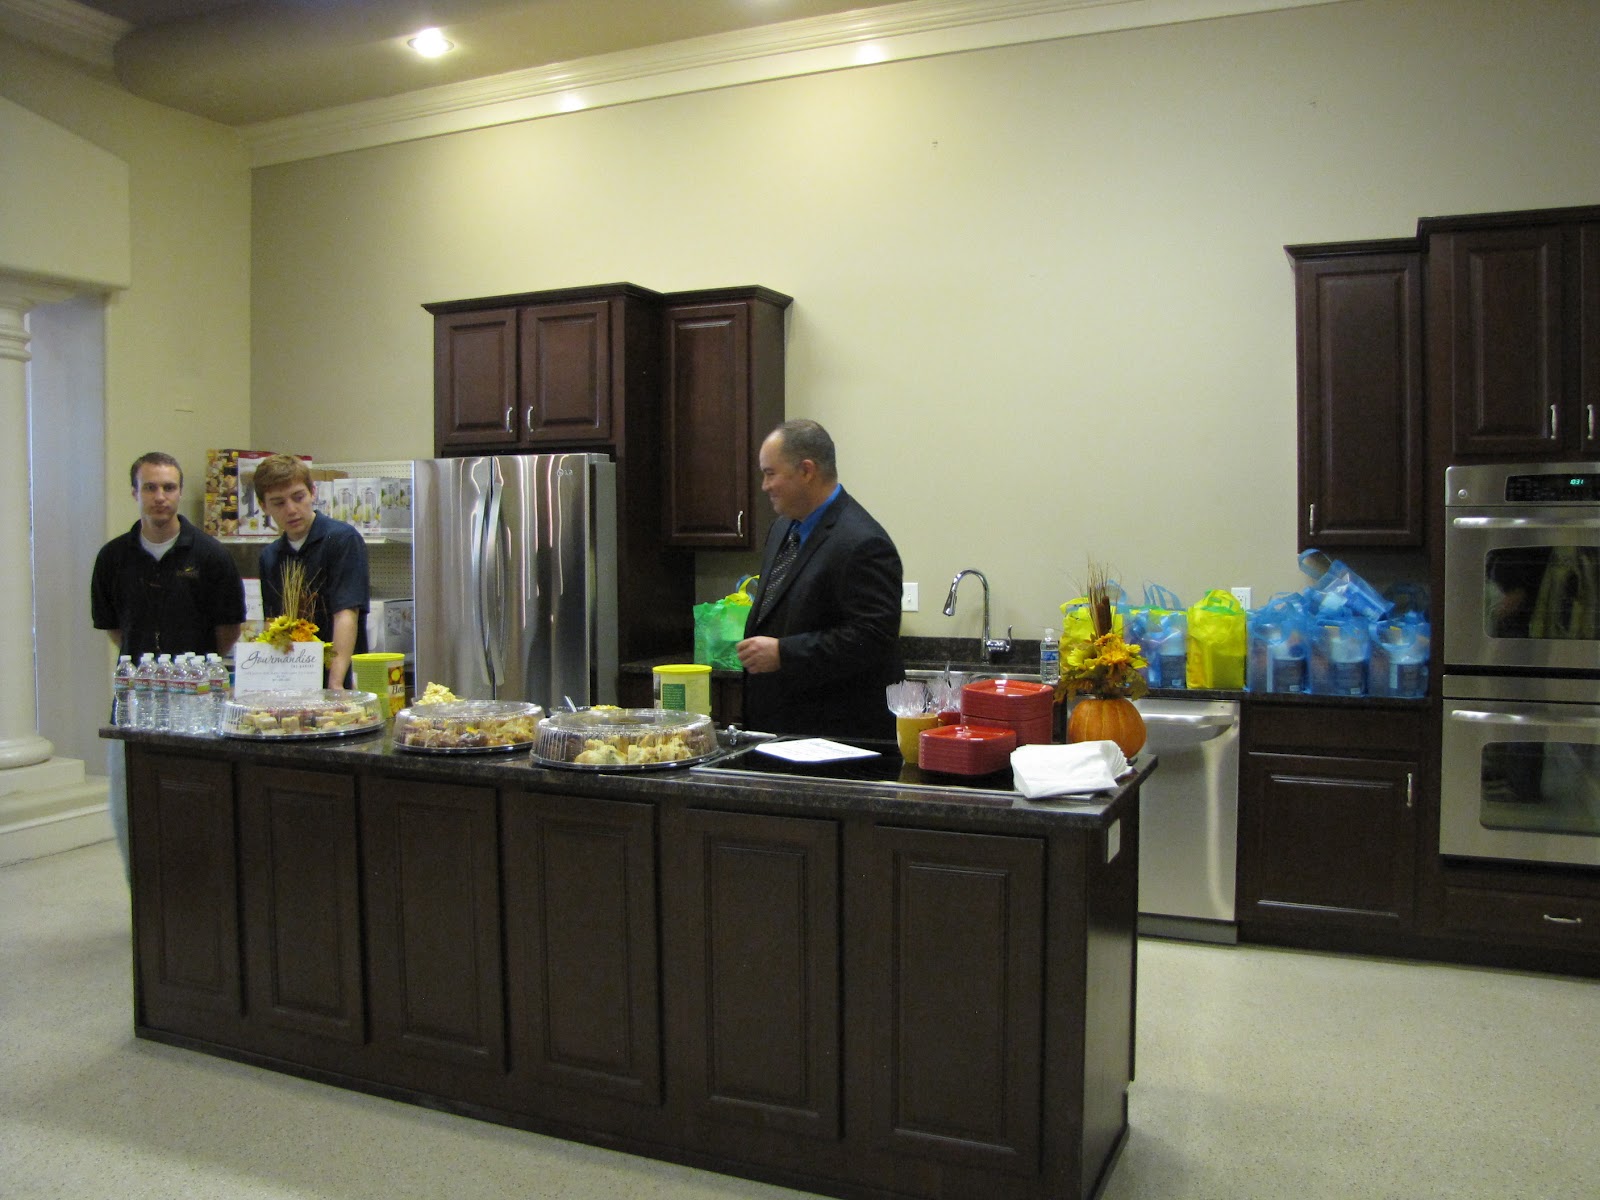
 And you MUST sign up to attend one of Honeyville's classes!!  They are free and you learn soooo much from each and every class.  The new teaching kitchen is gorgeous and will make teaching and learning much more efficient. Isn't it pretty!! There will be a large mirror so everyone will be able to see what is being cooked.  Click HERE to see what classes are coming up.

Picture yourself here, learning everything you ever needed to know about food storage!!

 The next few photos showcase all the amazing products that Honeyville carries in their store.  You will find everything you need to cook with, bake with, and complete your food storage. And they also have fun kitchen gadgets that we all just need to make us smile :)


If I haven't sold you on this store yet, come by next week and meet Doug Wright and the Food Nanny (Liz Edmunds).  Doug will be airing live from Honeyville on the 28th and there will be giveaways and prizes all week long.  

Lisa chats with Liz Edmunds the Food Nanny!!
 What time you may ask????  Monday, September 24th at 9:00AM-6:00PM  and Saturday 9-5.  The whole week will be filled with fun, food, prizes, and amazing people!!  Don't miss out! 


Honeyville Farms
Salt Lake City Store

389 West 1830 South
Salt Lake City, UT 84115


Phone:(801) 839-7576
FAX:
(801) 972-8412


Hours of Operation

Monday - Friday: 9:00AM - 6:00PM
Saturday: 9:00AM - 5:00PM


Honeyville on Facebook

And you would think that I work for them, but I don't.  I was not compensated for this post, I truly love this company and the people that do work there!!

Sunday, March 25, 2012

Make-A-Mix Cookbook

Print Friendly and PDFPrint Friendly
Do you know what I love about taking a preparedness class??  I get so motivated to do something!!  Yesterday I took a Mix A Meal class at Honeyville Grain and I felt inspired to make a few of these mixes for my family.  I feel that preparedness is personal and is different for everyone, and you need to pray for guidance and inspiration for your family.  I have felt promptings during classes, at the store, at a garage sale and when I follow those promptings I find the items I purchased were meant for me to use in making preparedness that much easier. 

After the class I returned home to find a delivery from Amazon.com and it was my new Make-A-Mix cookbook.  Don't get it confused with the Mix-A-Meal cookbook and class that I attended at Honeyville.  Both books have the same idea, making mixes in bulk to save time and money.  I have an original copy (1978) of the Make-A-Mix book and I wanted the updated version, so when it showed up on my doorstep yesterday it was confirmation that I needed to make some mixes. Click HERE to see a previous post on the old book.

The updated Make-A-Mix cookbook.
 This is what I did today and I can't wait to save time making dinner this week!!
I am not going to publish the recipes because that would infringe on the rights of the authors, but I suggest you either look this book up at your local library or order one from Amazon.  It will save you time and money!!  The book starts off with how to put the mixes together and then gives you recipes for using the mixes. (the mixes last about 12 weeks)  This is what I plan on making with my mixes above.


Hot Roll Mix
-French bread
-Crescent rolls
-Hamburger Buns
-Pizza Crust
-Bagels
-English Muffins
There are many more but those are the ones I want to try first!


Quick Mix
-Crispy Breadsticks
-Biscuits
-English griddle scones
-Morning Muffins
-Quick pancakes
Many, many more recipes in the book!


Corn Bread Mix
-Corn Bread (I have several meals that I need corn bread for)
-Corn Dogs


There are 328 pages of recipes and ideas and I can't wait to implement them into my daily cooking.  I'll do almost anything to make dinner time easier and I hope these mixes are the way to go!!

Hot Rolls from the Hot Roll Mix
 Here are my rolls for dinner tonight using the Hot Roll Mix. They were delicious!!  


Rice cooked with onion soup mix.
I also made some of the "best rice ever", according to my daughter, using the Onion Soup Mix from the Mix-A-Meal book.  The owners of the book allowed me to share this recipe.

Onion Soup Mix
2/3 C dehydrated onions
1/2 C beef bouillon (I used Shirley J's)
1/2 C dehydrated butter or margarine (I used Honeyville's powdered butter)
2 T cornstarch
2 t onion powder
2 t parsley flakes
Mix well and store in an airtight container.  Use in any dry onion soup recipe.  About 1/3 C equals one packet of Lipton soup mix.

Onion Steamed Rice
Combine:
1 C rice to 3 C water
2 t onion soup mix
Cover and steam 20 minutes or  until rice is tender.  (I used my rice cooker and did 2 C rice, 3 1/4 C water, and 4 t onion soup mix)

(click HERE to view a  previous  post on the Mix-A-Meal cookbook)

Tuesday, February 28, 2012

Everyday Home Storage-Ensign Article

Print Friendly and PDFPrint Friendly
I found this great article in the March Ensign (an LDS monthly magazine) all about making food storage a part of our everyday lives. 


Making home storage a part of our everyday lives can seem daunting and expensive but this article has great ideas on how to have a home storage on the smallest of budgets.  If you don't get the Ensign magazine or would like to print out this article...CLICK HERE.  It had great ideas on how to establish a home storage and also on facing adversity.  

I can personally testify that my family has received both spiritual and temporal blessings from following the counsel of our Prophet. No matter what your financial situation is, you can prepare by taking home storage step-by-step.  "Home storage is not an event, it is a process."  And if it feels like nothing is going your way, have faith, pray, and the Lord will bless you!!

Saturday, February 18, 2012

Long-Term Produce Storage...Kind of...

Print Friendly and PDFPrint Friendly
A few weeks ago I posted about growing green onions on your windowsill and I am still doing this, and the onions are growing for the 3rd time since cutting.  I was seriously so excited when I found that it worked.  Well, this week I found a new tip that I wanted to share.  It is a way to preserve your celery and have it last at least 4 weeks.  

Photo of wrapped celery from 3monthspreparation.blogspot.com
If you wrap your celery in tin foil before placing it in the fridge it will last for weeks, and  it will still be fresh and crisp when you pull it out!!  This is where I learned this from.  Crystal Young, the blogger I learned this from, also stored broccoli for weeks wrapped in tin foil, and heads of lettuce too!!!

Crystal is a Christian mother of 10 and she decided to feed her family from her food storage for 3 months without going to the grocery store.  They didn't go to the store (except for more baby formula and her husband's deodorant) and she cooked all her meals and snacks from scratch.  She also blogged about her success' and failures at 3monthspreparation.blogspot.comI sat and read through her 90 day challenge for 2 hours last night.  I was inspired by her words and motivated by her skills!!  Crystal has such wisdom and faith and sees God's hand in all she does for her family.  I strive to have the faith of someone like her.  

There are so many ways to save money and to live frugally and I am still learning everyday.  I get so excited to learn a new trick and I hope you find them useful too!!

Update:  After 2 months of growing the same green onion bulbs they seemed to stop producing.  I started with new bulbs and they are shooting right up.  I'll keep track of how long the next batch lasts. 

Saturday, February 11, 2012

Provident Pantry-Homemade Mixes

Print Friendly and PDFPrint Friendly
One of the biggest tips when you are trying to save money is to make your own mixes from scratch instead of buying the prepackaged ones from the store.  Just the other night I needed a white sauce for a cream of broccoli soup I was making and I remembered a book that I have called "MixA-Meal" by Deanna Bean & Lorna Shute.  This book is full of mixes like the white sauce mix, a roll mix, banana bread, biscuits mixes, etc.  Having these on hand will save you time and money.  You can find the book at amazon.com, Honeyville (SLC store), and other retailers.  I think it is really worth the little extra time to buy flour, sugar, powdered milk, etc. in bulk and put a few mixes together. 

This is the white sauce mix that I made the other night.

This is all you need to make a white sauce mix.
White Sauce Mix
4 C powdered milk (non-instant from the cannery, if you use the instant from the grocery store you need double the amount of non-instant so 8 C in this recipe)
4 C flour
4 C dehydrated butter or margarine powder
2 t salt

Mix all and store in an airtight container.  To use:  1/2 C of white sauce mix and 1 C hot water and whisk over medium heat until thick.  Stir constantly to prevent scorching.  

Use this mix for soups, chowders, scalloped potatoes, white gravy, creamed veggies, chicken a la king, etc.  

I found a great blog that has many recipes for making mixes.  Everything from seasonings and soup mixes to pancake mixes.  Click HERE to see it! Find which ones work for you and try one out.  I recommend you try a half batch first in case you don't care for it.  I made a tortilla mix once and it didn't turn out so well and I had made a whole #10 can of it!  What a waste of money!  So definitely try it out in a small batch first. 

Saturday, February 4, 2012

Create Your Own Dinner In A Jar

Print Friendly and PDFPrint Friendly
 A full pantry on a budget, that's one of my goals with this blog .  I was so lucky to be able to attend some classes this week at Honeyville Grain  and I learned how to have convenience, save money, and have simplicity when planning your food storage.  (you should really check out the classes they have at Honeyville!!!  They are free and you learn soooo much!!! I swear I don't get paid to say all this,they really are just an amazing company!!)  The first class was taught by the creators of the Saratoga Jacks thermal cooker.  I have mentioned them once or twice on this blog ;)  and I really love their product.  But to see them in person and hear them talk about how they have used their cooker was really motivating to use mine more often.  The other class, Meals In A Jar, was taught by the store manager Lisa, and she showed us all how to save money, have quick meals, and even have our husbands and kids cook dinner!! Both of these classes made me think of how much money you can save and also have meals ready for an emergency.  I couldn't wait to share what I learned with all of you!!


The idea for dinner in a jar isn't new but Chef Tess of cheftessbakeresse.com (Stephanie Peterson) has a great set of recipes and ideas for making 7 meals x 52 of each for a year's supply to have on hand in case of an emergency.  Don't think of having these meals just for an emergency like a disaster.  
  • Think of all the times you are running late and your family wants dinner.  If you had a meal in a jar you could call home and have your children or husband boil some water and pour in the contents of the jar and dinner would be done by the time you got home.  
  • Have you ever been asked to take a meal to a neighbor?  Dropping off a meal in a jar would allow them to easily cook the meal at their convenience. 
  • Are there nights that you are so exhausted that the thought of making dinner is almost too much to handle??  (My hands are high up in the air!)  Knowing that I had a variety of meals ready to make (NO take-out!!) in just minutes would definitely create more harmony in my home!!  
  • Have you all seen the many dehydrated meal-in-a-bucket companies that sell a "complete emergency meal kit" for mucho dinero??  Now you can make your own meals and know exactly what is in them, and also know that your family will eat them. (because you have tested them first before making 52 of them, right??)  Please don't make a whole room full of jars before you have tried them out on your family.  It saves no money by having food no one will eat!!

Lisa, the store manager at Honeyville, demonstrated how to make the meals in a jar and then cooked one for us.  It honestly only took about 20 minutes from start to finish!  Once you have all the ingredients on hand, it is just a matter of layering the food into the jars and sealing them.  She uses the Foodsaver to seal the jar.  Remember when layering your food in the jars to always have the powdery ingredients towards the bottom so they aren't sucked up into your Foodsaver hose.  Chef Tess has some amazing recipes on her site and Lisa cooked one for us called "Baked Ziti".  This is one recipe that I personally have in my storage.  I am a vegetarian but my family is not and this recipe was easily converted using tvp ingredients.  My family will eat the tvp but I won't eat the real stuff so it works out :)

You can see all the ingredients layered in the jar.  This jar would feed my family of 7 (with little kids and only 1 teenager).  It would probably feed 4-5 adults.  This is the recipe that I used to make the jar above.


Chef Tess' Saucy "Baked" Ziti with Sausage and Mushrooms
Put the following in a quart jar (use wide mouth funnel):
2/3 C Honeyville tomato powder
1/3 C Honeyville dehydrated onion 
1 T Chef Tess Italian Seasoning (available at Honeyville but regular seasoning will work too 
1/3 C Honeyville freeze dried sausage or sausage TVP 
2/3 C Honeyville freeze dried hamburger or beef TVP
1 C Ziti (3 oz) (I used elbow noodles in mine because that is what I had on hand) 
1/3 C Honeyville freeze dried mushrooms
2/3 C Honeyville freeze dried Mozarella cheese (in a baggie)

After layering you can add an oxygen absorber and close the lid or use a Foodsaver with a jar attachment to seal the jar.  The jar is good on the shelf for 5-7 years.  Attach the following 'to use' directions to the jar.  Directions:  Place contents of jar (except for the cheese) in a covered skillet or pot with 4 1/2 C of water.  Simmer 15-20 minutes or until pasta is tender and sauce is thick.  (Solar Oven 30-40 minutes covered)  Place the contents of the cheese bag in a bowl and spray lightly with cool water, not warm water or your cheese will be glumpy mess.  Sit for 5 minutes. Uncover cooked pasta and top with cheese.  Cover again and allow cheese to melt, about 5 min.


See!!!  How easy is that!!!???  Think if you got your whole family or a group of friends and you had a meal in a jar party!! It would be fun and you would walk away with meals for your family!  Honeyville would love to have you come in and have your group too.  Then you wouldn't have a mess to clean up at your house.  Honeyville carries everything you need and you could show up with some friends and get your food storage done at the same time. Just an idea if you have a group of people that would like to make meals like this. 


Do you know what gadget goes perfect with a meal in a jar?  Yup...the Saratoga Jacks thermal cooker!!!  Since all the food in your jars are dehydrated you only need to boil your food for 1 minute and then place in the cooker.  It will be hot and ready for up to 6 hours!!  Amy and Jack Loveless (the creators) taught a class at Honeyville and they were so fun!  They told stories of traveling with their cooker and how they even fed other hotel guests when there was a water main break and the hotel had no food.  I have talked about the Saratoga Jacks before, click HERE, HERE, HERE, and HERE to view my previous posts.  The cooker just fits perfectly with the jarred meals and also with saving money because you are conserving fuel in an emergency. (use the butane portable stove to cook the food)
I wanted to share this jar of muffin mix with you too!  My sweet neighbor (I have the most amazing neighbors!!!) gave this to me for Christmas and I keep it right next to my jarred dinners so I can have muffins with one of my meals!!  There are so many meals you can store in a jar and you can convert many of your own recipes into a jar recipe.  There is a cookbook called "Dinner Is In The Jar" that has great recipes and also labels to print out for the jars.   It is available at Honeyville and online.  This post ended up really long (sorry) but think of all the ways that having your meals ready to go will save you time and money.  There will be no more excuses as to why you stopped at the drive-thru again!!

Saturday, January 28, 2012

Frugal Food Tip- Leftover Reincarnation

Print Friendly and PDFPrint Friendly
Don't waste money by throwing away your food!!
Last week I talked about using all of your produce so it doesn't go to waste. This week is all about using your leftovers in a new way. Honestly I am really not a fan of leftovers.  They just seem to lose that fresh, just-prepared look and taste, but if you use them in a new dish they won't feel like leftovers!
  
Leftovers--Made Over (some ideas from allyou.com)

RICE:  Warm rice with cinnamon, brown sugar, milk and raisins for a delicious breakfast or make into rice pudding.  Adding a little rice to soups/stews will add texture and volume to extend your soup farther. Fried rice is always a favorite in my house. 


JARRED PASTA SAUCE:  When only a few spoonfuls are left heat up and use as a dipping sauce for grilled cheese.

NOODLES:  Toss extra noodles (even with sauce) into a frittata.


GROUND MEAT:  Saute with onions and garlic, add it to jarred tomato sauce and try as a pizza topping.  Or wrap well, label and freeze.  When you've saved up to 1lb make meatballs or meat loaf.  

POTATOES:  Stir mashed potatoes into soup to add body; chop boiled or roasted spuds and saute for a breakfast hash.  Make potato pancakes and fry in a little oil for a yummy side dish.  

VEGETABLES:  Use the extra veggies and turn into leftover soup.  Keep leftover veggies in the freezer until you have enough for a meal. A pot pie is another easy dinner that will use up extra veggies. I keep my veggies in the freezer and then dehydrate them and seal them in a mason jar to save for another meal.

MEATS:  Soups, stews, sandwiches, omelets, casseroles, stir fry, enchiladas, toss into spaghetti sauce, tacos, lasagna, etc.

BREAD:  Store ends in the freezer to use as bread crumbs.  Croutons, toast, and french toast will use up those last few dry bread slices too.

Think outside of the box to save time and money.  Take advantage of leftovers and stop tossing away your food...and money!!

Saturday, January 21, 2012

Frugal Food Tips

Print Friendly and PDFPrint Friendly
Part of food storage on a budget is to use all the food that you have in your pantry and fridge before it expires.  Sometimes with produce that is hard to do.  "On average, Americans throw out 25% of the food they bring home, worth an astonishing $2,200 per year!!" (All You Feb. 2012 pg. 18) Think of all the long-term food storage you could purchase with $2000.  

I have a subscription to All You magazine, it's great for clipping coupons, and they had a great article called "Stop Wasting Food". After reading it I knew it would go perfect with our food storage on a budget for 2012 and I had to share their ideas with you.  I love to serve and cook with fresh produce, but if I knew how to make it last longer it would save me a ton of money.  Here are a few tips from All You to help stretch your dollar when using fresh produce.


Broccoli Stems-- Make broccoli slaw.  Shred the stems and mix with coleslaw  dressing to change up your regular salad.

Citrus Peel-- Make a habit of zesting citrus before you juice.  To save zest, cover with water in an ice cube tray and freeze.  To use, add to beverages or defrost and drain.

Mushroom Stems-- Finely chop and use to stretch ground beef.


Parsley Stems-- Toss into a juicer, or add to simmering chicken broth.  (Strain both before using)


Wilted Carrots-- Refresh soft carrots in ice water for a few hours before eating.


About-to-Expire Eggs-- If they're just at their expiration date, hard-boil for a nutritious snack.  (eggs do last a couple of weeks beyond the expiration dates)


Softening Fruit-- Freeze bananas to use in baked goods.  If you have extra apples or pears, peel, core, and cook until soft.  Mix with jam and spread on toast for a breakfast treat.


Fennel Fronds-- Use fennel fronds as you would dill--on top of salads, in soup or to flavor coleslaw.


Limp Spinach or Arugula-- Blend past-their-prime greens with walnuts or pistachios, olive oil, and garlic for a nontraditional pesto.

Extending the Life of Lettuce-- I learned this from Lisa at Honeyville Grain.  Chop your Romaine lettuce and then seal it in a jar with your food saver.  You can have fresh salad for up to 14 days.  It has to be sealed with a vacuum sealer for this to work though.  Click HERE to see more info on sealing a salad in a jar.


And my favorite new tip is for green onions.....you can grow them inside on a window sill!!!  I have tried this and it works.  I may be the last person to know this but if I didn't know maybe someone else out there can use this tip too.

 Don't throw away your green onions after using the green parts.  Place the white part of the onion in water and place in a window.  I just added water when it would get low and didn't do anything else.  I don't have a green thumb so this was so exciting for me to learn.

This is a week and half of growth.  I would have grown more in the glass but I couldn't find the bag of green onions that were in my fridge.  (no one would admit to throwing it away)  I am excited to have green onions on hand all the time now. I used to dehydrate my green onions to have some on hand, but this is so much better.  Next time green onions are on sale I am buying a bunch and growing new ones all together in a glass!!

--One more tip for green onions is to use an empty water bottle, chop the green onions and store them in the water bottle in the freezer. Just use what you need and put back in the freezer.

There are so many ways to stretch your dollar and these are only a few ideas.  If you have any great ideas please leave a comment and I'll write another post about stretching the food dollar. 

Saturday, January 14, 2012

How To Eat on $10 A Week

Print Friendly and PDFPrint Friendly
The focus for 2012 on this blog is going to be filling our pantry on a tight budget.  I am going to use the word pantry more than the word food storage because we are counseled to have a 3-month supply of food that we normally eat.  Food storage isn't about mysterious #10 cans in the basement for "just in case" scenarios.

With getting food storage for less on my mind I was so excited to see that Honeyville Grain was having a free class on "How to Eat on $10 A Week:  A 10 Step Guide to Living on Less", taught by Cindi Van Bibber.  Cindi has written a few books on cooking with wheat, eating more vegetables and sprouting, but eating on $10 a week is her new book.  You can get more information by checking our her blog HERE.
Cindi teaching her Veggies With a Side Of Fruit Class at Honeyville Grain.
 The whole idea behind Cindi's guide is to work hard for 6 months at building up your food storage and after the 6 month mark you'll be able to use that storage for daily living.  Once you have stored food and supplies for 6 months the shopping you do will be to maintain the storage you have.  That's how you can get your price point down to $10 a week per person for food.  


A 10 Step Guide to Living on Less: By Cindi Van Bibber


Step 1:  Find Your Average
  • Go through every bill you pay in a year.  Make a budget by dividing the money coming in by 12, subtract the bills you pay and this will be your monthly average. Now you will need to make a list of everything you would probably purchase in one year.  This includes household supplies, food, snacks, toiletries, etc.
  • Looking at a list of everything you buy will allow you to cross off the unnecessary items.  Cindi suggests that you quit buying snacks.  Think of how much a box of 10 granola bars costs.  I know they are around $2.50 on sale.  I have 5 kids and that box of granola bars would last 2 days at my house if they ate one a day.  I can make a whole tray of granola bars that last a week or so for much less!!
  • By making a list and setting a budget you can see where your money is going and also where you can cut out the extra spending.
Step 2:  Work With Half
  • In step one you should have come up with a number for your household budget, the monthly average.  This will include food and household supplies.  Say you have $600 a month for that.  You are going to cut that budget in half and work with it.  The first half ($300) is going to be for groceries and the second half ($300) is going to be for getting food storage, birthday/wedding gifts, and saving.  
  • You're going to live like this for 6 months and build up your food supply.  If you need more money for groceries you can use some money from the second half of the budgeted money.  After 6 months you will have built up a livable supply and now you can go into maintaining mode.  
  • Watch the grocery store sales and use the case lot sales to buy food in bulk for the lowest price.  Having a price point list of the food you use along with the lowest prices you have paid listed will help you stay within budget. Also if you come across a good deal or a great clearance buy more than one to have on hand for birthdays or wedding presents. This money can come out of the second half of your household budget.  If you find a great price on chicken, use the second half of the budget money and not the grocery money.
  • After 6 months the second half of your household budget money can be used to start saving for bigger ticket items like a food dehydrator, wheat grinder, mixer, etc.  Or for emergency money.
Step 3:  Make A List
  • Make and use a weekly calendar of the meals for the week with the cookbook page numbers or where the recipe is found.  Knowing what you have on hand will save you from running to the store and spending more money.  The stress of making dinner every night is also eliminated. 
  • Make a yearly list of birthdays etc. and have the money set aside for the gifts.  Or buy toys or generic gifts on clearance and save.  
Step 4:  Plan Ahead
  • Plan your meals around your food storage.
  • Have gifts on hand for unexpected birthdays or weddings.  Finding gifts on clearance and thinking ahead for an event will save you money.
Step 5:  Learn To Cook
  • Know how to use your kitchen and the items in it.
  • Know how to cook with your stored food.
  • Have the correct utensils to make cooking easier.  If you need a whisk or spatula go get it!
  • Do whatever it takes to know how to cook!!  Look online or take a few classes.
  • Learn to sprout to have fresh veggies when your budget is tight.
Step 6:  Implement Your Learning
  • Don't just learn about food storage...use it in your everyday life.
  • Store what you eat....eat what you store!!
Step 7:  Share What You Learn
  • When you share something you are learning about it becomes a part of who you are.  You take ownership over it and it becomes a part of you.
  • Be excited about what you are doing and others will too.  (the kids included)
  • Others may have problems or questions just like you and together you can find answers.  (I personally wouldn't know half of what I know with out the information I get from attending classes at Honeyville Grain.)  They don't pay me for the name dropping, I really do learn so much from the classes.  Look online for information if there isn't a local resource. 
 Step 8:  Rotate & Replenish
  • Writing the date on a can will make it easier to see when it expires.  Keep track of what you have and don't waste your hard earned money.  
  • Keep replenishing what you use.
Step 9:  Save
  • After you have been storing food for 6 months with your budget from step 2, start saving for emergencies.  Don't use  your $$ for extras like boats, cars, TVs, etc.  
  •  Use the extra money for saving or to help you live.  (wheat grinders, dehydrators, Bosch mixer, extra food storage, emergency supplies)
Step 10:  Refinement
  • There is always room for improvement. 
  • Keep progressing!!
"Have Faith, Unencomber Your Life, Lay Up In Store."  -Keith B. McMullen

Saturday, May 29, 2010

What I Am Buying

Print Friendly and PDFPrint Friendly


I had a friend this week ask me where I buy some of my food storage. I realized that I haven't done a post of what I buy and where I buy it from. Most items can be purchased at the grocery store, but to get the best price when you are buying in bulk there are better deals out there. I will go through the items that I use for my family so this is not a comprehensive list by all means. It just helps to know what my bottom line price is and what I will and won't pay for certain items. Buying items at their cheapest price point allows you to save a LOT of $$$.

If you would like to read a wonderful price comparison list click HERE .
The list was put together in April during the case lot sales, and compares the case lot prices to Walmart, Costco, Sam's Club, & the LDS Cannery by preparedldsfamily.com. I actually printed it out and keep it in my purse so I am prepared at the store if I find an item on clearance and I know whether or not it is a stock up price. FYI: case lot sales are in April and September for Smiths and Macey's grocery stores.

Here's What I Am Buying: Prices are from May 2011 (add about 10% for 2013 prices)


Frozen Items
  • I buy frozen veggies at the grocery store and I wait until they are .88 or less for 16oz.
  • I buy Kroger frozen chicken in bags and I wait for it to go on sale for $6.96 or less.
Meat- I have to add a disclaimer here. I don't eat meat and my family really only eats chicken. I buy ground beef TVP, aka "fake" meat at Honeyville grain in 25lb bags.
  • Tuna- .50 or less at the grocery store during case lot sales. Fresh Market & Macey's is where I purchase it.
  • Canned chicken is the best price at Costco. You get 6 12.5oz cans for $9.99 (bottle your own chicken and buy chicken in bulk on sale to save the most money)
  • The best way to get meat for cheap is to wait for a sale and buy enough for 3 months and freeze it well.
Beans
  • Canned beans are cheapest at Smiths during the case lot sales. .50 a can
  • Dry beans are cheapest at the cannery. Black beans 25lbs $14.50, white navy beans 25lb bag $14.10, pinto beans #10 can $4.65
  • Pinto beans are cheapest at Costco 25lb bag $13.99
Pasta
  • I always get pasta during the case lot sales 8 48oz bags for $14.55
  • I also found great sales at Smiths this year and got 1lb bags for .29-.49 and with coupons I got 25 boxes of spaghetti for free (it is really worth it to coupon)
  • Mac'n Cheese is also cheapest at the case lot sales. WF mac'n cheese. 24 boxes for $6.00 at Macey's, If you have to have the Kraft brand it is cheapest at Walmart.
Soups
  • Ramen noodles I buy at the Smiths case lot sale. 12ct for $3.00
  • Kroger broth at the case lot sale. 24ct for $11.99.
  • Chicken Noodle soup, WF at Maceys 24ct for $11.28
  • Kroger Tomato soup at Smiths case lot sale 24ct for $10.68
  • Creamed soups I bought at Macey's. 24ct for $11.76
  • Progresso soups I buy in the winter during sales at Smiths and Walgreens
Vegetables
  • Canned tomatoes from Smiths case lot sale. 24ct for $11.99
  • Kroger tomato sauce 8oz cans from case lot sale. 24ct for $5.99
  • Kroger tomato paste from case lot sale. 24ct for $7.99
  • Hunt's pasta sauce from case lot sales and other sales during the year. I don't pay more than .75 a can.
  • Canned veggies from Macey's case lot sale. 24ct for $10.56
  • Dehydrated carrots from LDS cannery. #10 can for $7.10
  • Canned mushrooms from Winco .45 ea and Walmart for .46
  • WF diced green chilies from Macey's case lot sale. 24 for $12.00 (these go on sale all year for .50, don't pay more than that)
  • Dehydrated onions from LDS cannery. #10 can $6.00 (I rarely buy real onions, I use these in all my cooking)
  • Potato flakes from LDS cannery. #10 can $2.85 (shelf life of 30+ years)
Fruits
  • Raisins are cheapest at Macey's during the case lot sale and at Sam's Club for 32oz for $3.49ea. Costco's bag is only one penny more at $3.50 for 32oz.
  • Dehydrated apple slices from LDS cannery. #10 can for $4.90
  • Applesauce from Costco in #10 cans are $3.xx. I can't remember the actually price, but it is natural applesauce with no sugar and it is great for substituting for oil in baking.
  • Kroger mandarin oranges from case lot sale. 24ct for $7.99
  • WF canned pineapple is cheapest during the Macey's case lot sale, but I have found Dole pineapple for under .70 with coupons during the year.
  • I buy canned pears from the case lot sales and it is always a little different between Smiths and Macey's, but I don't pay more than .68 a can.
Sugars
  • Sugar is cheapest during Nov. and Dec. I stock up when there are sales. I don't like to spend more than $12 on a 25lb bag.
  • Powdered sugar and brown sugar are cheapest during the holiday's as well. Don't pay more than a $1.00 for a 2lb bag.
  • Honey can be found at Costco all the time for 6lbs for $11.99. Macey's also has really great prices during the case lot sales. 6 5lb containers for $59.88
Grains
  • I buy rice from Costco in 50lb bags for around $15.00. The price goes up and down all the time. You just have to watch it. Sams Club has 50lbs for about the same price. The cannery has 25lb boxes for $8.45 and are really easy to store.
  • Oats I buy at the cannery. 25lbs for $7.60. Winco also has oats in their bulk area for .58lb!
  • Flour is cheapest during the holiday's but there are also great sales during the year. I like to wait until I can get 5lb for $1.50 with coupons.
  • Hard White Wheat is a great deal at Macey's case lot sale. 45lb bucket with lid sealed for $11.99. LDS cannery 25lb bag for $5.80.
Milk/Dairy
  • Powdered milk from the cannery. #10 cans for $7.05. I bake with it a lot and make yogurt from it. Mozzarella cheese and cottage cheese can also be made from powdered milk. You will need it whether you like to drink it or not. It also has a shelf life of 25-30 years.
  • Morning Moos dried milk alternative. I bought a 50lb bucket a Costco last year for around $60.00, now the best price is a 37lb bucket at Costco for $39.97. #10 cans for $10.99 can be found at Macey's during the case lot sale.
  • Evaporated milk at Smiths case lot sale. 24ct for $15.60
  • Cheese- don't pay more than $1.50 for a pound of cheese. It goes on sale ALL the time and is good for a LONG time. Look at the expiration dates on it when you buy it. Tillamook goes on sale at Winco for $3.98 for 2lbs all the time, and it lasts for months.
  • Dried eggs-I cook with these now instead of real eggs. I only use real eggs for boiled eggs. Canned eggs are best at the Macey's case lot sale, #10 can for $14.00. I found some at Honeville Grain for $12.00 last month, so keep a look out for sales. Don't pay more than .99 for a dozen of eggs. Costco has great deals and so do the grocery stores.
Baking Items
  • Salt is cheapest at Walmart. 26oz for .38
  • Yeast- I use instant yeast and wait until it is $2.99lb. Emergency Essentials had it in May on sale. I stocked up. Yeast keeps indefinitely in the freezer. Costco and Sam's Club have great prices on yeast.
  • Lemon juice, vanilla I get at Maceys during the case lot sales.
  • Cake mixes and brownie mixes from case lot sales at Macey's and also during the holidays. .78 is an awesome price for mixes. With coupons I have gotten them for .50 and less.
  • Baking cocoa is the best at Costco. 23oz for $5.59. It also has an indefinite shelf life.
  • Spices are cheapest at Winco in their bulk area. You can fill a whole spice container for mere pennies. I filled my chive container for .11, it really is an awesome store!!
Oils and Fats
  • Kroger oil was $2.00 for 48oz at the last case lot sale, but they had a sale in April and I got them for $1.48 so watch. (This is why it is great to have the price list printed out and with you)
  • Cooking spray-Pam goes on sale, but Walmart has it all the time for $1.58 for 8oz.
  • Peanut butter is cheapest at Smiths during the case lot sales. 18oz for $1.00 and it is the Kroger brand or Skippy.
  • Olives are cheapest during Thanksgiving time for .88. Case lots and random sales during the year also have that price. I found some at Reams today (5/29) for .88.
  • Ketchup is cheapest during Memorial day and Fourth of July sales. Try not to spend more than .80 for 24oz. Case lot sales have them as well.
  • Mustard is cheapest during summer holiday's as well. Under $1.00 for 32oz is a great price.
  • Salad dressing goes on sale all the time. It doesn't have a long shelf life so watch the dates if you are stocking up. With coupons you can get it free a lot of the times too.
Water
  • 24 packs of water for $2.50 or less is a great deal. It goes on sale all year long, just watch for the price.Costco has a 35ct of water for $3.45 if you don't want to wait for a sale.
Misc.
  • 5 gallon buckets with lids- $3.99 at Macey's during the case lot sales
  • 5 gallon Gamma lids (these are amazing) Don't pay more than $5.99 for these. Macey's and Honeyville have these on sale during the case lot seasons.
  • 55 water drum- don't pay more than $39.99 for these. During conference these go on sale at Emergency Essentials and Macey's has them at the case lot sales.
  • Paper towel and toilet paper I buy at Macey's during the case lot sales. It was $3.98 for 12 double rolls of TP and 8 big rolls of paper towel. I buy enough for 6 months which is the time until the next case lot sale.
  • Laundry det. goes on sale all the time. I wait for sales with coupons so your best bet would be to watch for sales and learn what the bottom line price is for the brand you use.
  • Dishwasher detergent I also get for free with coupons but watch for sales for what brand you like to use.
Ideas to get the best price:
  1. You can't be brand specific, a lot of store brands are made in the same facilities as name brand.
  2. Know what you use. Buying 50 cans of stew because it is cheap and finding out no one likes it, saves you no money.
  3. Know what price you are willing to wait for and pay for.
  4. Be patient and know that food goes on sale about every 3 months. You will catch the good deal the next time around.
  5. Watch the blog on Wednesday's for the weekly grocery sales. Knowing what is a good price will help in saving you a lot of money.

MAY GOALS

  1. PURCHASE VEGETABLES THAT FIT INTO YOUR 3-MONTH MENU. THINK OF CANNED, DEHYDRATED, FREEZE DRIED, AND FRESH. (185lbs per family is a year supply)
  2. PLASTIC BAGS OF ALL SIZES, ALUMINUM FOIL, AND PLASTIC WRAP.
Enjoy the journey!
Enjoy the blessings!
Feel the peace!
Related Posts Plugin for WordPress, Blogger...